
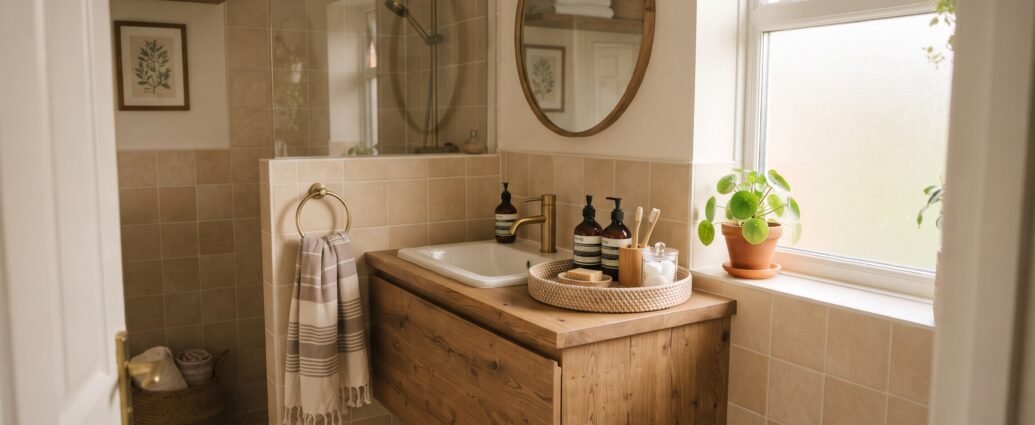
Last spring I opened our medicine cabinet to grab a Band-Aid and eleven different things fell into the sink. Half-used sunscreen from three summers ago. A retainer case with no retainer in it. Two nearly empty bottles of the same electrolyte powder, because I kept forgetting we already had one. I stood there holding a Band-Aid, staring at the pile, thinking: this is a 24-square-foot room. How did it get this out of control?
Here’s what I’ve figured out since: small bathrooms don’t get messy because you own too much. They get messy because everything in a bathroom is small, easy to forget you have, and multiplies quietly — travel bottles, sample sizes, the hair product you tried once and never touched again. I spent one weekend fixing ours, and most of what worked cost less than a takeout order. Eight months later, it’s still working. Here’s exactly what I did.
If you already tackled your home office organization, this is the next domino — and honestly, it’s the easiest room on the list. The small laundry room is the one I’d save for last, since it takes the most planning.
Start With the Ten-Minute Edit (Before You Buy a Single Bin)
I know it’s tempting to skip straight to the pretty bins. I did the opposite the first time — bought a whole matching set of acrylic organizers before I’d thrown anything out — and ended up with beautifully organized expired sunscreen. Don’t be me.
Set a timer for ten minutes and pull everything off one shelf or out of one drawer. Anything expired goes. Sunscreen loses its SPF strength after about a year open, and most skincare has a small jar icon on the label with a number of months it’s good for once opened — check it, you’ll be surprised how much is past its window. Anything you haven’t touched in six months, gone too, unless it’s a genuine backup (extra toothpaste, backup razors — those stay).
This step is free, and it’s the one people skip, which is exactly why it matters most. You can’t organize your way around too much stuff. You can only organize less stuff, better.
Get Real About What’s Under Your Sink
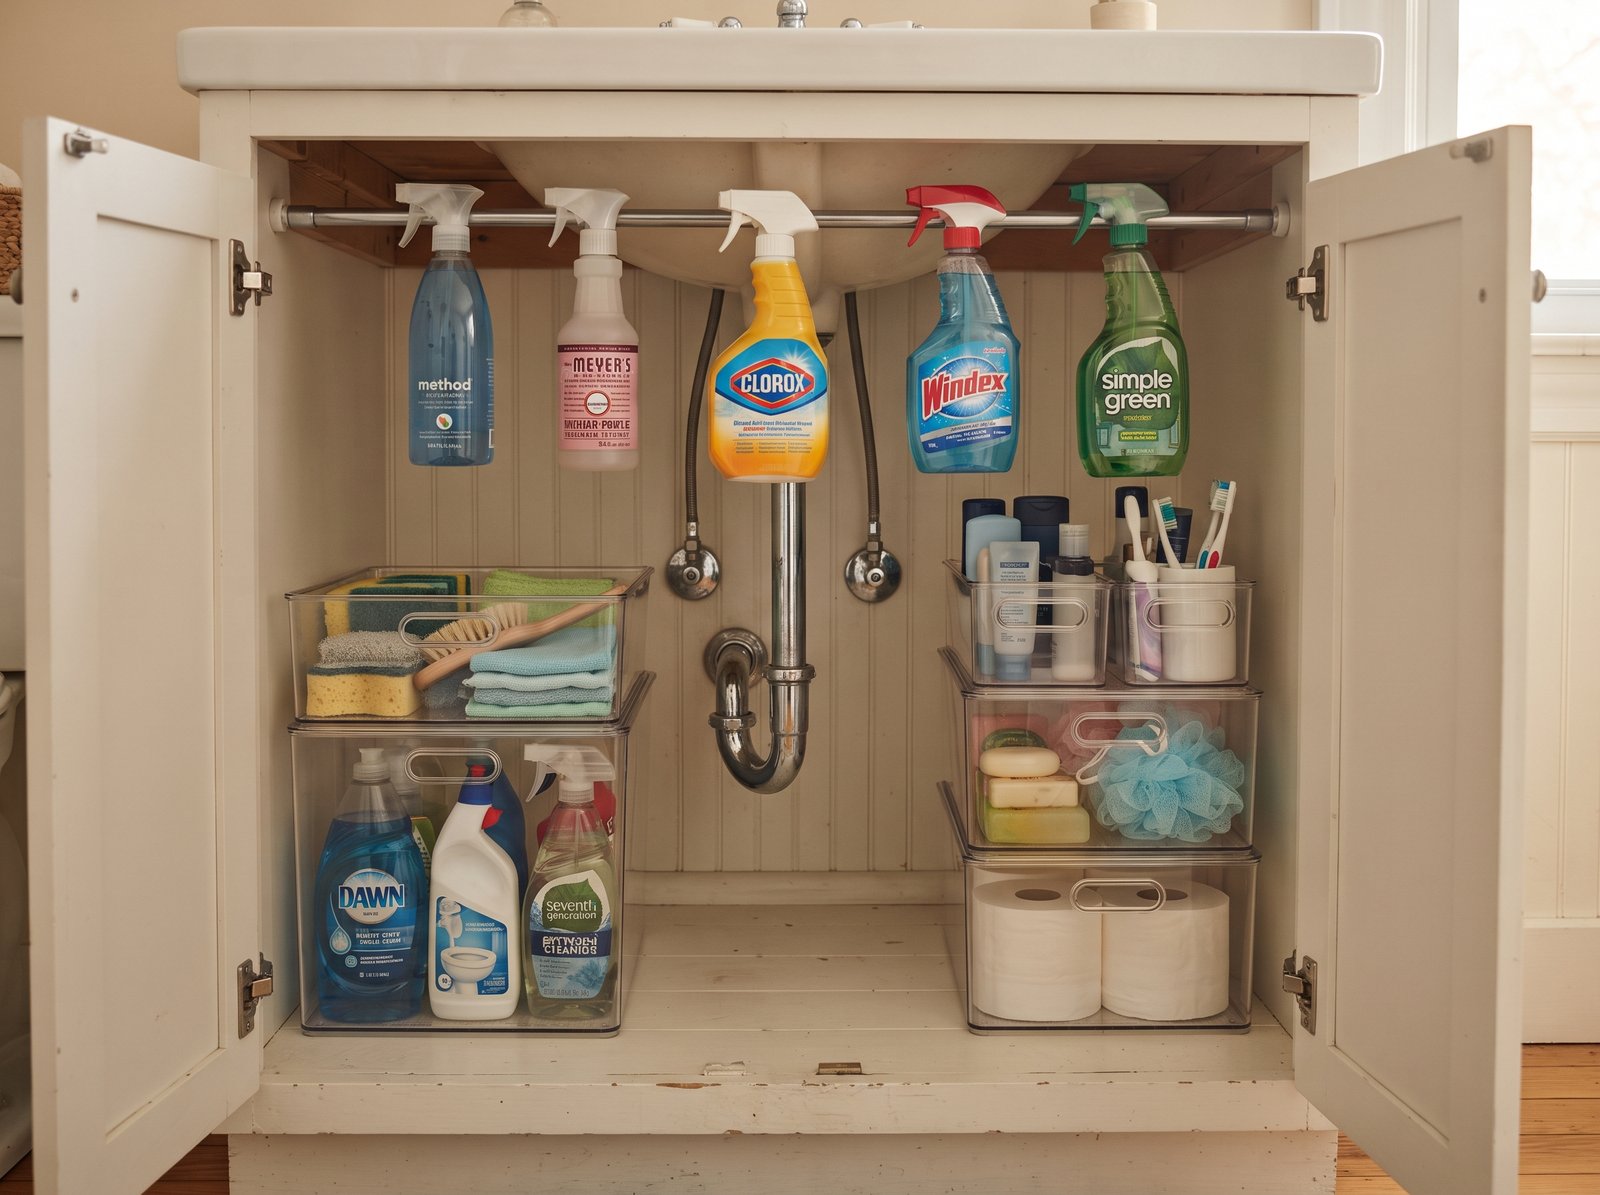
The under-sink cabinet is where most bathroom chaos actually lives, because it’s deep, dark, and out of sight. A tension rod ($6–8 at any hardware store) mounted a few inches below the top of the cabinet lets you hang spray bottles by their trigger handles, which instantly frees up the entire floor of the cabinet for taller items. It takes about ninety seconds to install and nothing gets drilled.
Below that, group by category in shallow bins rather than one big jumbled bin — cleaning supplies in one, extra toiletries in another, hair tools in a third. Clear bins from the dollar store do this job exactly as well as the matching stackable ones from a container store; the only real difference is $30 and a label maker. If you want the splurge version, a stackable modular system (the kind with drawers that pull out toward you) makes the back of a deep cabinet actually usable instead of a place where things go to disappear.
Claim the Counter (Without Losing the Counter)
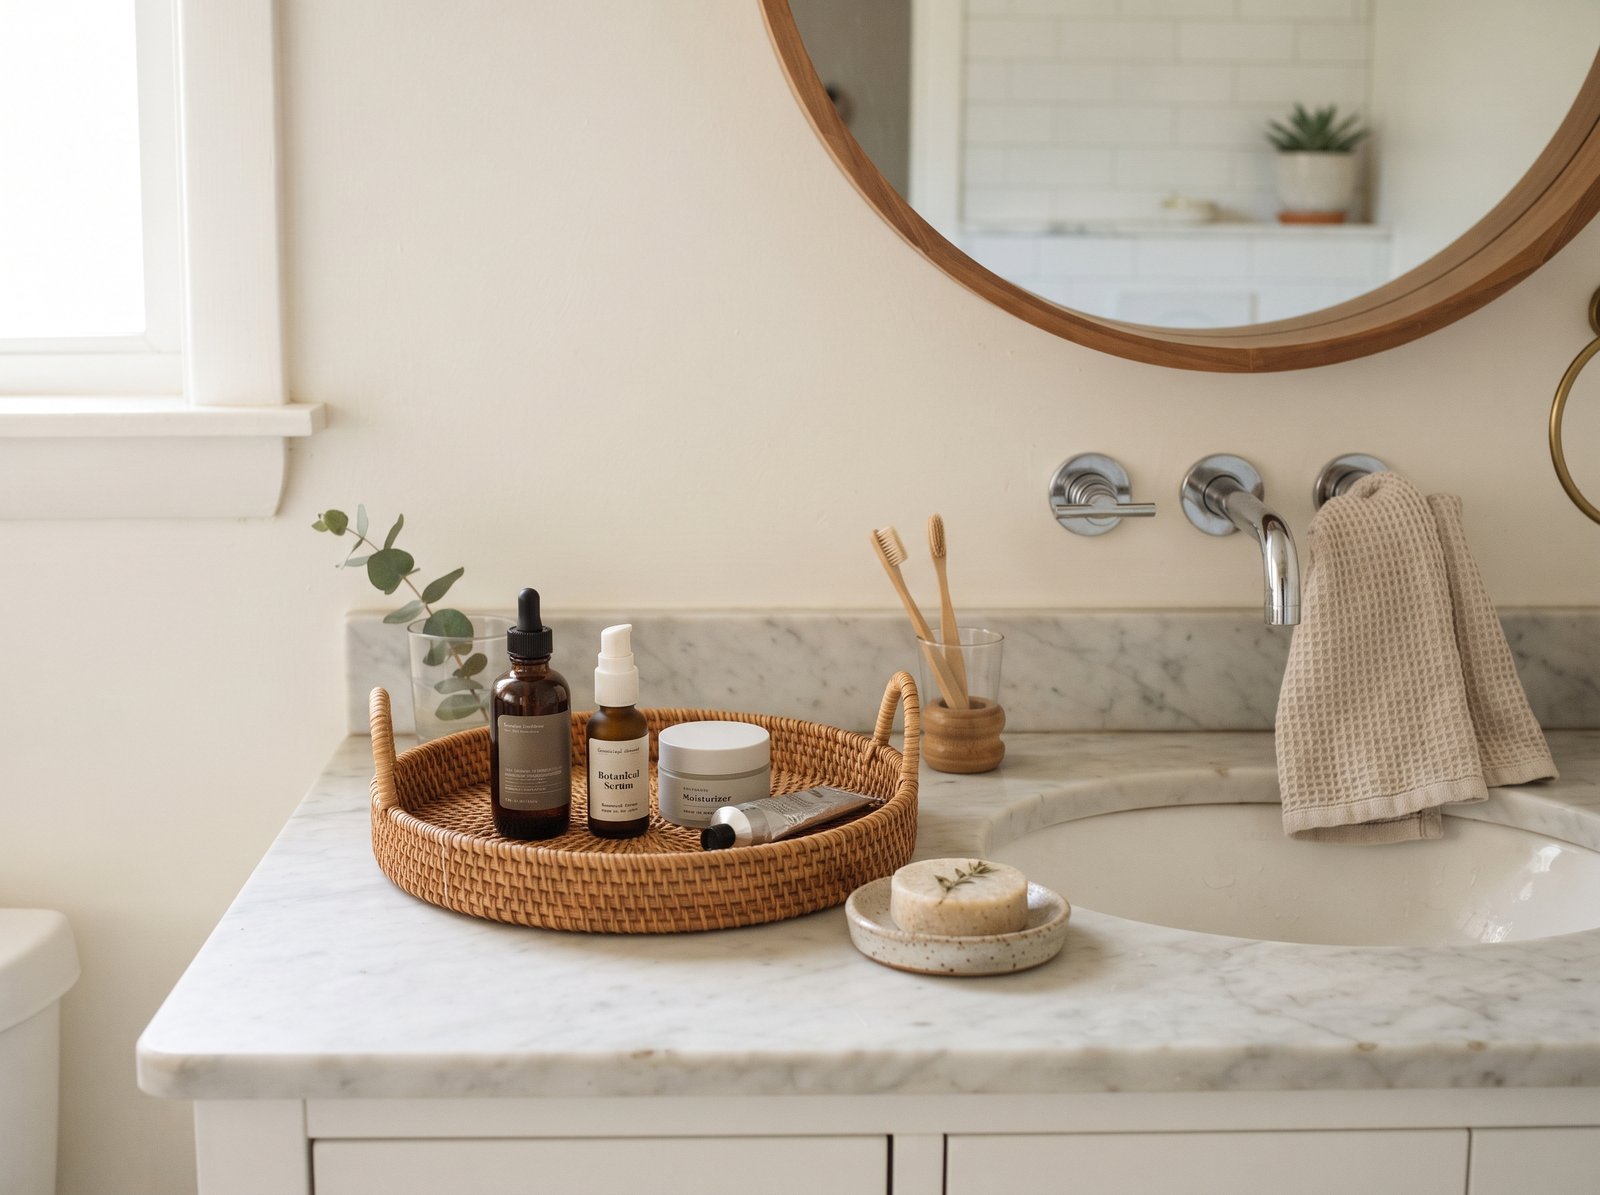
Counter chaos is usually a sign that things don’t have an actual assigned spot — they land wherever there’s room. The fix that made the biggest difference for us was a one-tray rule: if it lives on the counter, it lives inside a tray, not loose. Everything outside the tray gets put away every night. It sounds almost too simple, but a tray creates a visual boundary that your eye (and your hands, when you’re rushing) automatically respects in a way an open counter doesn’t.
For two people sharing a bathroom, give each person their own tray or their own end of the counter instead of one shared free-for-all. It cuts down on the “whose toothbrush is this” chaos immediately. If you want a few pieces that earn their spot, I wrote up the bathroom accessories worth actually buying — a couple of them are still in daily rotation in our house.
A cheap vertical organizer (the kind that mounts to the inside of a cabinet door or the wall) also does a lot of work for hair tools — curling irons and straighteners are notorious counter hogs, and getting them vertical and off the counter changes the whole feel of the room in about five minutes.
Make the Cabinet Actually Work for You
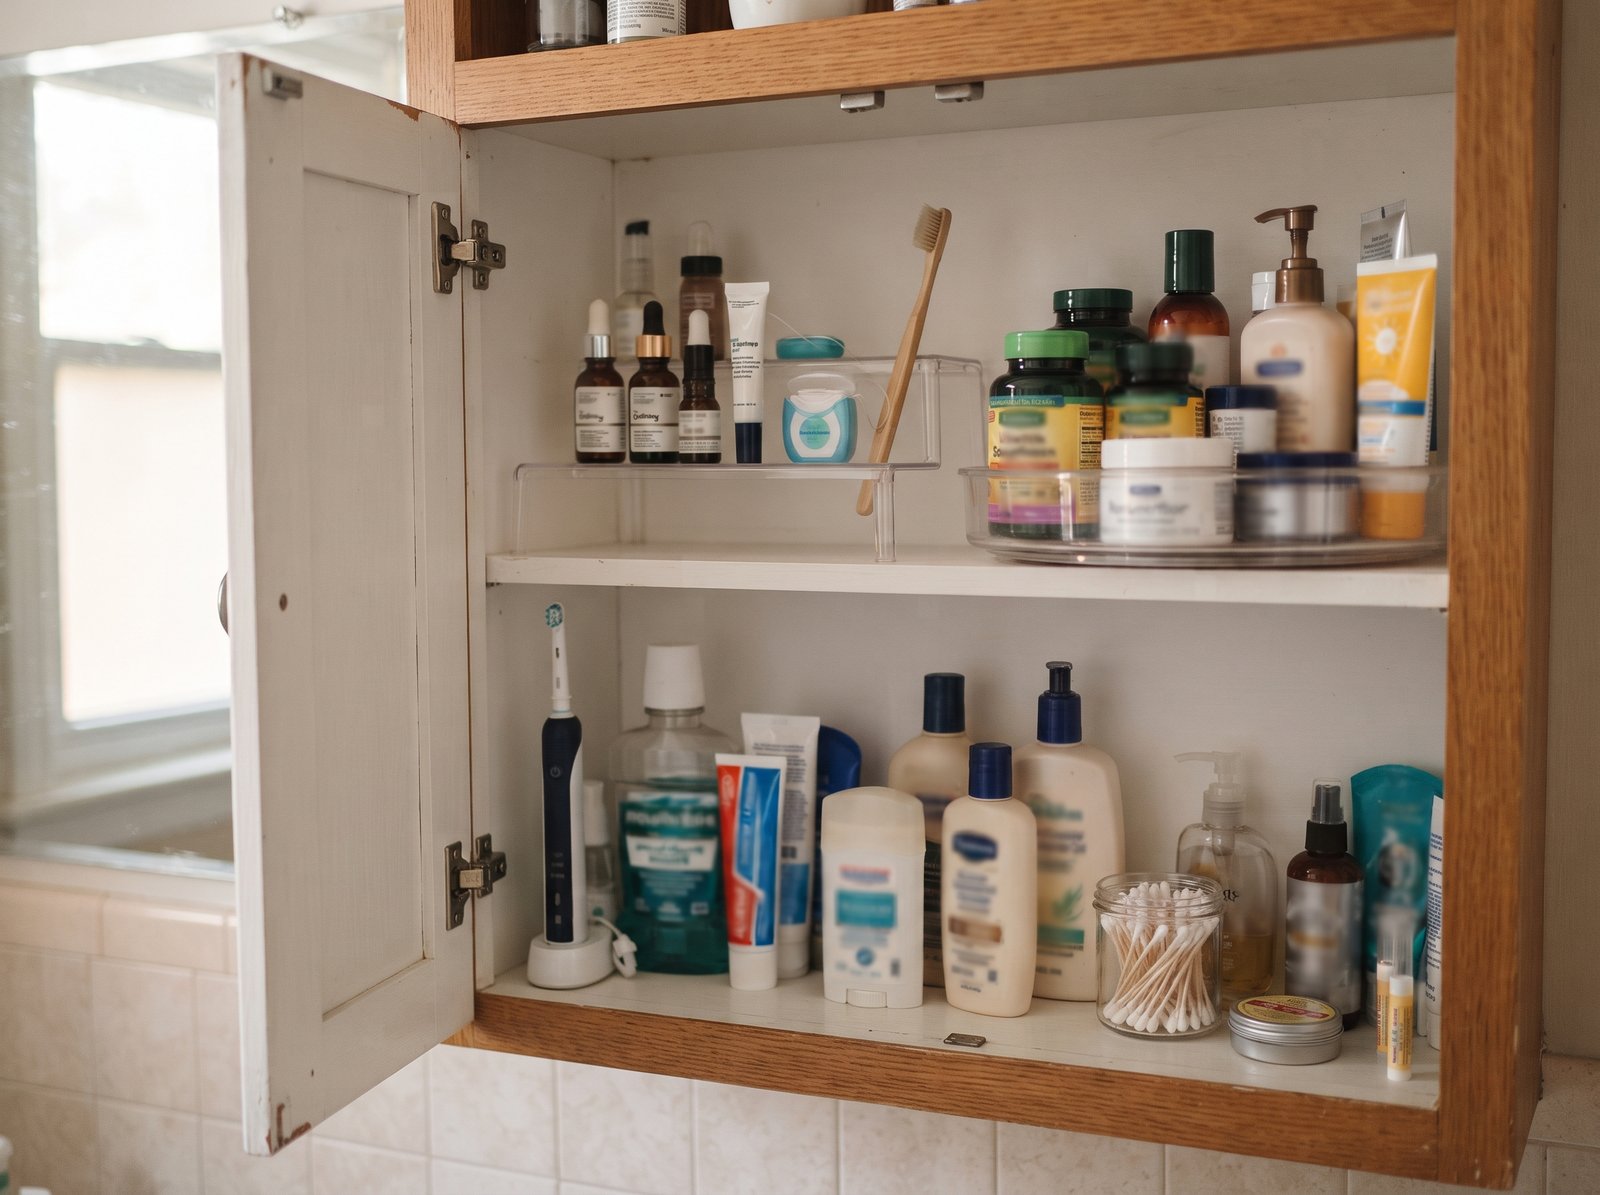
Medicine cabinets and linen cabinets fail for the same reason: everything gets stacked flat, so you can only see what’s on top. Two small additions fix almost the whole problem. A shelf riser (a little plastic step that sits inside the cabinet) doubles your usable space on a single shelf by letting you see and reach the back row without digging. A small turntable — the lazy-susan kind, usually under $10 — does the same job for anything round: lotions, sprays, vitamins.
One more thing about linen cabinets: the stale-towel smell is usually the cabinet, not the towels. Leave the door open for an afternoon so it can air out, then tuck something scented in with the folded stacks — a homemade sachet takes about ten minutes. Free option: a handful of dried lavender or a couple of bay leaves in a spare sock, knotted at the top. It works just as well as the pretty version nobody sees.
Put your twice-a-year expiration check on your calendar the same way you’d remember to change smoke detector batteries. I do mine when the clocks change. It takes ten minutes and keeps the ten-minute edit from Step 1 from ever needing to become a full weekend project again. If your cabinet situation is truly maxed out, it might be less about organizing and more about needing actual storage solutions — a few of those ideas are the kind of thing worth adding once, not managing forever.
Small Bathroom? Here’s What Actually Changes
Everything above works in any bathroom, but a small one needs you to think vertically, because you’ve run out of horizontal. Corner shelves (the kind that sit in the shower or above the toilet) use dead space that’s otherwise wasted. An over-the-door organizer on the back of the bathroom door works even in bathrooms too small for a single extra piece of furniture, because it uses a surface you already have and never think about.
If you rent, everything here can still work — you lean on tension rods, adhesive hooks rated for the weight you need, and anything freestanding instead of anything that requires a drill. I go into more of the renter-specific tricks in small bathroom design ideas that maximize space, and a lot of the general small-space thinking in styling small spaces without making them feel crowded applies directly here too.
One thing I’d add specifically for tiny bathrooms: resist the urge to fill every inch. A small room that’s completely packed with organizers can end up feeling more cluttered than one with a little visual breathing room, even if everything technically has a home.
Don’t Forget the Shower Itself
The shower is usually the last place people think to organize, and it’s often the most cluttered surface in the whole room — six bottles balanced on the edge of the tub, a suction-cup caddy that fell off the wall for the third time. Suction cups fail because bathroom tile expands and contracts with heat and humidity, so the seal breaks down faster than you’d think. A tension-rod shower caddy or one that hangs from the shower head instead avoids the whole problem, since there’s nothing that needs to stick to anything.
Keep it to what you actually use daily — shampoo, conditioner, one soap, one razor. Backup bottles belong in the under-sink cabinet, not lined up in the shower where they get in the way and make the whole space harder to wipe down. If more than one person showers in your house, a second small caddy for the “extras” (kids’ bath toys, a second conditioner) keeps everyone’s stuff from merging into one crowded shelf.
For a family bathroom especially, this is the one swap I’d make first if I only had time for one thing. It’s the surface guests actually see, and it’s the one that gets water-damaged and grimy fastest if it’s disorganized, which makes it a strange amount of the room’s overall “does this feel put together” impression for such a small footprint.
Towels and Linens Without a Linen Closet
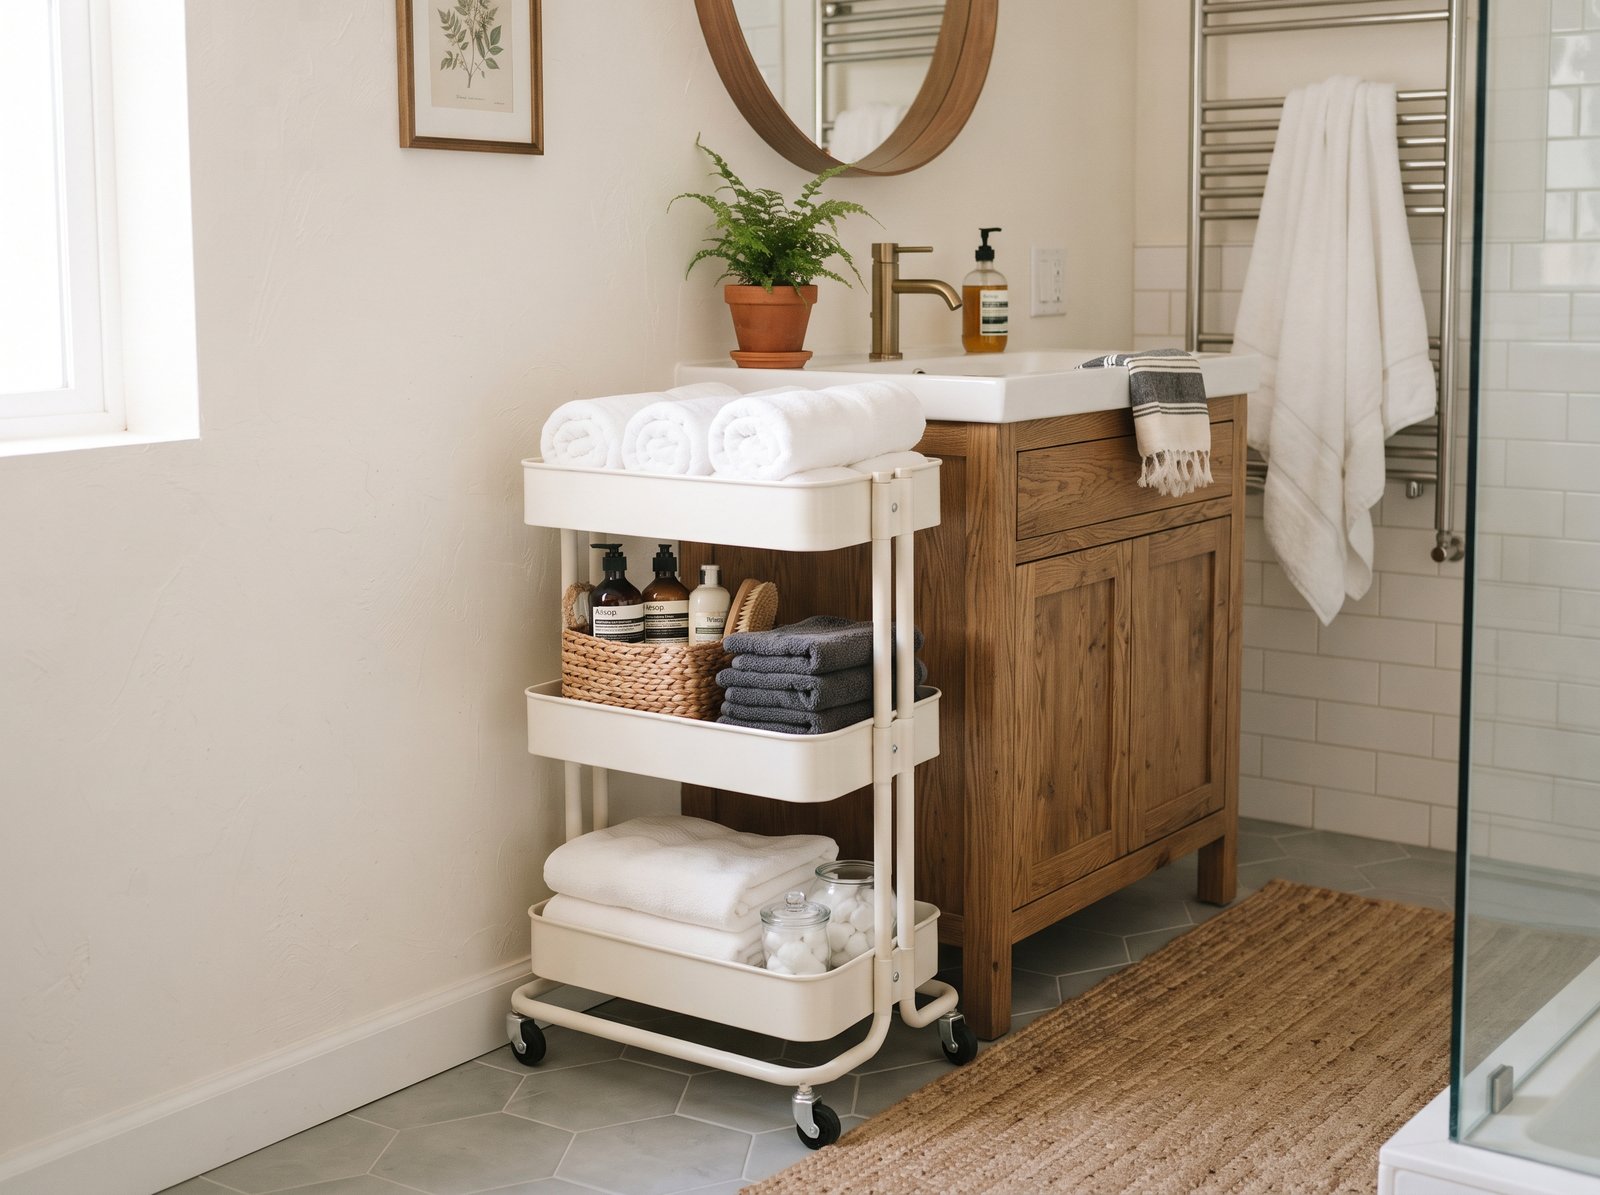
Not every bathroom has a linen closet attached, and that’s fine. A slim rolling cart tucked beside the toilet or vanity holds rolled towels, extra toilet paper, and a basket of bathroom essentials, and it moves if you ever need the floor space for something else. Rolling towels instead of folding them flat isn’t only a styling trick — rolled towels genuinely fit more efficiently into a narrow space and you can see how many you actually have left at a glance.
If you have a nearby hallway closet instead, a couple of matching bins labeled “bath” and “extra” keep bathroom linens from getting mixed in with everything else in the house, which is usually how you end up buying a fourth set of towels you didn’t need.
And if your towels honestly live downstairs beside the machines rather than in any closet, it’s worth solving the storage at that end instead of hauling them up and back. Open shelving above a washer does the same job a linen closet does, for about the cost of two brackets and a board — I walked through the whole setup, lighting and damp included, in our basement laundry room ideas.
DIY Bathroom Organization: What’s Worth Making Yourself
Nearly everything above is something you buy, and I want to be straight about that, because a lot of organizing advice quietly assumes a trip to the container store. Some of the pieces that have held up best in our bathroom are ones we made from a board and a couple of brackets, for a fraction of what the bought version costs. But building storage for a bathroom is genuinely different from building it for any other room, and almost nobody mentions why.
Seal it before it goes in the room
A bathroom is the dampest room in the house, and raw wood drinks that up. The part that catches people out is the cut ends: the end grain of a board absorbs moisture far faster than the flat faces, so an unsealed cut edge is where swelling and that soft, furry texture start. Whatever you make, seal or paint all six faces — including both cut ends and the back nobody sees — before it goes on the wall. Two thin coats of a water-based polyurethane or any bathroom-rated paint will do it. It costs you a day of drying time and makes a real difference to how long the piece lasts.
The same logic rules out one material that looks ideal for the job: standard MDF pegboard. It softens around the holes after a season or two of steam. If you want pegboard in a bathroom, use a metal panel or sealed plywood instead.
A board and two brackets above the toilet
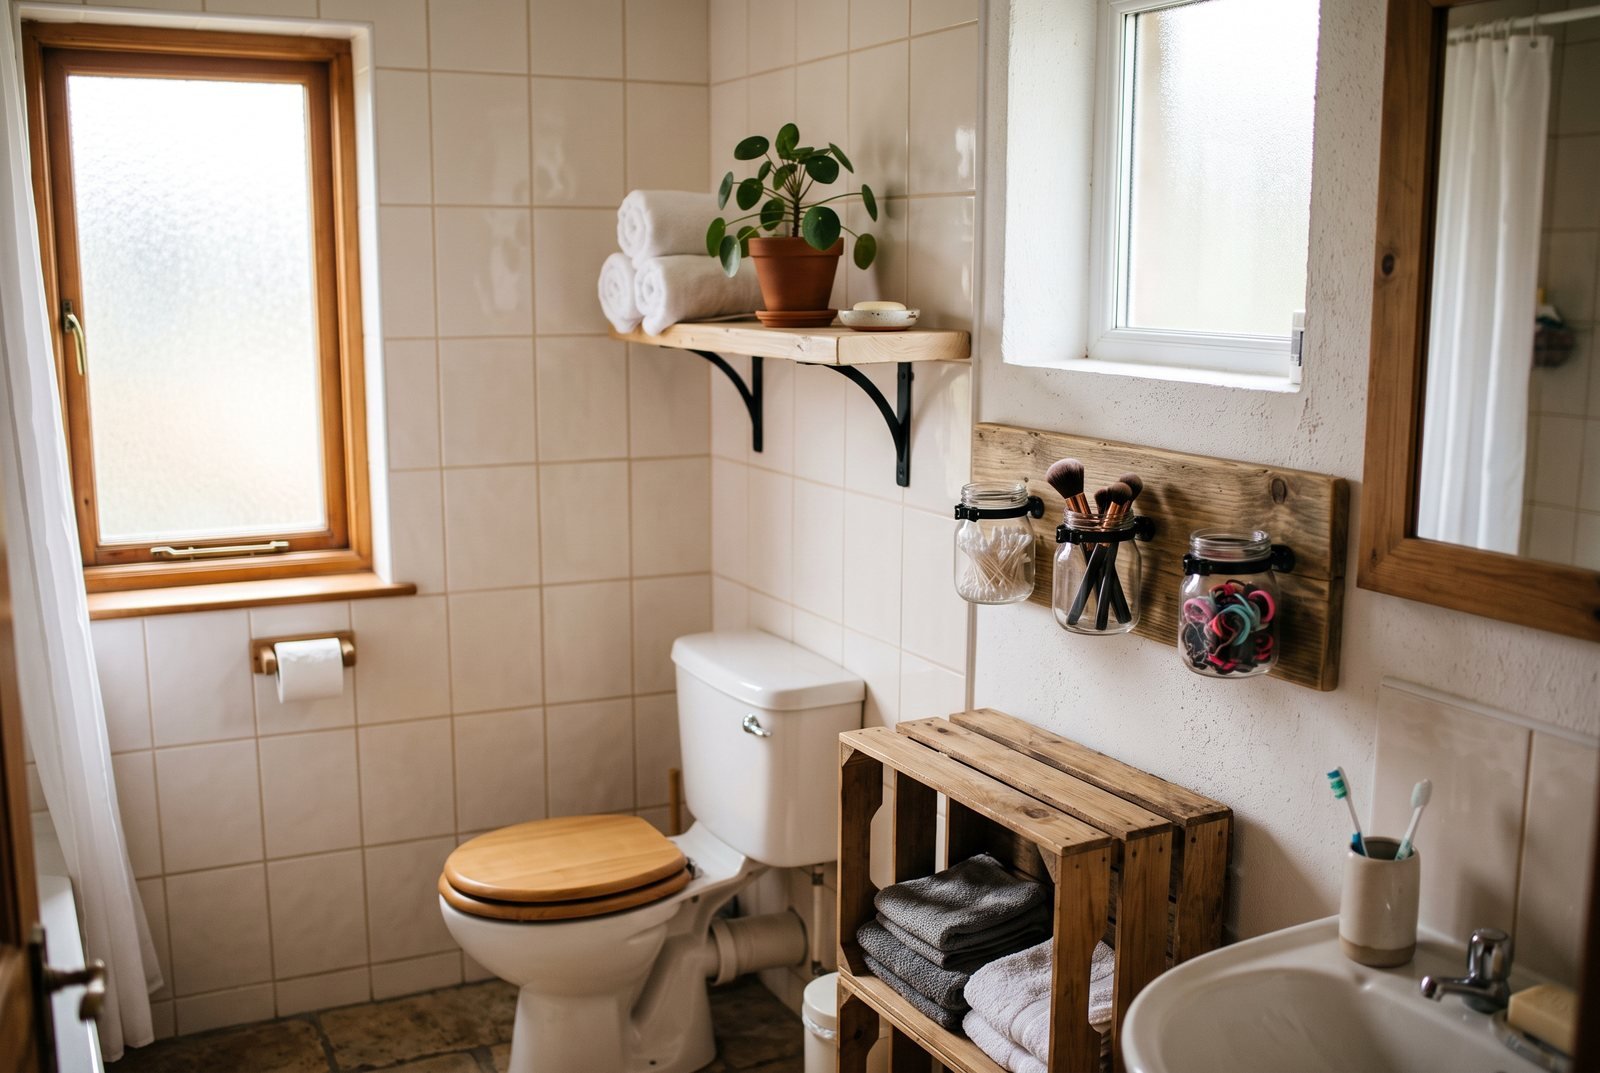
The wall above a toilet is dead space in most bathrooms, and it is the easiest shelf you will ever make: one length of board, two brackets, four screws. A 1×8 pine board is deep enough for rolled towels and a small basket, and shallow enough that you won’t catch your head on it. Mount it high enough that the cistern lid still lifts off, or you’ll find out about the problem the first time something needs fixing.
The part to get right is what you are screwing into. Find the studs, or use hollow-wall anchors rated for the weight — a shelf of damp towels is heavier than people expect, and the failure mode is that it comes down all at once rather than sagging politely first. Free option: if you have ever taken apart a flat-pack bookcase, its shelves are already finished, edge-banded board at a useful depth, and the cam-fitting holes end up hidden under a bracket.
A jar rail for everything small
What makes a bathroom read as cluttered is mostly tiny: cotton buds, hair ties, brushes, clippers. A jar rail gets all of it vertical and visible. Screw three or four metal pipe straps (the plumbing clamps that hold a pipe to a joist, sold in multipacks for very little) through a sealed board, slide a glass jar into each, tighten. The jars lift out to be emptied and washed, which matters more than it sounds — anything in a bathroom that can’t be cleaned easily eventually stops being used.
Two honest notes. Use the jars without their metal lids; a lid left in a steamy bathroom rusts and leaves a ring. And mount the rail low, or over something soft rather than high above a tiled floor. This is the one project here where the failure mode involves bare feet.
A magnetic strip inside the cabinet door
This is the smallest thing on the list and the one I would do first. An adhesive-backed magnetic strip stuck inside the medicine cabinet door holds tweezers, nail scissors, clippers and bobby pins — exactly the items that otherwise sink to the bottom of a drawer and are never found when you want them. Bobby pins hold better than you would guess. Two minutes, no tools, nothing drilled.
A crate, sanded and sealed
A wooden crate or an old wine box is already the hard part of a shelf: a box with a bottom. Sand the inside so nothing snags a towel, seal it per the rule above, then either stand it on end on the floor as an open cubby or screw it to the wall through its back panel. Two of them stacked and offset give you a short run of vertical storage for the cost of sandpaper and a tin of sealer.
A shelf riser for the price of an offcut
The plastic shelf riser I mentioned earlier is genuinely useful, and it is also a board standing on two legs. An offcut of 2×4 cut into two short blocks, with a board laid across the top, does the same job inside a cabinet — in whatever width your cabinet actually is, rather than the three widths the shop happens to stock. It doesn’t need to look like anything, since it lives behind a closed door, but seal it anyway: under a sink is the dampest spot in the dampest room.
If you rent, or don’t own a drill
None of this has to touch the wall. The jar rail works lying flat on a shelf or standing against the back of a cupboard. The crate needs no fixing at all. The magnetic strip is adhesive. For a shelf without screws, a tension rod across a narrow alcove with a board resting on it is surprisingly solid as long as nobody leans on it, and it leaves nothing behind when you move out. The sealing rule matters more in a rental, not less — you want the piece to come with you in good condition rather than be the thing you leave behind.
What I wouldn’t make
Anything that holds water, and anything structural over a bath. A homemade shower caddy sounds appealing and then lives in direct spray, which is harder on a glued or screwed joint than anywhere else in the house, so buy that one. I would also skip building a vanity cabinet as a first project, because the plumbing cut-outs are fussy and a mistake there gets expensive. Shelves, rails, cubbies and risers are the sweet spot: simple shapes, no standing water, and nothing that takes the room down with it if it fails.
The Two-Minute Reset That Actually Keeps It Working
Organizing a bathroom once is the easy part. Keeping it that way is the part that actually matters, and it comes down to one habit: a two-minute reset before bed. Wipe the counter, put anything loose back in its tray or bin, hang up the towel. That’s genuinely the whole thing.
I resisted this for a long time because it felt like one more chore on top of everything else. What changed my mind is that a two-minute reset every night is a lot less overwhelming than a two-hour reset every few months, which is what happens if you skip it. The system only works if putting things back is easier than leaving them out — which is really the whole point of everything above.
Budget Version vs. the Splurge
If you’ve got zero dollars to spend today: do the ten-minute edit, use containers you already own (a shoebox, a cereal box cut down, an empty candle jar) to create rough zones, and start the two-minute reset habit tonight. That alone will make the room function better by this weekend.
If you’ve got $25–40: a tension rod, a couple of clear bins, and a shelf riser or turntable will cover the highest-impact spots — under the sink and inside the cabinet.
If you want to go further, a stackable modular under-sink system and a few pieces from the accessories that are actually worth it will get you the fully put-together look. And if you’re already thinking about a bigger refresh alongside the organizing, our budget-friendly bathroom upgrades and current bathroom trends roundups are good next reads — the small bathroom trends piece and our bathroom color palette ideas pair especially well with a freshly organized room, since a calm color scheme makes an organized space read as calm, not only tidy.
A Few Things I’d Skip
Honestly, in the spirit of telling on myself: skip buying a full matching organizer set before you’ve done the edit. I did it backwards once and it’s an expensive way to learn the lesson. Skip labeling every single bin with a fancy label maker unless labeling genuinely helps your household remember where things go — for us it did, for a single-person bathroom it might be one more thing to maintain. And skip trying to make your bathroom look like minimalist bathroom inspiration photos exactly — those are useful for ideas, but a bathroom that three people actually use every morning is allowed to look a little more lived-in than a photo shoot.
What’s the cheapest way to organize a small bathroom?
Start with what you already own. A shoebox or an empty container can create a rough zone for free, and the ten-minute edit, clearing out expired or unused products, costs nothing but makes the biggest visible difference of any single step.
How do I organize under my bathroom sink?
Mount a tension rod a few inches below the cabinet’s top shelf to hang spray bottles by their handles, then group remaining items into shallow bins by category (cleaning, toiletries, tools) so you’re not digging through one big pile.
How often should I clean out expired bathroom products?
Twice a year works well for most households, since many people tie it to the daylight saving time change as an easy date to remember. Sunscreen and skincare typically list a small months-after-opening icon on the label to guide you.
What’s a good bathroom organization idea for renters?
Lean on tension rods, adhesive hooks rated for your item’s weight, freestanding shelving, and rolling carts. None of it requires drilling, and all of it comes with you when you move.
How do I keep a bathroom organized once it’s set up?
A two-minute reset before bed, wiping the counter and returning loose items to their tray or bin, prevents the slow buildup that turns into a full weekend re-organizing project every few months.
Go clear off one shelf today. One shelf, nothing else. That’s the whole assignment. — Quinn


2 Comments