Do you ever walk past that door to the basement and feel a quiet pang of wasted potential? Like there’s an entire floor of your home just sitting there, cold and dark, doing absolutely nothing for your life. Maybe it’s a dumping ground for holiday décor and forgotten exercise equipment. Maybe it’s just… concrete and cobwebs.
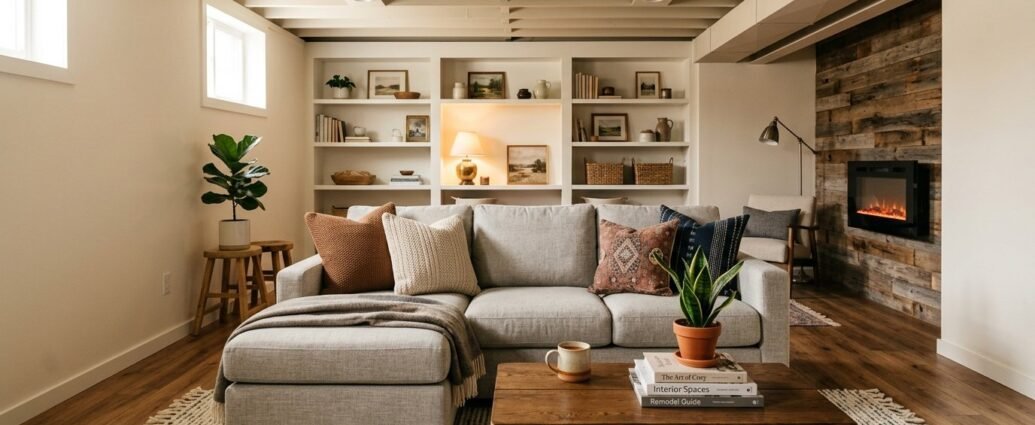
Here’s the thing — finishing a basement is one of the highest-return projects a homeowner can take on, both financially and emotionally. In this post, we’re walking through the entire process together, from the very first moisture check to the moment you flip on the lights in your brand-new cozy basement living space and exhale. Let’s make that square footage count.
Key Takeaways
- Moisture control is the single most critical step — skipping it leads to costly repairs later.
- Egress windows are legally required in most jurisdictions for basement bedrooms and living areas.
- LVP flooring outperforms carpet in moisture resistance, but carpet wins on warmth and comfort.
- Recessed lighting and layered light sources are essential for making below-grade spaces feel alive.
- A realistic basement finishing timeline runs 8–16 weeks depending on scope and contractor availability.
- Total costs range from $25,000 to $75,000+, with strong DIY savings possible on select phases.
Why Basement Finishing Ideas Start With a Plan, Not a Pinterest Board
I know that’s a little ironic coming from someone who lives half her life on Pinterest, but hear me out. The most common mistake I see homeowners make is jumping straight into inspiration without auditing what they’re actually working with. A basement has unique structural, legal, and environmental realities that have to shape the design — not the other way around.
Before you choose a single paint color or flooring sample, you need to answer a few foundational questions about your space.
Assess Your Basement’s Current Condition
Walk the space slowly. Look for water stains along the base of the walls, efflorescence (that chalky white mineral residue on concrete), cracks in the foundation, and any musty odor. These are red flags that need to be addressed before a single stud goes up. A structural engineer or waterproofing specialist is worth every penny at this stage.
Also note your ceiling height. Anything below 7 feet will require some creative thinking — I’ve written extensively about low ceiling basement ideas that actually work if you’re dealing with a tighter overhead situation.
Define the Purpose of Your Space
A basement gym has different needs than a guest suite. A home theater needs different electrical than a playroom. Nail down your primary use case — and be honest about how you actually live, not how you wish you lived. Most successful basement conversions serve one or two clear purposes rather than trying to be everything at once.
Pull Permits Early
This is non-negotiable. Finishing a basement without permits can invalidate your homeowner’s insurance, complicate future home sales, and put your family at risk if the work isn’t up to code. Contact your local building department early, understand what inspections are required, and budget for permit fees (typically $500–$2,000 depending on your municipality).
Moisture Barriers: The Unglamorous Hero of Basement Renovation
If the planning phase is the brain of this project, moisture control is the spine. Get it wrong, and everything built on top of it eventually fails. Concrete is porous — water vapor migrates through it constantly, even in basements that look perfectly dry.
Interior Waterproofing vs. Exterior Waterproofing
Exterior waterproofing is the gold standard. It involves excavating around the foundation and applying a waterproof membrane directly to the outside of the wall. It’s expensive ($10,000–$30,000) and disruptive, but it solves the problem at the source. Interior waterproofing, which includes drainage channels, sump pumps, and vapor barriers applied to interior walls, is far more common and accessible for most budgets ($3,000–$10,000).
For the vast majority of basement finishing projects, a well-installed interior system paired with a quality vapor barrier is completely sufficient. I recommend a 20-mil polyethylene vapor barrier on walls and a dimple mat underlayment on the floor before any framing begins.
Sump Pump Essentials
If your basement doesn’t already have a sump pump — and especially if you’ve ever had standing water — install one before you frame a single wall. A battery backup sump pump is a wise addition, because the power outages that come with heavy storms are exactly the moments you need it most. Budget $800–$2,500 for installation including the pump unit.
Egress Windows: Safety, Light, and Legal Compliance
Egress windows are one of those requirements that homeowners sometimes try to sidestep, and I always push back firmly on that instinct. If your finished basement will include a bedroom — or even a room that could be used as a sleeping space — an egress window is required by building code in virtually every U.S. jurisdiction. It’s a fire safety issue, full stop.
What Qualifies as an Egress Window?
IRC code requires a minimum opening of 5.7 square feet, at least 20 inches wide and 24 inches tall, with the sill no more than 44 inches above the finished floor. The installation involves cutting into your foundation wall, which is best left to professionals. Budget $2,500–$5,000 per window including the well and cover.
The Design Upside of Egress Windows
Here’s the part I love: egress windows aren’t just safety features — they’re light sources. A well-positioned egress window with a deep well and a reflective liner can flood a previously cave-like corner with genuine natural light. Pair it with sheer linen curtains and you’ve just elevated the entire mood of the room. Don’t think of egress windows as a cost — think of them as an investment in how the space feels.
Framing and Insulation: Building the Bones of Your Basement
Once moisture is addressed and permits are in hand, framing begins. This is where the blank concrete box starts to look like actual rooms, and it’s genuinely one of the most exciting phases of the whole project.
Framing Strategies for Basement Walls
Most basement walls are framed using 2×4 pressure-treated lumber for the bottom plate (which sits directly on concrete) and standard dimensional lumber for the studs. Walls are typically built 1–2 inches away from the foundation wall to allow for insulation and airflow. This gap also protects against moisture wicking directly from concrete into your drywall.
Steel stud framing is an excellent alternative in humid climates — it won’t warp, rot, or attract mold. It’s slightly more expensive and requires different fastening techniques, but it’s worth considering if your basement runs consistently damp.
Insulation Options Compared
Insulation is where a lot of homeowners underinvest, and it shows up in cold floors and high utility bills for years afterward. Here’s a quick breakdown of the most common options for below-grade spaces:
| Insulation Type | R-Value | Moisture Resistance | Cost (per sq ft) | Best For |
|---|---|---|---|---|
| Closed-Cell Spray Foam | R-6 to R-7 per inch | Excellent | $1.50–$3.00 | High-humidity basements, rim joists |
| Rigid Foam Board (XPS) | R-5 per inch | Very Good | $0.25–$0.60 | Walls, floors before framing |
| Fiberglass Batt | R-13 to R-15 | Poor | $0.40–$1.00 | Driest basements only, between studs |
| Mineral Wool / Rockwool | R-15 to R-23 | Good | $1.00–$1.80 | Sound dampening + thermal performance |
My personal recommendation for most basements: a layer of rigid foam board directly against the foundation wall, followed by closed-cell spray foam at the rim joist, and mineral wool batts between the studs. It’s a layered approach that handles both thermal performance and moisture beautifully.
Drywall, Ceilings, and Creating Finished Surfaces
With framing and insulation complete, the space is finally ready to look like a room. Drywall installation is often where most homeowners hand the reins to professionals — and for good reason. Mudding, taping, and achieving smooth, paintable walls is a skill that takes practice. That said, hanging the boards is very DIY-friendly if you have a helper and the right tools.
Moisture-Resistant Drywall in Basements
Standard drywall is not appropriate for basements. Use moisture-resistant drywall (often called greenboard or purple board) throughout, and consider mold-resistant drywall like DensArmor in any area near a bathroom or utility sink. The upcharge is modest and the protection is significant.
Ceiling Options for Below-Grade Spaces
Dropped ceilings (suspended grid systems) were the default for decades, and while they’re still a practical choice for easy mechanical access, they can feel dated. Modern homeowners are increasingly choosing drywalled ceilings — which feel more finished and architecturally intentional — or exposed painted ceilings for an industrial-chic look that also preserves headroom.
If you’re working with limited ceiling height, an exposed ceiling painted a deep charcoal or warm black can actually make the space feel more intentional and moody rather than cramped. I’ve seen this technique work beautifully alongside some of the inexpensive family room updates I’ve covered before — it’s amazing what a bold ceiling choice can do for a room’s energy.
Flooring Options: LVP vs. Carpet for Your Basement
This is the question I get asked more than almost any other when it comes to basement finishing ideas. And the honest answer is: it depends on how you plan to use the space, how your basement performs moisture-wise, and how you want it to feel underfoot.
“A basement should feel like a destination, not an afterthought. The right flooring is what separates a finished space from a truly livable one.”
Luxury Vinyl Plank (LVP): The Practical Champion
Luxury vinyl plank flooring is my top recommendation for most basements, full stop. It’s 100% waterproof, highly durable, available in stunning wood-look finishes, and far warmer underfoot than tile. Installation is DIY-friendly with click-lock systems, and quality LVP runs $2–$5 per square foot. Pair it with a cork or foam underlayment for extra warmth and sound absorption.
Carpet: The Comfort Argument
Carpet is still a genuinely wonderful choice for basement bedrooms, playrooms, and media rooms where comfort and acoustics matter most. The key is choosing a low-pile, moisture-resistant carpet with a waterproof pad, and ensuring your moisture mitigation is airtight before it goes down. Budget $3–$7 per square foot installed. Avoid plush or Berber styles in a basement — they trap moisture and are difficult to dry if a leak ever occurs.
Lighting Strategies That Make Below-Grade Spaces Glow
Lighting is where so many basement conversions fall short, and it breaks my heart every time. A basement with one fluorescent tube overhead isn’t a finished space — it’s a finished failure. Below-grade rooms have to work harder to feel warm and welcoming, which means your lighting plan needs to be intentional, layered, and generous.
Recessed Lighting as Your Foundation
Recessed LED can lights should be your starting point. Space them roughly 4–6 feet apart in a grid pattern, and choose fixtures with a warm color temperature — 2700K to 3000K is the sweet spot for creating that golden, lived-in glow. Dimmers are non-negotiable. The ability to shift your basement from bright and functional to soft and cinematic transforms how the space actually gets used.
Layering Light Sources
Recessed lights alone make a basement feel like an office. Layer in floor lamps, wall sconces, table lamps, and even LED strip lighting under shelving or behind a TV console. Think of light sources the same way you think about texture in a room — more variety creates more depth. A basement with five different light sources at varying heights feels infinitely warmer than one with a single overhead plane of light.
Natural Light Amplification
If you have egress windows or any above-grade windows, position mirrors and light-toned furnishings to bounce that natural light as far into the space as possible. Light walls (warm whites and soft greiges work beautifully down here) also help enormously. When thinking about your color palette, you might take inspiration from the same earthy, calming tones explored in this post on 2026 nursery color trends — those soft sage greens and warm creams translate beautifully to basement spaces too.
Realistic Costs and Timeline for Your Basement Project
Let’s talk numbers — because I think a lot of people avoid starting this project simply because they’re afraid of what it might cost. Here’s an honest breakdown of what you can expect, whether you’re hiring everything out or doing a healthy mix of DIY.
Cost Breakdown by Phase
- Planning, permits, and engineering: $1,000–$3,000
- Waterproofing and moisture mitigation: $3,000–$15,000
- Egress window installation: $2,500–$10,000 (2 windows)
- Framing and insulation: $4,000–$10,000
- Electrical (panel upgrade may be needed): $3,000–$8,000
- Drywall, tape, and finish: $3,000–$7,000
- Flooring (LVP or carpet, 800 sq ft): $3,000–$6,000
- Lighting and fixtures: $1,500–$4,000
- Trim, doors, and paint: $2,000–$5,000
- Total estimated range: $25,000–$75,000+
Realistic Project Timeline
Most basement finishing projects, when properly sequenced and contractor-scheduled, run 8 to 16 weeks from permit approval to final walkthrough. DIY-heavy projects can stretch longer depending on your availability. Here’s a rough week-by-week sequencing:
- Weeks 1–2: Permits, waterproofing, sump pump
- Weeks 3–4: Egress window installation, rough framing
- Weeks 5–6: Rough electrical, plumbing (if adding a bathroom), insulation
- Week 7: Inspections
- Weeks 8–10: Drywall hang, tape, mud, prime
- Weeks 11–12: Paint, trim, doors
- Weeks 13–14: Flooring installation
- Weeks 15–16: Lighting fixtures, finish electrical, final punch list
Frequently Asked Questions
How do I know if my basement is ready to be finished?
The most important indicator is moisture performance. Run this simple test: tape a 12″x12″ piece of plastic sheeting to your concrete floor and walls, seal the edges with tape, and leave it for 24–48 hours. If you find condensation on the underside of the plastic, moisture is migrating through the concrete and needs to be addressed before finishing. You should also look for any foundation cracks, signs of prior flooding, and grading issues outside the home.
Do I really need an egress window if I’m not adding a bedroom?
Technically, egress windows are only code-required for sleeping rooms in most jurisdictions. However, I strongly encourage adding at least one anyway — for natural light, for emergency exit capability, and for resale value. A below-grade space with even one source of natural light simply feels more livable and commands a higher appraisal value.
Is LVP or carpet better for a basement family room?
For a family room that will see heavy foot traffic, pets, and the occasional spilled drink, LVP is the more practical choice. It’s easier to clean, completely waterproof, and holds up beautifully over time. If comfort and acoustics are top priority (like for a home theater or kids’ playroom), a moisture-resistant carpet with a waterproof pad is a wonderful option — just make sure your moisture mitigation is solid before it goes down.
Can I finish my basement myself to save money?
Absolutely — certain phases are very DIY-friendly. Framing, insulation installation, drywall hanging, painting, LVP flooring, and trim work are all tasks a capable, patient homeowner can tackle. However, I strongly recommend hiring licensed professionals for electrical, plumbing, structural modifications, and waterproofing. The savings aren’t worth the risk when it comes to those systems.
What’s the best way to handle low ceilings in a basement?
Low ceilings are one of the most common basement challenges, and there are genuinely beautiful ways to work with them rather than against them. Exposed painted ceilings, strategic lighting placement, vertical wall elements, and keeping furniture lower to the ground all help. For a deep dive on this topic, the strategies covered in my guide to low ceiling basement ideas that actually work are a great starting point.
How long does a basement finishing project typically take?
For a full basement finishing project with professional contractors, budget 8–16 weeks from permit approval to completion. DIY projects often run longer — sometimes 4–6 months depending on weekends and availability. The biggest timeline variable is usually the permit and inspection process, which varies widely by municipality.
Will finishing my basement add value to my home?
Yes, consistently. According to most real estate data, a finished basement returns approximately 70–75 cents for every dollar invested at resale — and in high-demand markets, that return can be even stronger. Beyond dollar-for-dollar return, a finished basement significantly expands your functional square footage, which makes your home more competitive when it’s time to sell.
A finished basement isn’t just a renovation — it’s an entire layer of your home finally coming to life. Whether you’re creating a cozy family hangout, a guest retreat, a home office, or a wellness room, the key is approaching it methodically: moisture first, structure second, beauty third. Do it in that order, give it the time and budget it deserves, and you’ll end up with a space that genuinely surprises you every time you walk down those stairs. If you’re ready to start planning, I’d love to hear what you’re envisioning — drop a comment below or send me a message. This is one of my favorite types of projects to talk through, and I’m always here for it. ☕