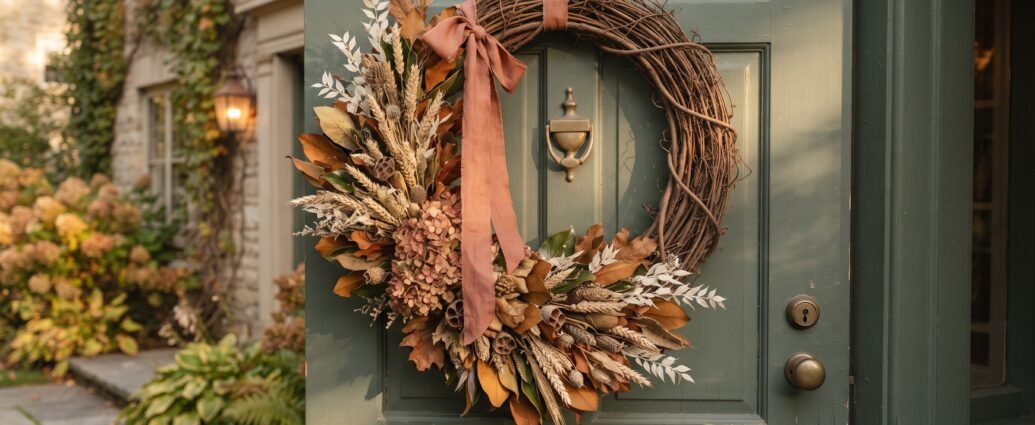
A store-bought fall wreath costs $45 to $130 and there is a decent chance three houses on your street have the same one. A DIY fall wreath costs $35 to $70 in materials, takes about ninety minutes, and — this is the part that matters — it lasts three to five seasons instead of one, because you are building it out of dried and preserved material on a real grapevine base rather than hot-gluing plastic to a foam ring.
This is the full tutorial: exact supplies, exact quantities, the wiring technique that keeps it from falling apart, and the specific mistakes that make a homemade wreath look homemade. The difference between a wreath that looks professional and one that does not comes down to about four decisions, and none of them are about how much stuff you put on it.
No floral-design experience needed. If you can twist wire, you can do this.
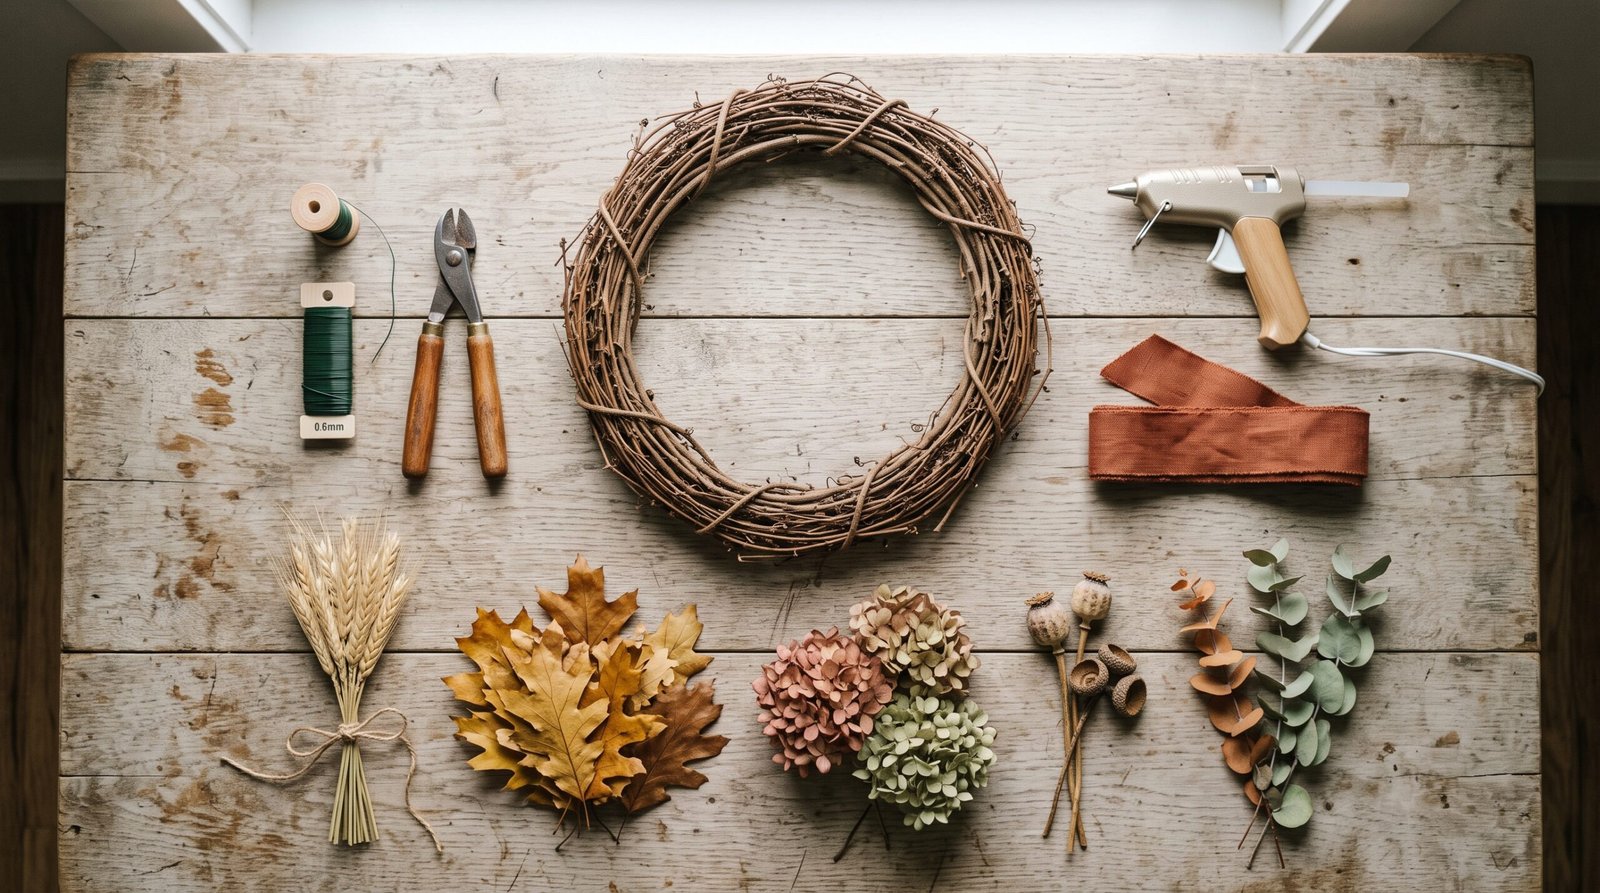
What you need, and what it costs
Everything here is available at Michaels, Hobby Lobby, Joann, or online from dried-floral specialists like Afloral. Prices are typical retail before the coupons those craft stores hand out constantly — check for a 40 percent off single-item coupon before you go, because it applies to the most expensive thing in your cart.
| Supply | Quantity | Typical cost |
|---|---|---|
| Grapevine wreath base, 18 in | 1 | $8–$14 |
| Paddle floral wire, 22–24 gauge | 1 spool | $4–$7 |
| Wire cutters or floral snips | 1 | $8–$14 (one-time) |
| Dried wheat | 1 bundle | $8–$15 |
| Preserved oak or magnolia leaves | 1–2 bunches | $12–$22 each |
| Dried hydrangea heads | 3–5 heads | $15–$25 |
| Seed pods, bunny tail or bleached ruscus | 1 bunch | $10–$18 |
| Ribbon — linen, velvet or grosgrain, 2–3 in wide | 2–3 yd | $5–$12 |
| Hot glue gun and sticks | 1 | $10–$20 (one-time) |
Total for a first wreath, including the tools you will keep: about $70 to $110. Every wreath after that is $35 to $55, and less than that if you cut your own material. Wheat, hydrangea, ornamental grasses, oak leaves, sedum and seed pods all dry well straight from a yard or a field in September.
On the base: grapevine over foam or straw, every time. Grapevine is stiff enough to wire into, it looks good where it shows through, and it survives being stored. An 18-inch base is the workhorse size; go to 22 or 24 inches only if you have a double door or an unusually wide entry.
Sizing the wreath to your door
This is the decision most people get wrong, and it is the reason a lot of DIY wreaths look slightly off without anyone being able to say why.
A standard exterior door is 36 inches wide by 80 inches tall. Your finished wreath — including the botanicals, not just the base — should be roughly half to two-thirds of the door width. That means 18 to 24 inches finished, which means starting with an 18-inch base, since the material adds 2 to 4 inches all around.
On a 30-inch door, drop to a 14 or 16-inch base. On a 42-inch or double door, go to 24 inches or hang two.
Storm door warning: if you have a glass storm door, measure the gap between the two doors first. It is frequently only 1.5 to 2.5 inches. A lush 5-inch-deep wreath will not fit, and forcing it will bend the wreath and stress the storm door hinge. If that is your situation, build a deliberately flat, low-profile wreath — mostly leaves and wheat laid tight to the base, no bulky hydrangea — or hang it somewhere else entirely.
Step 1: Prep your materials (15 minutes)
Lay everything out and cut all your stems to 4 to 6 inches. This feels wasteful the first time. Do it anyway — long stems are what make a wreath look shaggy and unfinished, and short stems tuck cleanly under the ones in front of them.
Now build your bundles. Group 3 to 5 stems of mixed material into a small cluster — say, three wheat stalks, two oak leaves and one seed pod — and set it aside. Make 12 to 18 of these. Keep each bundle small; roughly the size of a golf ball at the stem end is right.
Why bundles: wiring individual stems takes three times as long and produces a thinner, patchier result. Bundles are the entire trick.
Step 2: Decide on your coverage (2 minutes)
Pick one of three layouts before you attach anything:
- Partial, about one-third coverage. Botanicals clustered on the lower-left or lower-right, bare grapevine showing across the rest. This is the most current-looking option and it uses the least material, which makes it the cheapest.
- Crescent, about half coverage. A sweep along one side from roughly eight o’clock up to two o’clock. The most forgiving layout for a first attempt.
- Full coverage. Botanicals all the way around. Uses roughly double the material and takes about twice as long. Beautiful, but this is the version where a thin build shows most.
Pick one and commit. Deciding halfway through is how wreaths end up looking lopsided in the wrong way.
Step 3: Wire on the first bundle (5 minutes)
Do not cut the wire off the spool. You are going to work continuously from the paddle, which is why paddle wire exists.
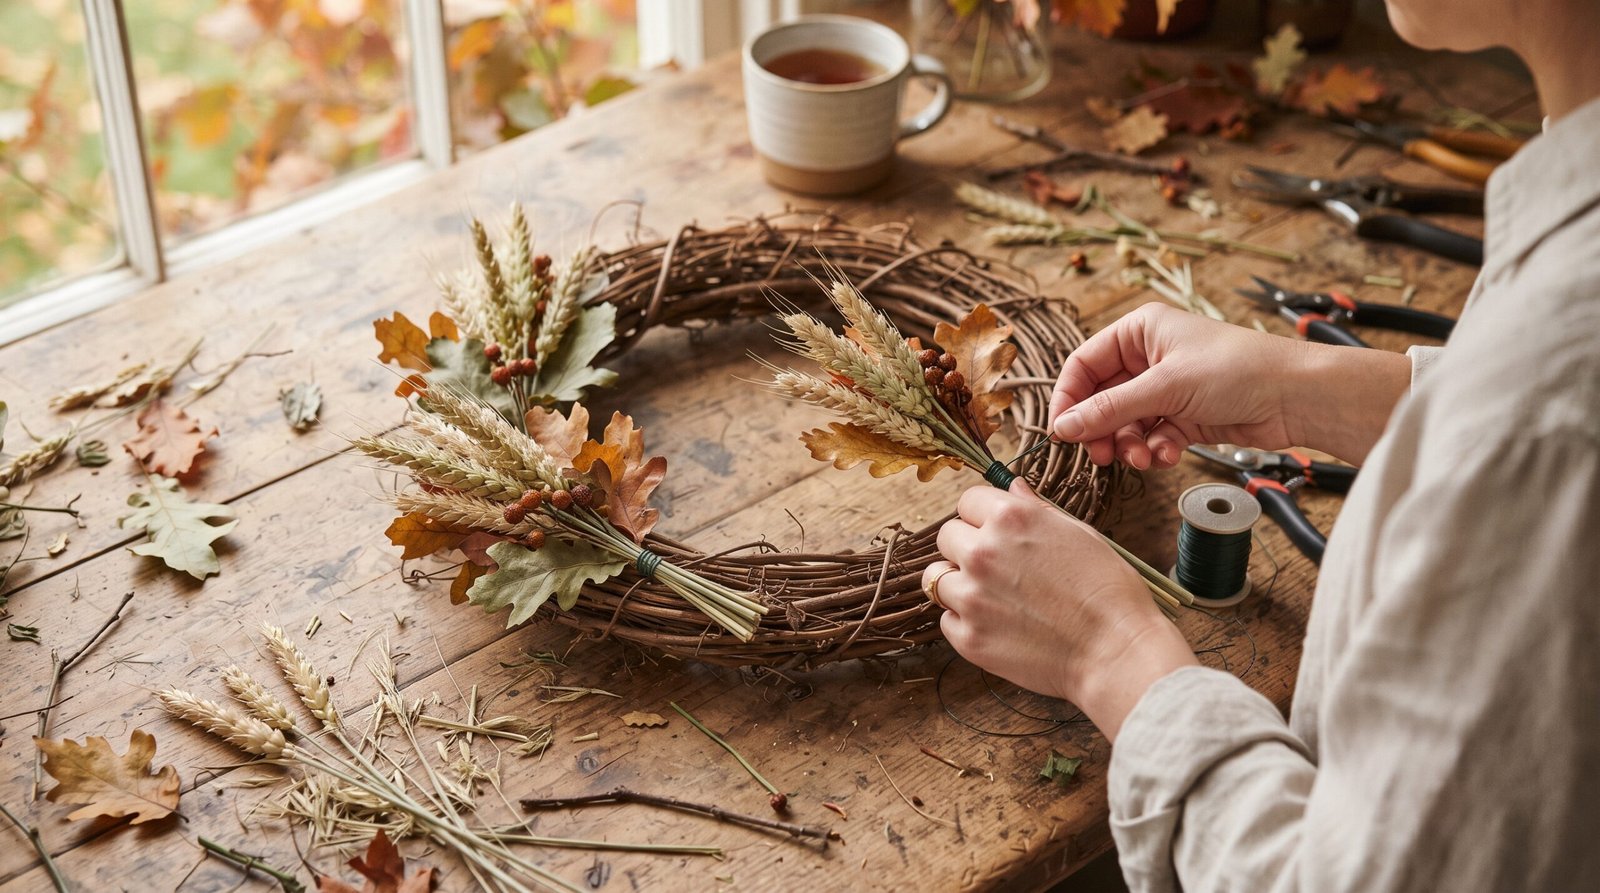
Wrap the loose end of the wire around the grapevine base three times at your starting point and twist it tight to anchor it. Lay your first bundle flat against the base with the stems pointing in the direction you will be working — clockwise, say — and wrap the wire around both the bundle stems and the base four to five times, pulling firmly each time.
Pull harder than feels polite. A loose wrap is the number one reason wreaths shed. The stems should not move at all when you tug the bundle.
Step 4: Shingle the rest (30–45 minutes)
Place the next bundle so its flowering end overlaps and hides the wired stems of the previous one, all stems pointing the same direction. Wrap four to five times. Repeat.
Three rules while you shingle:
- Every bundle points the same way. This is the single biggest visual difference between a wreath that reads professional and one that reads craft-fair. Stems all flowing one direction creates movement; stems pointing every which way creates a bush.
- Vary the material bundle to bundle. If bundle four was heavy on wheat, make bundle five heavier on leaves. Repeating an identical bundle twelve times reads as manufactured.
- Angle some bundles outward and some inward. Push a few slightly off the outer edge of the base and tuck a few toward the inner opening. That variation in depth is what keeps a wreath from looking like a flat ring.
When you reach the end of your planned coverage, wrap the wire five or six extra times, cut it, and tuck the cut end down into the grapevine so nothing scratches your door or your hand.
Step 5: Fill the gaps and add the focal points (10 minutes)
Step back six feet and look at it. There will be gaps and thin spots — there always are, and they are invisible from eight inches away and obvious from across the porch.
This is the one place hot glue earns its keep. Tuck individual stems and small heads into the gaps and glue the stem end down into the grapevine. Hydrangea heads in particular are usually best added last as focal points rather than wired in as part of a bundle, because they are bulky and they let you balance the composition once you can see the whole thing.
Add your largest, most eye-catching elements slightly off-centre. Three focal points arranged in a loose triangle across the wreath, rather than in a straight line, is a reliable arrangement.
Glue rule: glue for filling and detail, wire for anything with weight. A hydrangea head that is only glued will pop off in the first hard wind. If it weighs anything, wire it.
Step 6: Ribbon and hanger (10 minutes)
Ribbon is optional and a wreath is often better without it. If you do use one, a long tail streaming down from the top hanger looks more current than a big centred bow. Linen and velvet in rust, ochre, sage or cream all work; wired plaid holds a shape better outdoors but reads more traditional.
For hanging, an over-the-door metal hanger is $6 to $12 and the simplest option — but check your weatherstripping first, because a thick hanger can hold the door open a hair and let cold air in all winter. Alternatives: a self-adhesive hook rated well above the wreath weight (a finished 18-inch dried wreath runs 1 to 3 pounds), a suction hook on a glass storm door, or a length of ribbon anchored over the top of the door.
Three variations from the same technique
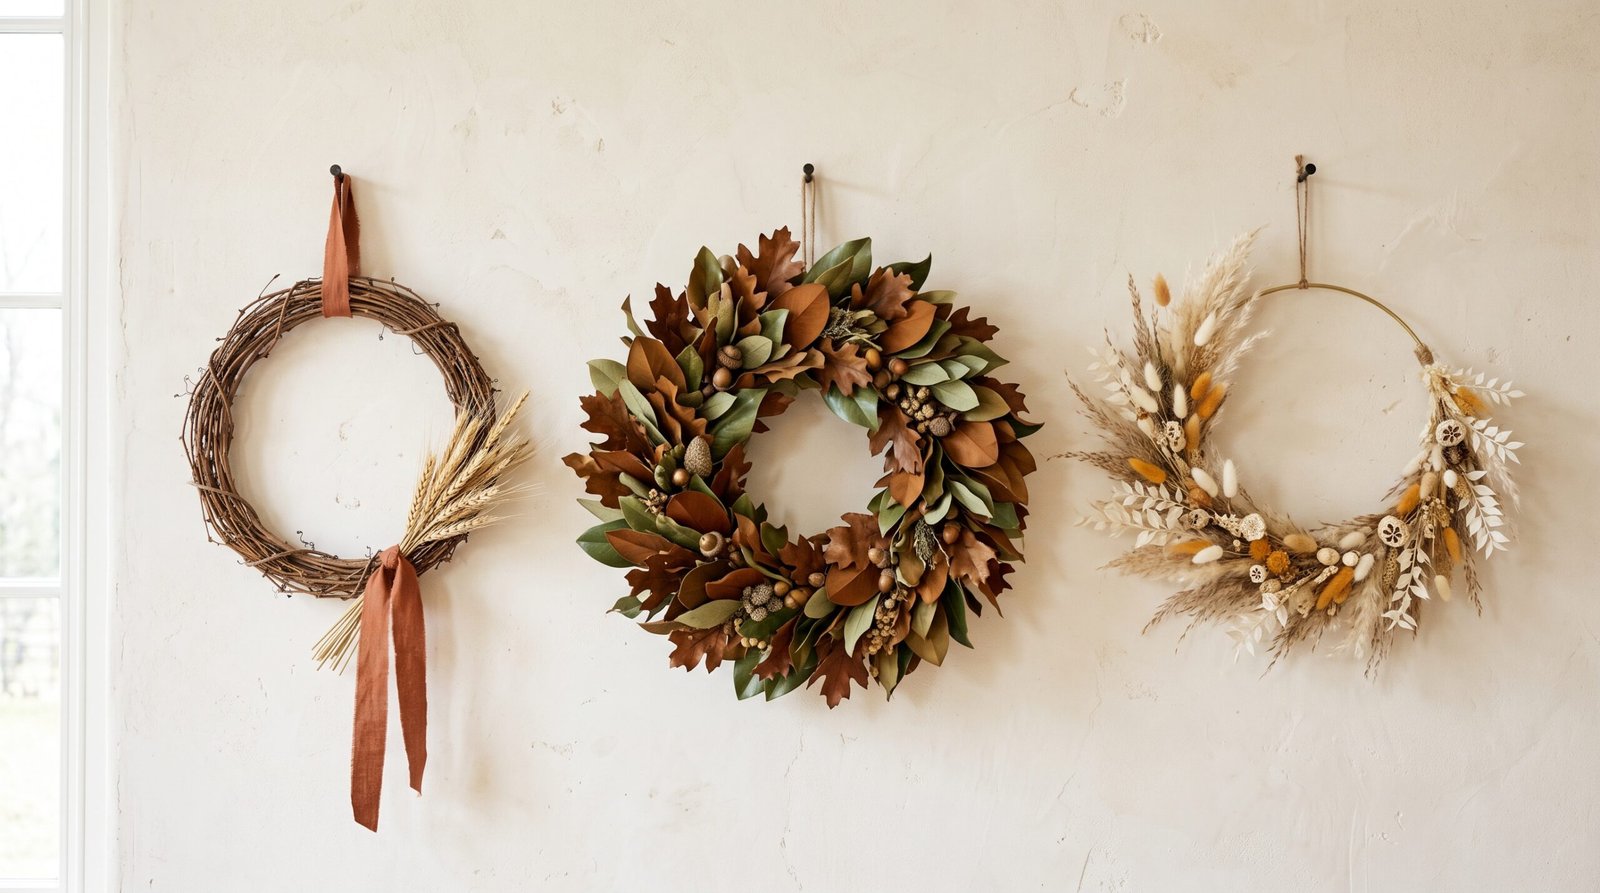
The minimal version — about $20, 30 minutes
An 18-inch grapevine base, one small cluster of dried wheat wired at the four o’clock position, and a rust linen ribbon. That is the whole wreath. It is genuinely the most modern-looking of the three and it uses about one-fifth of the material.
The lush leaf version — about $60, 90 minutes
Full coverage in preserved oak and magnolia leaves in bronze and deep sage, with dried hydrangea as focal points. This is the one that reads most like an expensive store-bought wreath. Preserved magnolia has a natural bronze reverse to the leaf — deliberately flip some leaves so both the green face and the bronze back show.
The airy grass version — about $40, 45 minutes
Built on a thin brass or gold metal hoop rather than grapevine, with dried grasses, bunny tail and bleached ruscus wired in a sparse crescent. Modern, light, and the best option for a small or narrow entry where a full wreath would overwhelm the door. Note that a metal hoop has nothing to grip, so every bundle must be wired — glue alone will not hold on smooth metal.
The mistakes that make a wreath look homemade
Stems pointing in different directions. Worth repeating because it is the one that matters most and the one nobody mentions.
Too thin. Underbuilding is more common than overbuilding. If it looks a little sparse on the table, it will look very sparse on a door from the street. Make more bundles than you think you need.
Uniform coverage with no focal points. An even ring of identical material has nowhere for the eye to land. Three larger elements in a loose triangle fixes it.
Visible wire and glue strings. Pull the hair-thin glue strings off with your fingers once everything cools, and check that no wire wraps are showing on the front face. Two minutes, big difference.
Too many colours. Three to four colours total, all in the same muted family — rust, ochre, sage, cream, warm brown. A wreath with orange, red, yellow, burgundy, purple and green in it turns to visual mud from ten feet away.
Wrong size for the door. Covered above, but it is the mistake with the least excuse, because it is fixed entirely by measuring first.
Will it survive outside?
Honest answer: it depends almost entirely on whether your door is covered.
Under a covered porch or deep overhang: a dried wreath will hold up for the full season and come back for several more. Store it flat in a box, never compressed under anything, ideally in a closet rather than an attic where summer heat makes everything brittle.
Fully exposed to rain: dried hydrangea disintegrates, wheat goes limp, and preserved leaves lose their flexibility. If your door takes weather directly, build with the tougher materials — preserved magnolia, seed pods, pinecones, ornamental grasses, dried oranges — and skip hydrangea entirely.
Hard direct sun: a south or west-facing door will bleach dyed dried florals noticeably in six to eight weeks. Lean on naturally pale material — bleached ruscus, cream wheat, bunny tail — where fading simply does not show.
A clear matte acrylic sealer, sprayed lightly from about twelve inches and allowed to dry fully, adds meaningful moisture and UV resistance for about $8. It is not waterproofing, but on a semi-covered door it makes a real difference.
Storing it for next year
The whole cost argument for a DIY fall wreath depends on it lasting. Wrap it loosely in tissue or an old pillowcase, put it in a box wide enough that nothing is compressed, and store it somewhere climate-stable. Attics and garages get hot enough in summer to make dried material crumble.
Next September, pull it out, replace any two or three bundles that have faded, and you have a fresh-looking wreath for about $12. That is the actual economics of building your own.
Where to go from here
The same wiring technique works for every season, which is the real payoff — our roundup of DIY wreaths for every season walks through spring, summer and winter versions on the same base, and 12 DIY holiday wreath ideas picks up in December. If you would rather work with materials you gather yourself, fall wreaths with natural decor and DIY summer wreaths with natural materials both lean foraged.
Once the wreath is up, the rest of the entry usually needs to catch up with it. Our roundup of fall porch decor ideas handles the pots, pumpkins, lighting and layout, and our fall mantel decor guide uses the same dried materials indoors, so a single shopping trip can cover both. For matching pumpkins, no-sew fabric pumpkins is the natural companion project.
Build the bundles first, wire everything tight, and keep every stem pointing the same direction. Do those three things and your first wreath will look like your fifth. — Quinn