
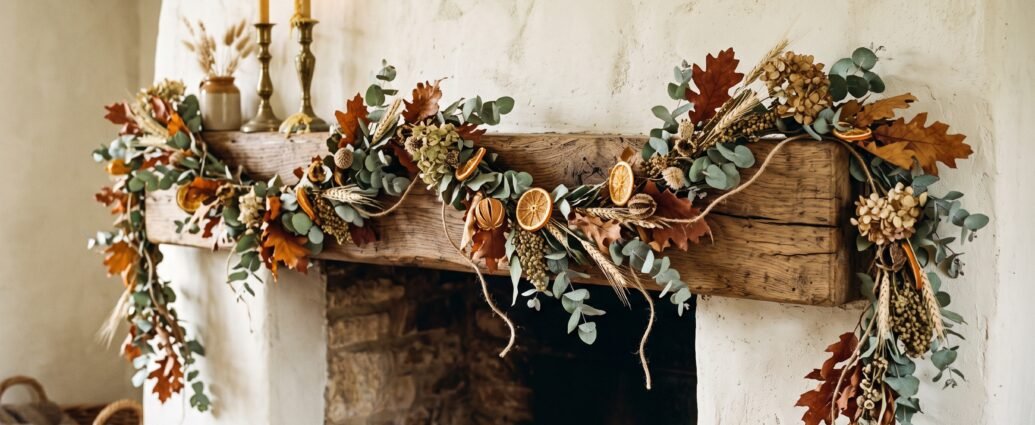
A store-bought fall garland is one of the worst value purchases in seasonal decorating. You pay $40 to $90 for something that’s usually 6 feet long, made largely of polyester leaves on a plastic vine, and looks convincingly fake from about four feet away. Meanwhile the materials to build a better one — real dried and preserved botanicals on jute twine — run about $25 to $45 and produce something that lasts several seasons and doesn’t announce itself as artificial.
The reason more people don’t make one is that most tutorials skip the numbers. How long should the twine actually be? How many bundles do you need? How far apart do they go? What happens if you run out of eucalyptus two feet from the end?
This is that version. Real lengths, a shopping list with quantities, honest timings, and the four or five places where this project goes wrong so you can avoid them.
How long does your garland need to be?
This is the number that determines everything else, and it’s the one most people get wrong. Your garland needs to be considerably longer than the surface you’re hanging it on, because you’re accounting for both drape and tails.
The formula
For a mantel or shelf: surface length x 1.5, plus 24 inches for the trailing ends.
| Where it’s going | Span | Cut your twine to |
|---|---|---|
| Standard mantel | 54″ | ~9 ft (108″) |
| Wide mantel | 72″ | ~11 ft (132″) |
| Doorway (over the frame) | 36″ wide | ~7 ft (84″) |
| Standard stair banister | 12 ft run | ~16–18 ft, or two 9 ft sections |
| Dining table runner (flat, no drape) | 72″ table | ~6 ft (72″) — no extra needed |
| Window frame | 48″ wide | ~8 ft (96″) |
Two things to note. A table runner garland lies flat, so it needs no drape allowance at all — cut it to the table length or slightly shorter so it doesn’t hang off the ends into people’s laps. And a banister garland spirals around the rail rather than draping, which eats length fast; if you’re spiraling tightly, budget closer to 1.75x the run.
Always cut long. You can trim excess twine at the end in ten seconds. You cannot add length to a garland you’ve already wired without a visible splice.
A quick note on drape
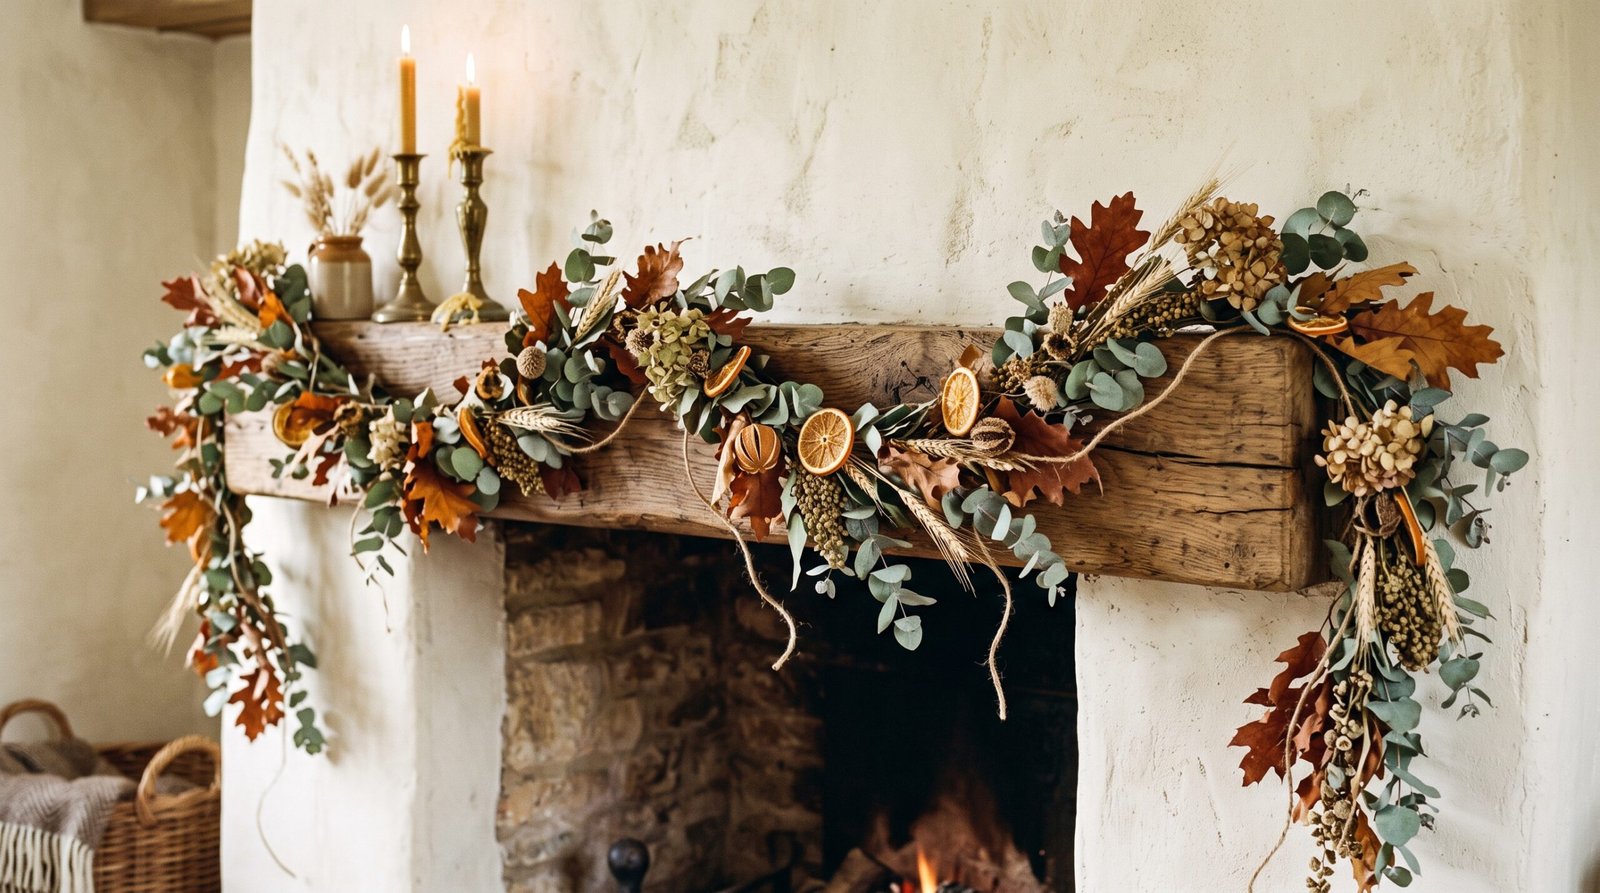
For a mantel, the swag should dip roughly 6″ to 10″ below the mantel edge at its lowest point. Much shallower and it looks like a straight stick; much deeper and it starts blocking the firebox and catching on things. The tails hanging off each end should fall about 12″ to 18″. Asymmetrical tails — one noticeably longer than the other — look far better than matched ones.
What to buy, with quantities
Here’s the shopping list for a 9-foot mantel garland, which is the most common size. Scale proportionally for other lengths.
The base
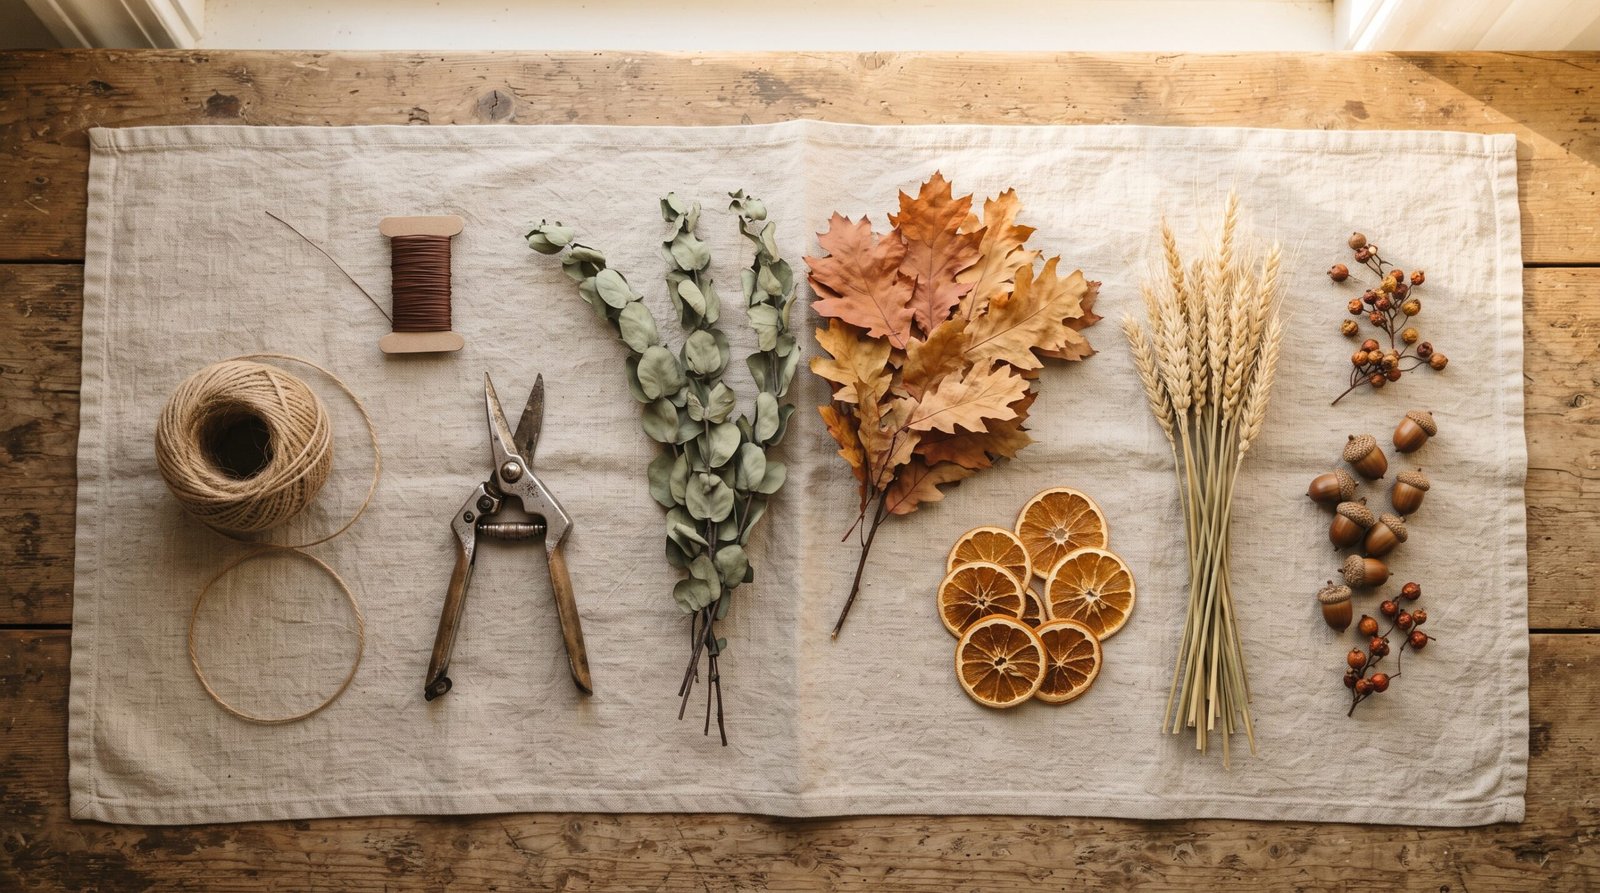
- Natural jute twine, 3-ply, about 20 ft ($4–7 for a full spool, which does two or three garlands). You want jute rather than cotton string — it’s stiff enough to hold a shape and its color disappears behind the foliage. A thin grapevine garland also works as a base if you want more body, and runs about $10–15 for 6 ft.
- Paddle floral wire, 22 or 24 gauge, brown or green ($4–6). Get paddle wire, not cut wire lengths — you’ll be wrapping continuously and cutting for each bundle wastes time and wire. 24 gauge is easier on the hands; 22 gauge holds heavier bundles better.
The greenery (the bulk of it)
For a 9-foot garland you’ll need roughly 18 to 22 small bundles, which works out to about 3 to 4 large retail bunches of mixed material. A typical florist or craft-store bunch yields 5 to 7 usable bundles once you break it down.
- Preserved eucalyptus, 2 bunches ($10–18 total). Seeded eucalyptus has more texture than silver dollar and is the better choice here. Preserved (glycerine-treated) stays supple; fully dried eucalyptus shatters when you bend it.
- Dried wheat or oats, 1 bundle ($5–9). Nearly indestructible and the warm straw color is the exact autumn tone you want.
- Dried oak, magnolia, or salal leaves, 1 bunch ($6–12). This is your rust and deep brown. Preserved oak leaves in particular hold color for years.
The accents (the seasonal part)
- Dried orange slices, 12–15 ($6–10 to buy, or free if you dry your own — see below).
- Small pinecones, 8–10 (free if you can forage; $5–8 for a bag).
- Bittersweet vine, dried hydrangea heads, or a few sprigs of dried lavender, optional, $0–10.
Tools
- Sharp floral snips or secateurs. Kitchen scissors will crush dried stems rather than cut them, which weakens the bundle.
- A work surface at least as long as your garland, or the floor. A dining table with a sheet over it is ideal.
Total cost: roughly $25 to $45 for a 9-foot garland, and the twine spool and wire paddle will cover your next two builds, so subsequent garlands land closer to $20.
Drying your own orange slices
Worth doing — they cost nothing beyond the oranges and they smell good for weeks. Slice navel oranges crosswise about 1/4 inch thick (thinner curls and burns, thicker won’t dry through). Blot both sides hard with paper towel. Lay them on a wire rack over a baking sheet and put them in the oven at 200°F for 3 to 4 hours, flipping once at the halfway point. They’re done when they’re leathery and translucent with no soft spots in the pith. Two large oranges yield roughly 14 to 16 usable slices.
Don’t rush the temperature. At 300°F they brown and curl in under an hour and look burnt rather than jewel-like. This is a low-and-slow job you start in the morning and forget about.
Time required, honestly
Every tutorial says “30 minutes.” That is not true unless you’ve done it before.
| Step | First time | Once you’ve done it |
|---|---|---|
| Drying orange slices (hands-off) | 3–4 hrs | 3–4 hrs |
| Prepping and sorting bundles | 25–35 min | 15 min |
| Wiring the garland | 45–70 min | 30–40 min |
| Adding accents | 10–15 min | 10 min |
| Hanging and adjusting | 15–20 min | 10 min |
| Active total | 1.5–2.5 hrs | ~1 hr |
Budget an afternoon and put something on in the background. It’s genuinely pleasant work once the bundles are prepped — the tedious part is all at the front end.
Step by step
Step 1: Cut and anchor the twine
Cut your jute to the length from the table above. Tie a small loop at each end — about 1.5″ across — and secure it with a couple of tight knots. These loops are what you’ll hang the garland by, and adding them now is far easier than trying to work them in around foliage later. This is the step people skip and regret.
Stretch the twine along your work surface. If you can, tape or weight both ends so it stays taut while you work. A garland built on slack twine ends up uneven.
Step 2: Break your material into bundles
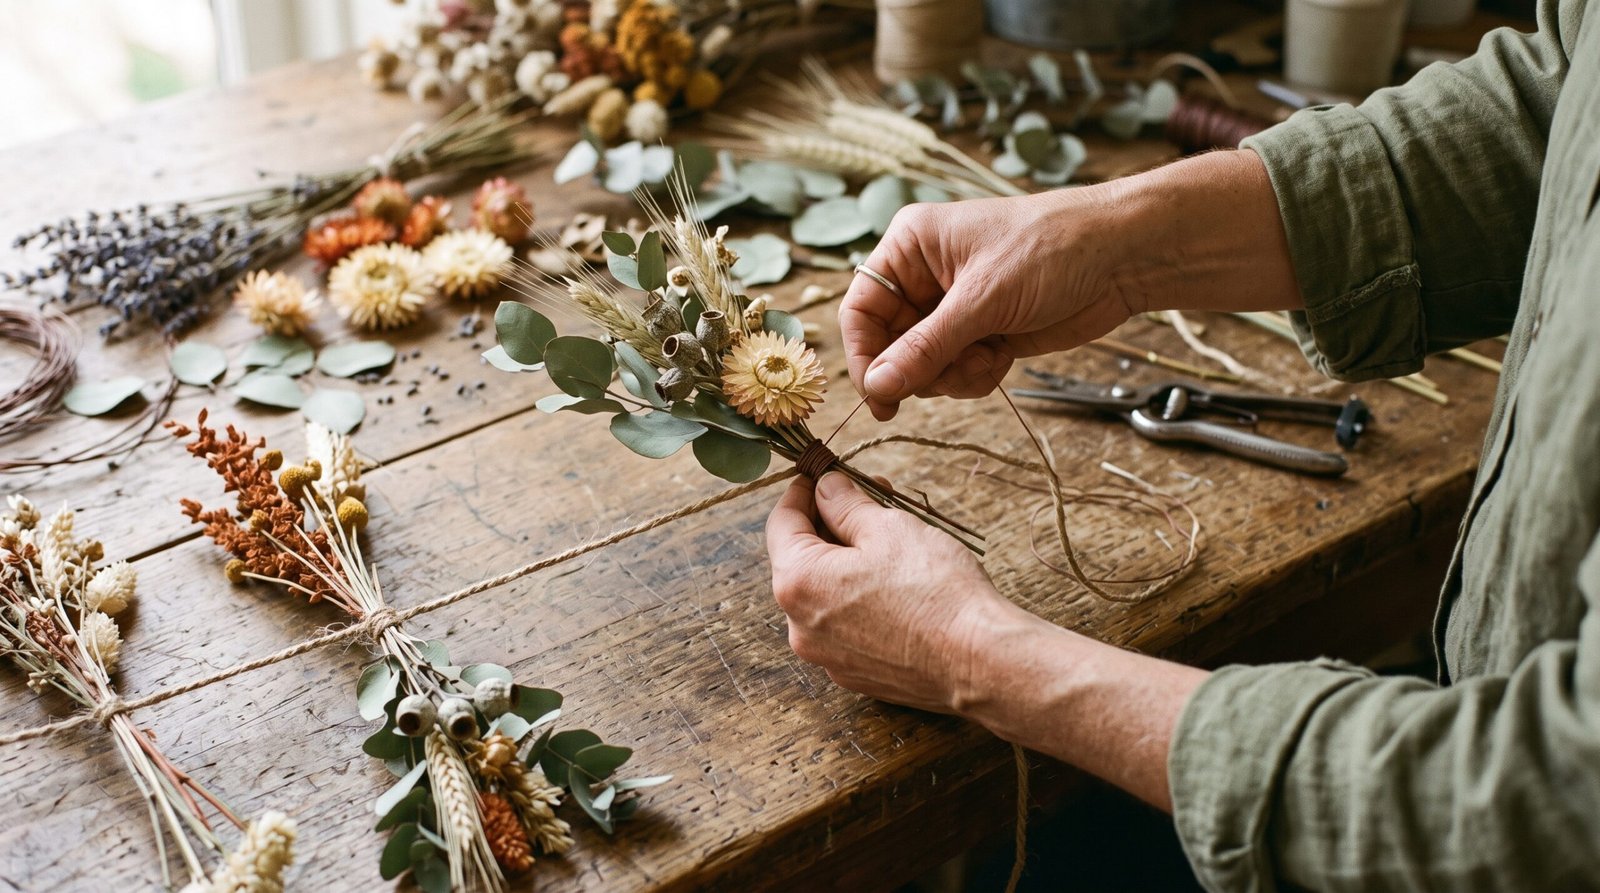
This is the step that determines whether the finished garland looks professional or homemade in the bad way. Every bundle should be roughly the same size — about 5 to 7 inches long and no thicker than your thumb at the stem end.
Each bundle should contain two or three different materials: a piece of eucalyptus, a few stems of wheat, and a couple of oak leaves, for instance. Mixing within the bundle is what gives the finished garland its depth. If you make bundles of pure eucalyptus and bundles of pure wheat and alternate them, you get stripes, and stripes look manufactured.
Make all 18 to 22 bundles before you wire anything. Lay them out in a row so you can see you’ve got consistent sizing. Working bundle-by-bundle as you go is how garlands end up thick at one end and thin at the other.
Step 3: Wire the first bundle
Start about 12 inches in from one end of the twine — that untouched 12 inches becomes your trailing tail.
Lay the first bundle along the twine with the stems pointing toward the near end, so the foliage points away down the length. Wrap the paddle wire around the stem end of the bundle and the twine together, four or five tight turns. Don’t cut the wire. Keep it attached to the paddle and let it hang.
Tight is important. A loosely wired bundle will rotate on the twine within a day, and rotated bundles are what make a garland look scraggly.
Step 4: Overlap and repeat
Here’s the core technique: lay the next bundle so its foliage covers the wired stems of the previous one. That means placing each new bundle about 3 to 4 inches further along the twine than the last. The overlap hides the mechanics, and hiding the mechanics is the entire difference between a good garland and an obvious one.
Wrap four or five turns of wire, still without cutting. Continue down the length. Every bundle points the same direction.
Keep checking your spacing against your remaining bundle count. At the halfway point of the twine you should have used roughly half your bundles. If you’ve used two-thirds, your spacing is too tight — spread the rest out slightly. If you’ve only used a third, tighten up. This mid-build check takes five seconds and saves the project.
Step 5: Reverse direction at the midpoint (optional but better)
If your garland is going on a mantel where both ends will be visible, there’s a refinement worth doing. Work from one end to the center, then cut the wire, flip the garland around, and start again from the other end working back toward the center, with all bundles pointing the opposite way.
The two directions meet in the middle. Cover that junction with one final bundle laid crosswise, or a cluster of pinecones and orange slices. The result is a garland where the foliage flows outward from the center in both directions, which looks intentional from any angle. A single-direction garland always has one end where you can see all the stems.
For a banister or a doorway where one end is less visible, single-direction is fine and saves ten minutes.
Step 6: Finish the ends
Wrap the wire several extra turns at the final bundle, then cut it and tuck the sharp end back under the wraps so nobody catches a finger on it. Leave your 12 to 18 inches of bare twine tail at each end — you’ll either tie these off or hide them behind the garland when hanging.
Step 7: Add the accents
Now, with the base built, go back and add the seasonal accents in short cut lengths of wire.
- Orange slices: thread a 4-inch piece of wire through the pith near the rind, twist, and attach to the twine backbone. Cluster them in groups of two or three rather than spacing them evenly — evenly spaced accents look like a factory did it.
- Pinecones: wrap wire tightly around the bottom two rows of scales, then twist and attach. This holds far better than trying to wire the middle.
- Hydrangea heads or bittersweet: tuck the stems directly into the existing bundles and secure with a single wire turn.
Stand back after every few accents. The temptation is to keep adding; the garland almost always looks better with fewer accents than you think. Three or four clusters across a 9-foot garland is plenty.
Step 8: Fluff
Lay it flat and work along the length pulling stems outward and upward so it has depth rather than lying flat like a pressed flower. A garland straight off the table always looks thin — most of the fullness comes from this two-minute step. Rotate individual stems so some point toward you and some away.
Hanging it without damaging anything
On a mantel
Two removable adhesive hooks on the underside of the mantel lip, positioned about 6 inches in from each end, hold a garland of this weight easily. Hooking on the underside keeps the hardware invisible. If your mantel has a deep shelf, you can skip hardware entirely and weight the tails with something heavy — a stack of books or a pair of candlesticks set on top of the twine ends works.
Check the weight before you trust adhesive hooks. A 9-foot dried garland typically comes in somewhere around 1 to 2 pounds, well within the range of a standard removable hook, but a heavily loaded one with lots of pinecones can push past that. When in doubt, use three hooks instead of two.
On a banister
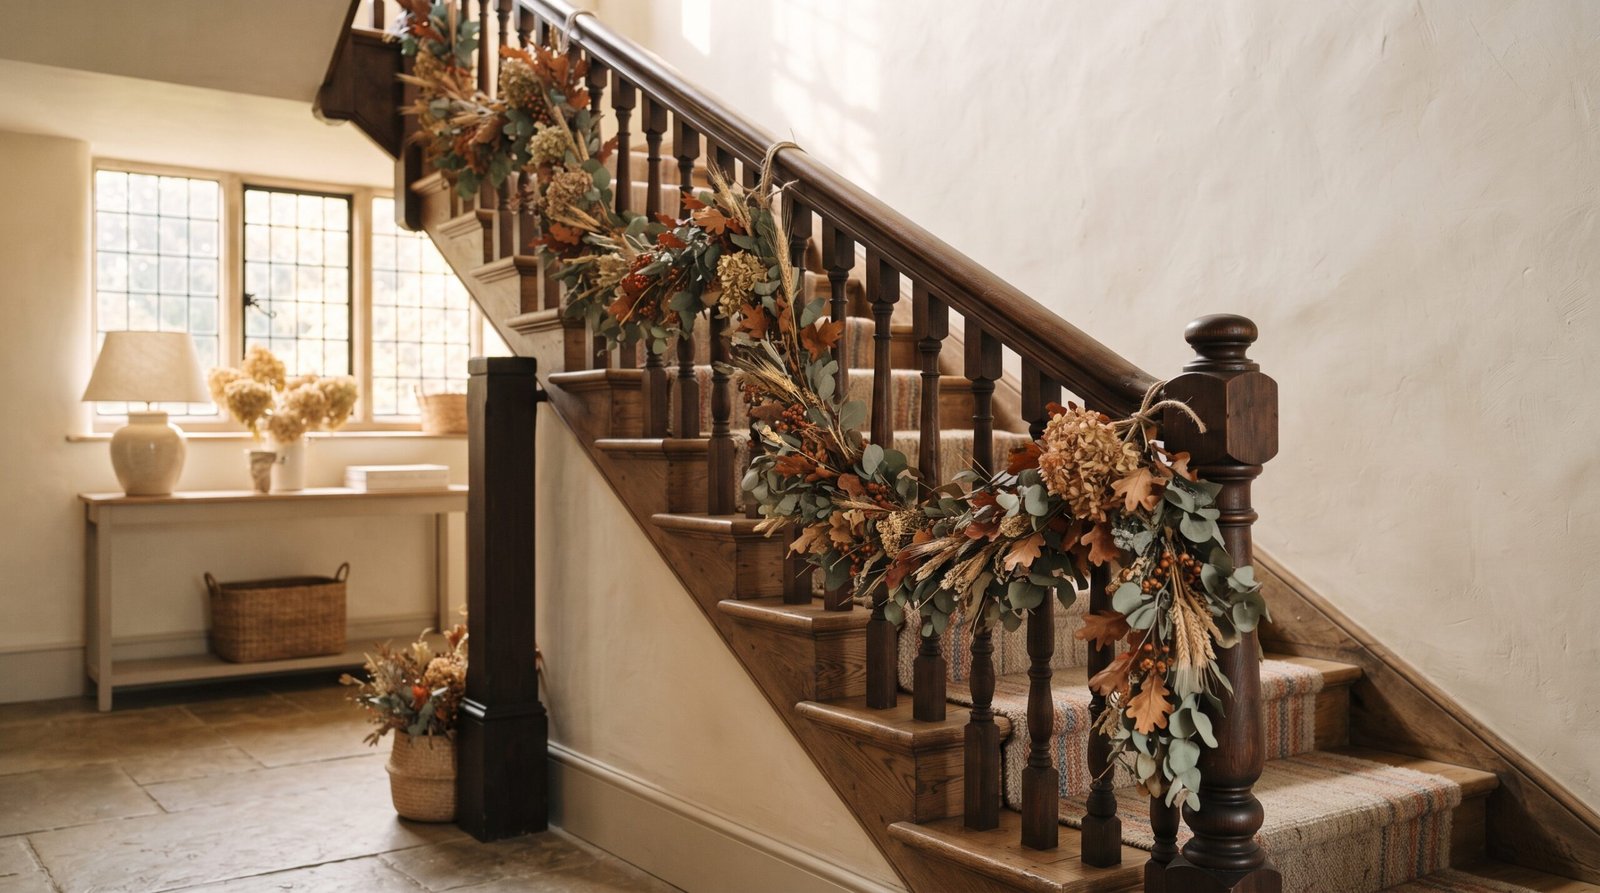
Spiral it around the handrail rather than draping it along the top, and secure with clear zip ties or short lengths of the same floral wire every 18 to 24 inches, tucked underneath the rail where they don’t show. Keep the garland to the outside face of the banister so the handrail itself stays usable — a garland you can’t grip past is a hazard on stairs, particularly at night.
Over a doorway or window
Adhesive hooks at the top two corners of the frame, with the garland swagging between them. For a wider doorway, add a third hook at the center top and let the garland dip on both sides — a single long swag across anything over 4 feet will sag unevenly.
As a table runner
Nothing to hang — just lay it down the center. Keep it under 4 inches tall so people can see across the table, and keep candles at least 12 inches away from it. There’s more on building a full table around it in cozy fall table settings for entertaining.
Where this goes wrong
- Bundles too big. The most common failure. Big bundles mean fewer of them, wider spacing, and visible twine gaps. Thumb-thickness at the stem, no more.
- Not overlapping enough. If you can see wire and stems from the front, your next bundle needed to sit closer. Overlap generously — you can always spread out later, but you can’t hide exposed mechanics.
- Cutting the wire between bundles. It doubles the time and creates weak points. Keep the paddle running.
- Using fully dried eucalyptus instead of preserved. Dried eucalyptus shatters the moment you bend it around twine. Preserved eucalyptus is glycerine-treated and stays flexible. The packaging will say which it is; if it’s brittle in the store, it’ll be worse at home.
- Running out of material at the end. Make all your bundles first and do the halfway check.
- Even spacing on accents. Orange slices every 8 inches looks mass-produced. Cluster them irregularly.
- Hanging it in direct sun. A south-facing window will bleach dried material pale within one season. Keep it off sunny walls if you want it to last.
- Fire risk. Dried botanicals are highly flammable. Never drape one across a mantel above a fire you actually light, and keep lit candles at least 12 inches clear.
Storing it for next year
This is the payoff for building rather than buying. Coil the garland loosely — never fold it — into a large box or a plastic bin with a lid, laying tissue paper or a towel between the coils so the layers don’t crush each other. Store it somewhere dry and temperature-stable; an attic that swings from freezing to 100°F will make everything brittle, and a damp basement invites mold.
Expect two to four seasons out of a well-stored garland. Wheat and preserved oak leaves last longest; orange slices fade first and are the cheapest thing to replace. Next September you’ll likely just wire on fresh slices and it’ll look new.
Variations worth trying
- All-neutral: wheat, dried grasses, bleached pampas, and cream hydrangea only. Reads as autumn through texture rather than color, and it works in a minimal room where rust would feel loud.
- Deep and moody: preserved magnolia leaves (brown suede underside showing), dark eucalyptus, and dried burgundy amaranth. Good for a room with dark walls or heavy wood.
- Foraged-only: oak and maple leaves pressed for a week between books, acorns, pinecones, and seed heads from your own yard. Costs the price of the twine and wire.
- Extended to Thanksgiving: build with wheat, oak, and pinecones and skip the orange slices, then add them in October — the base carries straight through November without looking like Halloween leftovers.
Where to use it, and what goes with it
A garland on the mantel is the anchor for a fall living room, but it needs the rest of the room to meet it. Our guide to fall decorating ideas for the living room covers the mantel proportions this garland should sit within, plus the pillow sizes, throw dimensions, and bulb temperatures that make the whole room read as autumn. For the surface right in front of the fireplace, fall coffee table decor has the tray sizing and height rules that keep the two vignettes talking to each other.
If you enjoy this kind of build, the same wiring technique underpins fall wreaths with natural decor and our wreaths for every season guide — a wreath is really just a garland wired onto a ring. Pair the garland with no-sew fabric pumpkins for the mantel shelf itself, and layering textures for a cozy fall home for everything soft in the room.
For style direction, rustic farmhouse touches for autumn and the full farmhouse decor guide lean into exactly this kind of natural material, and interior design styling tips covers the proportion thinking behind where a garland should sit.
Cut the twine longer than you think, make every bundle before you wire anything, and overlap more than feels necessary. Those three things are most of the difference. — Quinn


2 Comments