Do you ever walk into your garage and feel that low-level hum of creative frustration — all those half-finished projects, tools buried under extension cords, sawdust settled over everything like a fine beige snow? That feeling of potential without a real plan is one of the most common things I hear from people who dream of a functional home workshop but don’t quite know where to start.
In this post, we’re going to walk through a complete garage workshop setup from the ground up — workbenches, storage systems, lighting, dust control, and flooring. You don’t need a massive budget or a Pinterest-perfect space to build something that genuinely works for you.
Key Takeaways
- A torsion box or wall-mounted fold-down workbench can be built affordably and adapted to almost any garage footprint.
- French cleats offer more flexible tool storage than pegboards and can grow with your collection over time.
- Budget dust collection is achievable with a shop vac, a dust separator, and smart placement near stationary tools.
- LED shop lights on a linked chain pattern dramatically improve visibility without expensive electrical work.
- Interlocking rubber or foam floor tiles protect your back, your tools, and your concrete slab simultaneously.
- Planning your zones before buying any equipment saves money and keeps the workflow logical from day one.
Why Your Garage Workshop Setup Needs a Zone Plan First
Before a single screw goes into drywall, the single best thing you can do for your workshop is sketch a loose zone map. This isn’t about being rigid — it’s about understanding how you actually move through a project so your space supports that flow rather than fighting it.
Identifying Your Core Work Zones
Most home workshops break naturally into three zones: a primary work zone (your workbench area), a tool storage zone (walls and cabinets), and a machine zone (table saw, drill press, band saw — anything stationary). Think about how material flows between them. A sheet of plywood coming in the door should reach your table saw without navigating an obstacle course.
I always tell people to stand in the middle of their empty garage and turn 360 degrees. Where does natural light come in? Where are the outlets? That real-world orientation shapes everything that follows. If you’re also thinking about storage strategies beyond the workshop itself, my post on garage organization ideas for beginners covers the broader picture beautifully.
Allowing for Flex Space
Workshops evolve. Leave at least one wall open — or plan storage that can shift — because in six months you’ll discover a tool you didn’t know you needed or a workflow that makes more sense. Flexibility built in from the start is worth more than any single equipment upgrade.
Also consider clearance around stationary tools. A table saw typically needs four feet of outfeed space. A drill press needs to swing freely. Mapping this out on paper (or even blue tape on the floor) before you build anything saves real headaches later.
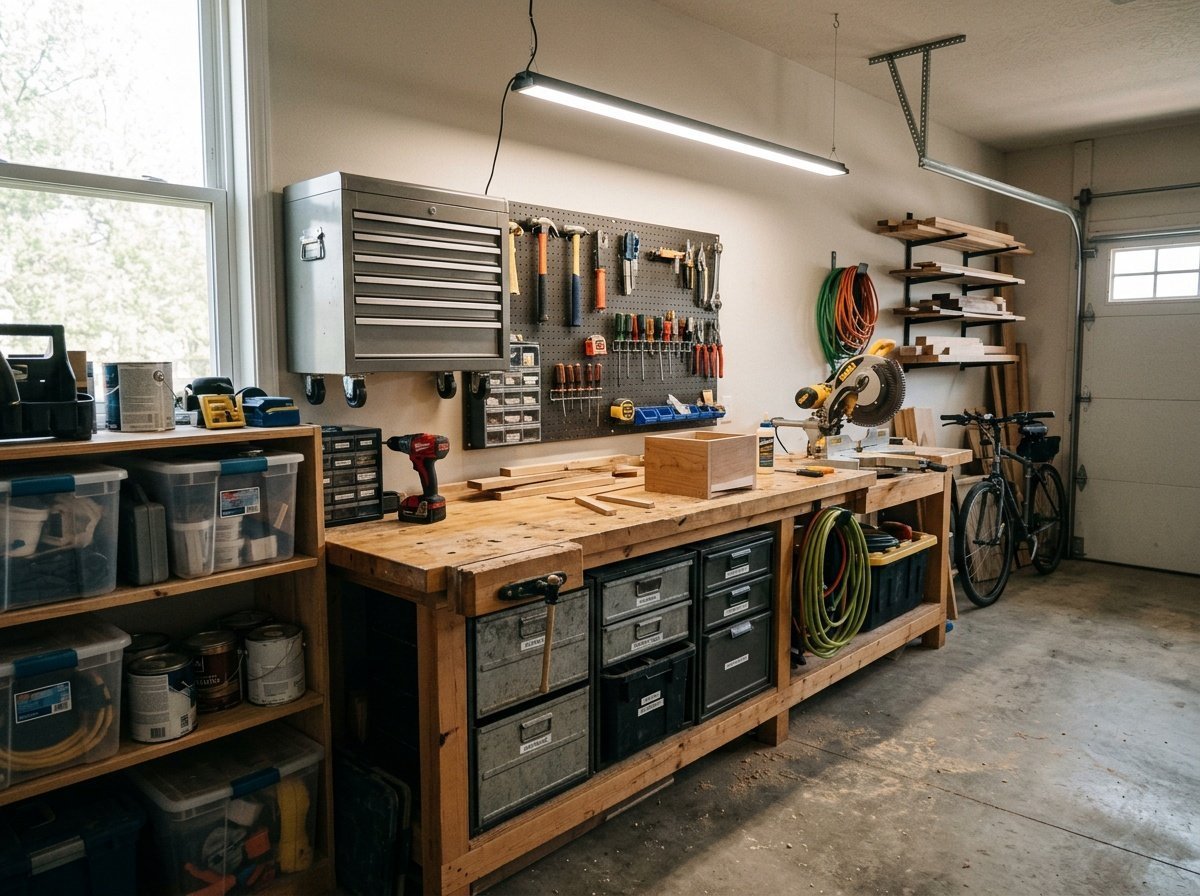
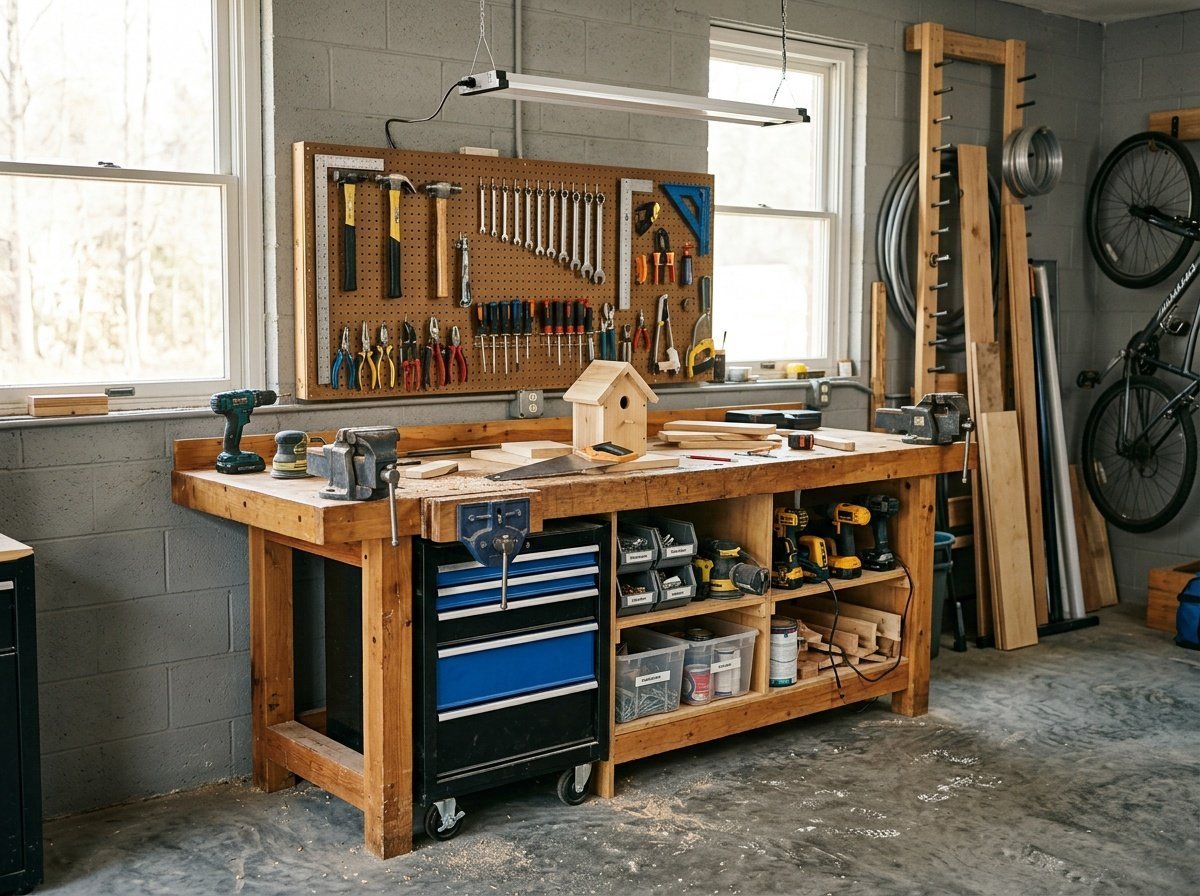
DIY Workbench Builds: From Simple to Space-Saving
Your DIY workbench is the beating heart of the whole space. The good news? You don’t need to spend thousands to get something solid, flat, and practical. The style you choose depends on your square footage, your budget, and how you work.
The Classic Torsion Box Workbench
A torsion box top is made by sandwiching a grid of internal ribs between two flat skins — typically MDF or plywood — creating a surface that’s incredibly flat, surprisingly light, and very stiff. This approach is perfect when you need a reliable reference surface for joinery, assembly, or finishing work.
Basic material cost for a 3×6 foot torsion box top runs roughly $60–$90 in sheet goods. Pair it with a simple 2×4 lumber base and you have a rock-solid bench for well under $200. The key is making your internal grid spacing consistent — every 6 to 8 inches works well for most shop use cases.
Wall-Mounted Fold-Down Workbench
If your garage doubles as car storage, a fold-down workbench is genuinely life-changing. When folded up, it takes almost no floor space. Folded down, it gives you a full working surface anchored to wall studs with heavy-duty piano hinges and a pair of folding legs or support chains.
A standard fold-down build uses a ¾-inch plywood top (often edged with hardwood for durability), piano hinges rated for at least 100 lbs, and legs that either swing out from underneath or are stored on wall hooks nearby. The whole build can be done in a weekend for around $80–$120 depending on your lumber prices.
Choosing Workbench Height and Surface
The ideal workbench height is roughly your wrist height when your arms hang at your sides — typically 34 to 36 inches for most adults. Going slightly lower (around 32 inches) works better for hand-planing or heavy assembly work where you need downward leverage.
For the top surface, hardboard (tempered Masonite) laid over your base is an affordable sacrificial layer you can flip or replace when it gets beat up. It’s a simple trick that keeps your structural top pristine for years.
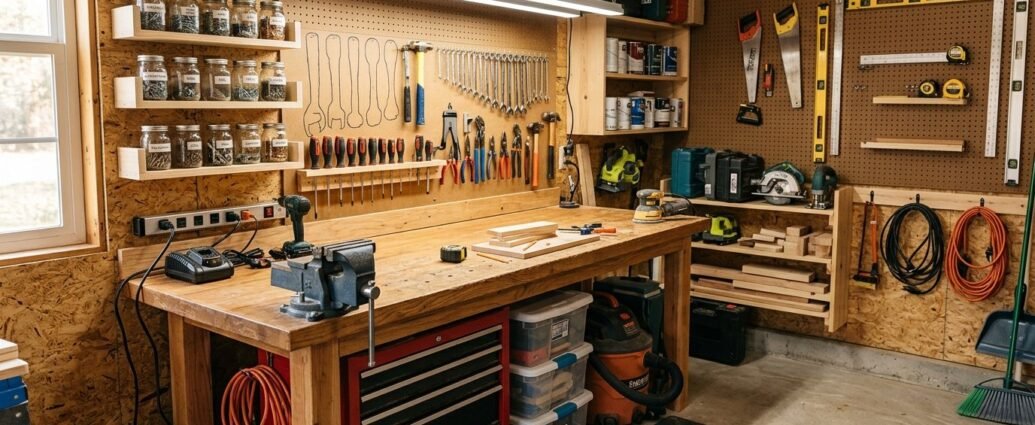
Tool Storage: French Cleats vs. Pegboards
Wall storage is where most garage workshops either shine or get chaotic fast. Two systems dominate the DIY world: French cleats and pegboards. Both have real merit, and the right choice often comes down to how your tool collection is likely to grow.
How French Cleats Work
A French cleat system uses strips of plywood or solid wood cut at a 45-degree angle, mounted horizontally across a wall. Matching angled hooks, brackets, and holders hang from any point on the wall — and they can be rearranged in seconds. No drilling, no holes, just slide and go.
This infinite adjustability is French cleats’ biggest advantage. As your tool collection changes, your wall layout changes with it. A full 8-foot wall of French cleats can hold hand tools, power tools, jigs, finishing supplies, and even small shelving units — all reconfigurable without touching a single fastener.
Where Pegboards Shine
Pegboards are lighter on the wallet upfront and easier to install for beginners. A 4×8 sheet costs around $15–$25, and the hook systems are universally available at hardware stores. They’re a great starting point if you have a small, stable collection and you know exactly what you need to hang.
The downside? Pegboard hooks walk. They shift and fall when you grab tools, and the hole pattern locks you into a grid that doesn’t always match odd-sized holders. Adding a pegboard backer board (a thin strip of wood behind the panel) and using double-bend hooks helps, but it still doesn’t match the rock-solid versatility of cleats.
| Feature | French Cleats | Pegboards |
|---|---|---|
| Upfront Cost | $25–$60 per wall section | $15–$30 per panel |
| Flexibility | Fully infinitely adjustable | Grid-limited |
| Weight Capacity | Very high (stud-mounted) | Low to moderate |
| DIY Difficulty | Moderate (requires table saw or circular saw) | Easy (drill and screws) |
| Best For | Growing collections, power tools, jigs | Small shops, hand tool sets |
Combining Both Systems
My honest recommendation? Start with pegboard above the workbench for frequently grabbed hand tools, and run French cleats along a longer side wall for everything else. You get the visual accessibility of pegboard right where you need it most, and the adaptability of cleats as your workshop grows over time.
Dust Collection on a Budget
Dust collection is the unsexy hero of any well-run workshop. Sawdust isn’t just messy — fine wood particles are genuinely hard on your lungs and can be a fire hazard around motors. The good news is you don’t need a $600 dedicated dust collector to make a meaningful difference.
The Shop Vac and Dust Separator Combo
A quality 5–6 gallon shop vac paired with a cyclone dust separator (like a Dustopper or Oneida Dust Deputy) is the most budget-friendly way to handle 80% of your dust needs. The separator sits between your tool and the vac, spinning large particles out into a separate bucket before they ever hit your vac filter. Your filter lasts longer, suction stays strong, and you empty a bucket instead of replacing a clogged filter every few sessions.
This whole setup can be assembled for $100–$150 and handles sanding, routing, and circular saw work with ease. Connect it to your workbench tools with a length of flexible hose and a few Y-connectors for multiple tool hookups.
Tool-Specific Collection Points
The most impactful place for dust collection is at the source. A hose connection directly at your miter saw, router table, or belt sander captures the dust before it becomes airborne — which is where it becomes a breathing problem. Most stationary tools have dust port fittings; adapters are inexpensive if the sizes don’t match.
For your table saw, a shop-made lower cabinet enclosure around the blade below the table can channel chips into a vac hose — a weekend build that makes a huge difference without costing much at all.
Ambient Air Filtration
Even with great point-of-capture collection, fine dust still escapes. A simple ambient air filtration unit — essentially a box fan mounted with furnace filters — hung from the ceiling in a corner pulls that floating fine dust out of the air over time. You can build one for under $40 with a box fan, 20×20 MERV-13 filters, and a bungee cord. Run it while you work and for 20–30 minutes after you’re done.
“A workshop that breathes well isn’t just safer — it’s a place you actually want to spend time in. Good dust management changes the whole energy of a space.”
Workshop Lighting: LED Shop Lights Done Right
Lighting is one of the most transformative and most underestimated elements of a good workshop. Poor lighting leads to measurement errors, eye strain, and real safety concerns around spinning blades and sharp tools. The shift to modern LED shop lights has made this easier and cheaper than ever.
Choosing the Right LED Fixtures
Look for linkable LED shop lights in the 4-foot or 5-foot format, rated at least 4,000–5,000 lumens per fixture, with a color temperature of 5000K (daylight). That color temperature renders wood tones accurately — critical when you’re matching grain or checking finish color. Anything warmer (3000K) gives wood a yellowish cast that can fool your eye.
Brands like Hykolity and Barrina make excellent linkable fixtures in the $20–$35 range per light. The linkable feature means you run one power connection and daisy-chain up to six or eight lights together — significantly reducing the number of outlets you need.
Placement Strategy for Shadow-Free Work
The goal is to eliminate deep shadows across your workbench and machine zone. Mount fixtures in rows perpendicular to your primary work orientation — if you face the long wall when working, run the lights front-to-back across the ceiling. This means light comes from both sides as you work, reducing shadow pockets around your hands and tools.
Over stationary tools like a drill press or scroll saw, add a dedicated task light — a simple gooseneck LED shop lamp pointed at the work surface makes detail work dramatically safer and more enjoyable. Similar principles apply when thinking about lighting in other challenging spaces; if you’ve explored low ceiling basement ideas, you’ll recognize how much strategic lighting changes the feel of a functional space.
How Many Fixtures Do You Need?
A rough guideline for workshop lighting is 50 foot-candles of illumination across your main work areas. For a typical two-car garage (roughly 400–500 sq ft), plan on six to eight 4-foot LED fixtures arranged in two or three rows. That might sound like a lot, but at $25 a fixture it’s a $150–$200 investment that completely transforms the usability of your space.
Garage Workshop Flooring That Can Take a Beating
Bare concrete is functional but brutal — on your knees, your feet after long sessions, and your tools when they get dropped. The right workshop flooring choice improves comfort, safety, and even how your space feels to be in. And it doesn’t have to cost a fortune.

Interlocking Rubber Floor Tiles
Interlocking rubber tiles (the kind used in gym flooring) are arguably the best all-around workshop floor option. Typically ¾-inch thick and sold in 2×2-foot tiles, they cushion dropped tools, reduce fatigue, provide excellent traction even when wet, and clean up beautifully with a sweep and occasional mop.
Cost runs $1.50–$3.00 per square foot — so a 400 sq ft workshop floor comes in at $600–$1,200 fully covered. That’s the higher end of budget flooring options, but it’s also a forever solution that handles oil, water, and impact without complaint. Many people cover only the main work zones and leave the machine area as bare concrete.
Foam Interlocking Tiles
Foam anti-fatigue tiles are lighter on the wallet ($0.50–$1.00/sq ft) and genuinely comfortable underfoot. The tradeoff is durability — heavy equipment dents them permanently, they’re not impervious to oil, and they can tear if you’re dragging heavy stock across them regularly.
Where foam tiles genuinely shine is as dedicated anti-fatigue mats directly in front of your workbench or miter saw station. Use them as targeted comfort upgrades rather than whole-floor coverage, and they’re a great value.
Epoxy Coating Your Concrete
A quality epoxy floor coating seals the concrete, resists chemicals and oils, makes cleaning trivial, and gives your garage a sharp, finished look. DIY epoxy kits run $100–$300 for a standard two-car garage and require a weekend of prep and application. The key is proper surface prep — acid etching or grinding — to get good adhesion.
The main limitation with epoxy is that it can be slippery when wet unless you add anti-slip aggregate, and it’s a permanent decision. But for a dedicated workshop where aesthetics and cleanability matter, epoxy is a genuinely satisfying finish. You might think of it similarly to how a thoughtful paint or surface choice transforms any room — the same principle I explore when helping readers with inexpensive family room updates that actually work.
Home Workshop Organization: Keeping It Working Long-Term
The best-designed workshop in the world stops working the moment the organization systems stop being used. Building habits and physical systems that make it easy to maintain order is the final — and most important — layer of any good garage workshop setup.
The One-Touch Rule
Every tool in your workshop should be returnable to its home in one motion. If putting something away requires moving other things first, the storage isn’t working. This is where French cleat holders custom-built for specific tools earn their keep — the tool silhouette is right there, and muscle memory takes over.
Label everything in the early stages of a new organization system, even if it feels unnecessary. Labels create intention, and intention is what separates a workshop that drifts into chaos from one that stays functional month after month.
Regular Reset Sessions
I build a 10–15 minute workshop reset into the end of every project session. Sweep the floor, return tools to their homes, check consumables (sandpaper, blades, screws), and make a note of anything running low. It sounds small, but that consistent reset means every new session starts clean — and that clean start fuels creative momentum in a way that a chaotic space simply can’t.
Evolving Your Layout
Plan to reassess your entire layout every six months, especially in the first year. As you work more, you’ll notice natural friction points — a tool you always have to walk past something to reach, a surface that’s always covered in project overflow. Those friction points are design problems worth solving. The flexibility you built into your storage systems from the start makes those adjustments relatively painless.
Frequently Asked Questions
What’s the minimum budget for setting up a basic garage workshop?
A functional beginner workshop — basic workbench, a wall of pegboard storage, one or two LED shop lights, and a shop vac — can be assembled for $300–$500. Prioritize the workbench and lighting first, since those impact every session, then add storage and dust collection over time as budget allows.
How do I know if my garage floor needs epoxy or if rubber tiles are better?
Epoxy works best on concrete that’s in good condition and doesn’t have existing moisture issues — do a plastic sheet test (tape a 2-foot square to the floor overnight; moisture droplets underneath mean epoxy may not adhere well). If your slab is uneven, cracked, or damp, interlocking rubber or foam tiles are more forgiving and can simply be replaced if damaged.
Can I build a French cleat wall without a table saw?
Yes — a circular saw with a quality ripping fence or a track saw can cut French cleat strips at 45 degrees reliably. Some hardware stores will also rip plywood strips to your spec for a small fee. The cuts don’t have to be perfect; consistency matters more than precision for cleat walls.
How many lumens do I need for a workshop garage?
For general workshop use, aim for 50 foot-candles of light across work surfaces. In a 400 sq ft garage, that translates to roughly 20,000–25,000 lumens total — achievable with six to eight 4-foot LED fixtures rated at 4,000–5,000 lumens each. Add dedicated task lighting over stationary tools for safety-critical operations.
Is a dust separator really necessary, or is a shop vac enough on its own?
A shop vac alone works, but a cyclone separator dramatically extends filter life and maintains stronger suction over longer sessions. Without a separator, fine dust clogs your filter quickly, reducing suction by 30–50% within a single session. For regular workshop use, the $30–$50 separator pays for itself in filter savings within a few months.
What’s the best workbench height for general garage workshop use?
The most commonly recommended workbench height is between 34 and 36 inches — roughly wrist height for an average adult standing relaxed. If you do a lot of hand-planing or heavy assembly work requiring downward pressure, dropping to 32–33 inches gives you better leverage. It’s worth testing with a temporary setup before committing to a permanent build.
How do I handle a garage workshop that also needs to park a car?
A wall-mounted fold-down workbench is your best friend in a shared-use garage. Combined with vertical French cleat storage (which takes zero floor space), you can maintain a full working setup that folds and collapses in minutes. Plan your machine tools on wheels with locking casters so they can be rolled aside when you need vehicle clearance.
Building a workshop that genuinely works for you is one of the most satisfying home projects you can take on — and the beauty of it is that it never has to be finished all at once. Start with a solid workbench, get your lighting right, and let the rest grow organically around how you actually work. If you’re craving more inspiration for transforming the functional spaces in your home, the ideas in my guide to beginner garage organization are a wonderful companion to everything we’ve covered here. Your workshop is waiting — and it’s going to be so good. 🔨