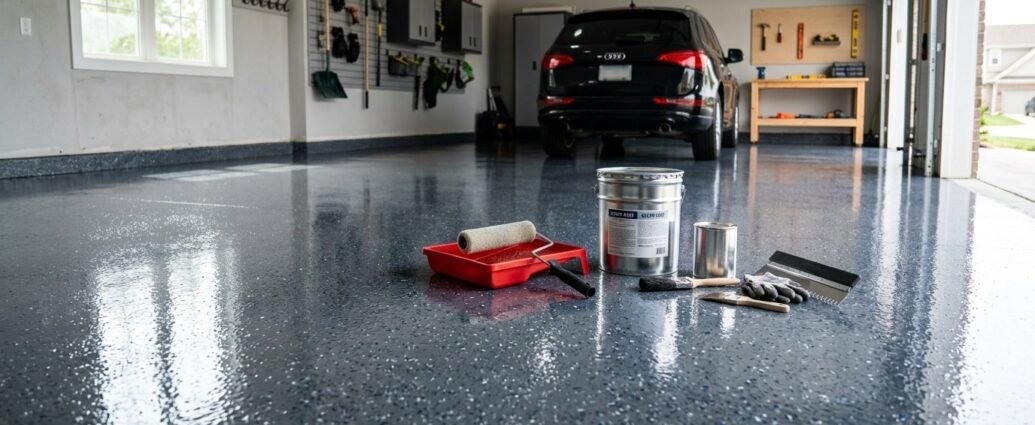
Do you ever pull into your garage and think, this space deserves so much better? That cracked, oil-stained slab feels like a missed opportunity every single time the door rolls up. A fresh epoxy garage floor can completely transform the way your garage looks, functions, and even feels — and the best part is that it’s genuinely something you can do yourself over a weekend.
In this guide, we’re walking through everything you need to know about how to epoxy a garage floor the right way — from the surface prep that most people rush through, to choosing the right coating, adding decorative chips, and sealing it all in. Whether you’re considering a DIY epoxy floor or weighing the cost of hiring a pro, you’ll leave here with a clear, confident plan.
Key Takeaways
- Surface preparation is the single most important step — skipping or rushing it causes 90% of epoxy failures.
- Mechanical grinding gives better adhesion than acid etching alone, especially on older or sealed slabs.
- Water-based epoxy is more DIY-friendly; solvent-based offers a harder, more durable finish.
- Decorative flake chips add grip, hide imperfections, and elevate the overall look dramatically.
- A proper polyurethane or polyaspartic top coat protects your epoxy and extends its lifespan significantly.
- DIY costs typically run $3–$7 per sq ft; professional installation ranges from $7–$15 per sq ft.
Why an Epoxy Garage Floor Changes Everything
Before we get into the how, let’s talk about the why. A garage floor coating isn’t just cosmetic — it’s a functional upgrade that protects your concrete from moisture, chemicals, tire marks, and daily wear. Once you’ve lived with one, bare concrete feels like a step backwards.
The Functional Benefits Worth Knowing
Epoxy creates a non-porous surface that resists oil, gasoline, antifreeze, and most household chemicals. Spills wipe up instead of soaking in. Dust and dirt stop embedding into the concrete texture. The whole floor becomes something you can actually mop — which sounds small until you realize how much easier cleanup becomes after a project.
Beyond that, the light-reflective quality of an epoxy coating genuinely brightens the space. If you’ve been frustrated by a dark, gloomy garage, a light gray or white epoxy floor with decorative chips can double your perceived light without touching a single fixture.
How It Connects to the Rest of Your Home
A polished garage floor is one of those quiet confidence moves that elevates everything around it. Pair it with some intentional garage organization strategies and you’ll wonder why you waited so long to treat this room like a real part of your home. It’s the same philosophy I apply everywhere — every space deserves to feel considered, even the utilitarian ones.
Surface Prep: The Step You Cannot Afford to Skip
If there is one truth in the world of DIY epoxy floor installation, it’s this: your results will only ever be as good as your surface prep. I have seen beautiful coating kits fail within months because the concrete wasn’t properly cleaned, profiled, or dried before application. This step is everything.
Cleaning and Degreasing the Slab
Start by sweeping out all debris, then address every oil stain with a dedicated concrete degreaser. Don’t skip the stains — epoxy will not bond over oil, full stop. Scrub degreaser into the stained areas with a stiff brush, let it dwell, then rinse thoroughly. For older garages with years of buildup, you may need to repeat this step two or three times.
After cleaning, check for any existing sealers or coatings on the concrete. Drip a few drops of water onto the surface. If the water beads up instead of soaking in, there’s a sealer present that must be removed before any epoxy application will work.
Testing for Moisture
Moisture is the silent killer of garage floor coatings. Tape a 2-foot square of plastic sheeting to the slab overnight. If you lift it in the morning and find condensation on the underside, you have a moisture transmission issue that needs to be addressed — either with a moisture-mitigation primer or by reconsidering epoxy entirely. High-moisture slabs may be better suited to polyurea coatings instead.
Repairing Cracks and Damage
Fill any cracks wider than a hairline with a polyurethane concrete crack filler or an epoxy crack repair kit. Let repairs cure fully before moving forward. Small divots and bug holes can be filled with an epoxy patching compound. A smooth, solid surface isn’t just aesthetic — it ensures the coating bonds evenly across the entire floor.
Acid Etching vs. Mechanical Grinding: Which Is Right for You?
Once your floor is clean and repaired, it needs to be profiled — meaning the surface needs a slight texture so the epoxy has something to grip. This is where the debate between acid etching and mechanical grinding comes in, and the right choice depends on your concrete’s condition and your DIY comfort level.
Acid Etching: The Accessible Option
Acid etching uses a muriatic acid or citric acid solution to chemically open the pores of the concrete. It’s accessible, inexpensive, and doesn’t require renting equipment. You dilute the acid, apply it to the dampened floor, scrub it in, let it fizz, then rinse and neutralize thoroughly. The result should feel like 120-grit sandpaper when dry.
The downside? Etching is inconsistent on dense or hard-troweled concrete and does nothing for floors that have been previously sealed. It also requires careful safety precautions — eye protection, rubber gloves, and excellent ventilation are non-negotiable. And you’ll need to ensure the floor is completely dry before coating, which can add a day or two to your timeline.
Mechanical Grinding: The Professional Standard
Diamond grinding or shot blasting gives a more consistent, deeper profile than acid etching. You can rent a walk-behind concrete grinder from most tool rental shops for around $80–$150 per day. The mechanical abrasion opens the concrete uniformly and removes any existing sealers at the same time, which is why professional installers almost universally prefer it.
If your concrete is older, has been sealed, or had previous coatings, grinding is the safer investment. Yes, it takes more effort and cost up front. But it dramatically reduces the chance of peeling or delamination down the road.
| Method | Cost | Effectiveness | Best For |
|---|---|---|---|
| Acid Etching | $15–$40 | Moderate | New, unsealed concrete in good condition |
| Mechanical Grinding | $80–$150/day rental | High | Older slabs, sealed or coated concrete |
| Shot Blasting | $150–$300/day rental | Very High | Large areas, professional-grade prep |
Choosing Between Water-Based and Solvent-Based Epoxy
Once your surface is prepped, it’s time to choose your coating. The two main categories of garage floor coating are water-based and solvent-based epoxy, and they have meaningfully different performance profiles. Understanding the difference helps you match the product to your goals and your DIY comfort level.
Water-Based Epoxy: The Friendlier Choice
Water-based epoxy is lower in VOCs, easier to mix, more forgiving during application, and dries faster. It’s what most consumer-grade DIY kits use, and for good reason — it’s genuinely approachable for a first-timer. The finish is attractive and durable enough for most residential garages, especially when paired with a quality top coat.
The trade-off is thickness. Water-based formulas typically build less film per coat, which means they may not be as chemically resistant or as hard as their solvent-based counterparts over the long term. For a hobbyist garage or a space that sees moderate traffic, they perform beautifully.
Solvent-Based Epoxy: The Heavy-Duty Option
Solvent-based epoxy penetrates more deeply into the concrete, builds a thicker film, and cures to a harder, more chemically resistant finish. It’s the preferred choice for high-traffic garages, workshops, and commercial spaces. The downside? Strong fumes, longer open windows, and less margin for error during application. You’ll need serious ventilation and respirator protection.
For most homeowners doing their first garage floor coating, I recommend starting with a high-quality water-based system and upgrading to a polyurethane or polyaspartic top coat for added durability. You’ll get a beautiful, long-lasting result without the complexity of a full solvent-based system.
“The best garage floor coating isn’t the most expensive one — it’s the one applied correctly to a properly prepared surface.”
Applying Decorative Chips for a Professional Finish
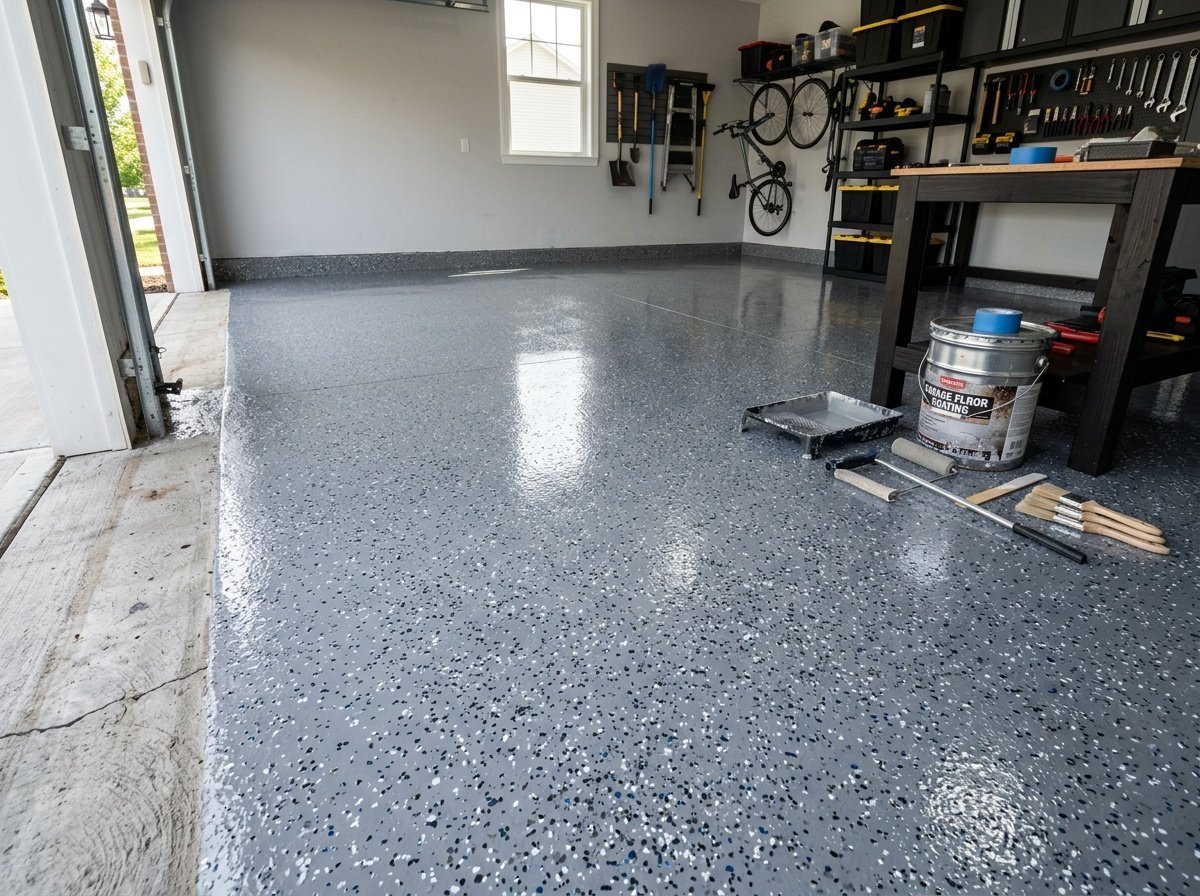
This is the part where function becomes genuinely beautiful. Decorative color chips — also called vinyl flakes or broadcast chips — are scattered into the wet epoxy base coat to create that speckled showroom look you’ve probably admired in high-end garages and even some finished basement floors. They’re not just decorative, though. They add texture, improve grip, and help hide any minor surface imperfections in the concrete.
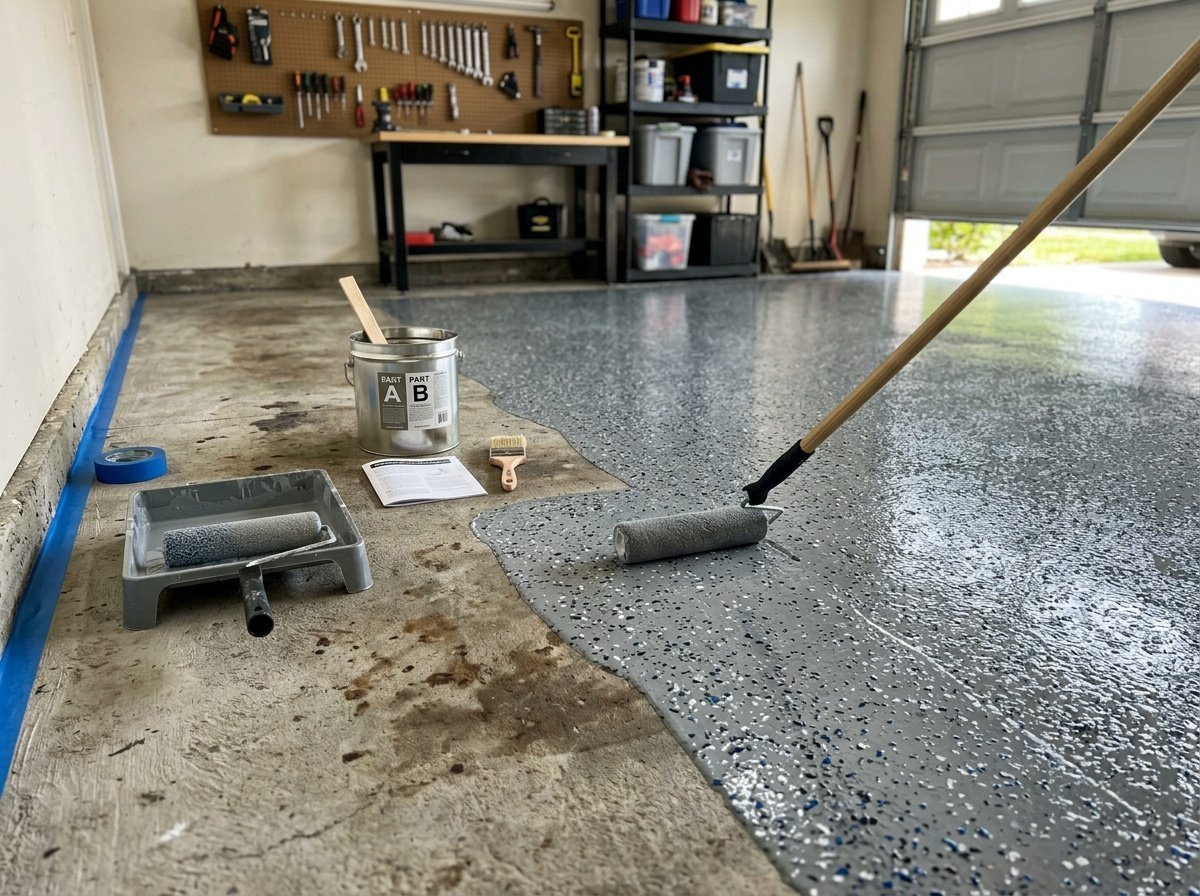
How to Broadcast Chips Properly
Apply your base coat epoxy in manageable sections — typically 8 to 10 feet wide — using a notched squeegee and back-rolled with a 3/8-inch nap roller. While the epoxy is still wet (usually within 10–15 minutes of application), grab a handful of chips and toss them upward in a wide arc so they fall randomly across the surface. Work quickly and consistently for an even distribution.
For a full broadcast (where chips cover nearly 100% of the surface), you’ll toss generously until the floor looks almost fully covered. For a medium broadcast, aim for 50–70% coverage. Both look great — it’s genuinely a personal style choice, so lean into what feels right for your space.
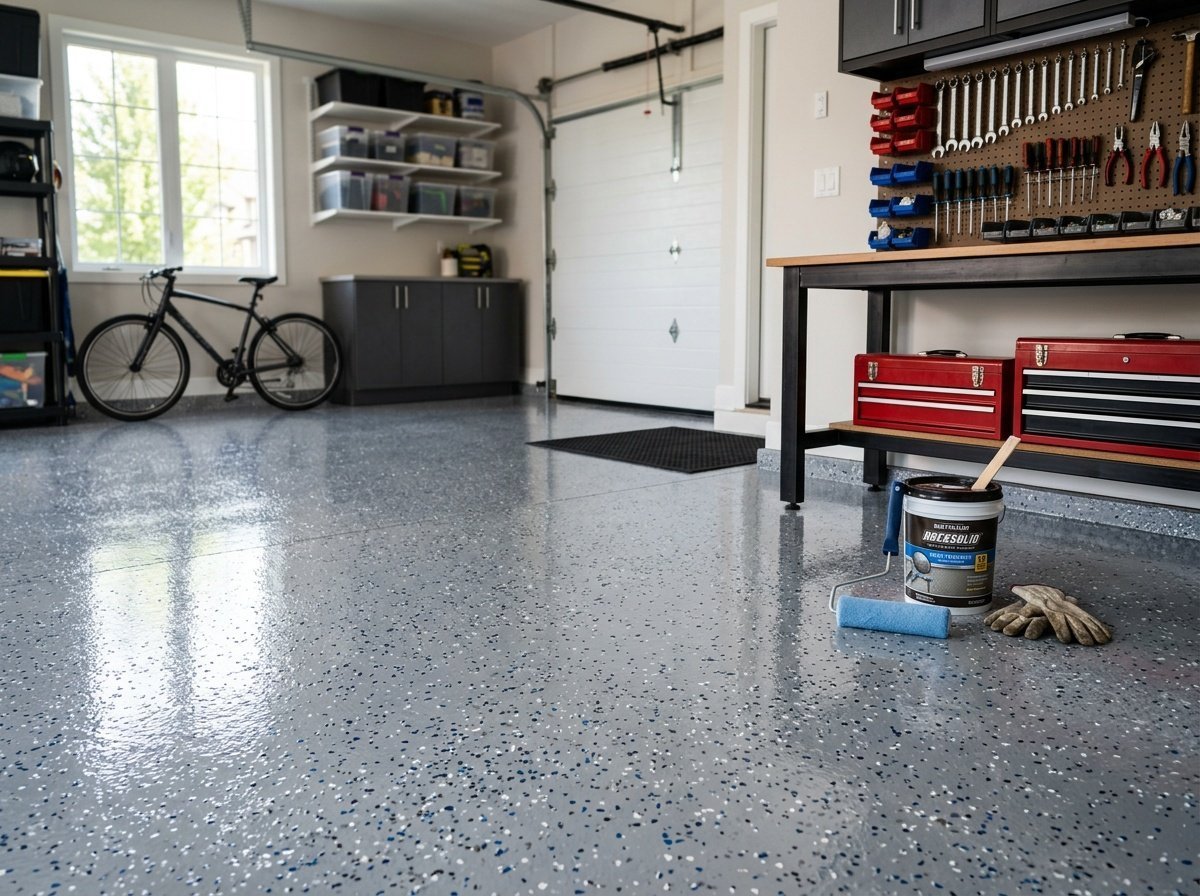
Choosing Your Color Palette
Standard chip blends come in gray, tan, earth tones, and even bold multicolored mixes. The most popular look for a clean, modern garage pairs a medium gray base coat with a gray and white chip blend. If you’re someone who appreciates design details — the same instinct that goes into choosing intentional updates for every room in your home — spending an extra few minutes choosing a chip color that complements your home’s overall palette is absolutely worth it.
Top-Coat Sealing: Locking In Your Work
After your base coat and chips have fully cured (typically 12–24 hours), it’s time to seal. The top coat is what provides UV resistance, chemical protection, and the glossy or satin sheen that makes an epoxy floor look finished and intentional. Think of it as the protective layer that determines how long your floor actually lasts.
Polyurethane vs. Polyaspartic Top Coats
Polyurethane top coats are the standard for most DIY systems — they’re UV stable, scratch resistant, and easy to apply with a roller. A single coat of polyurethane is typically sufficient over a full-chip broadcast. Polyaspartic coatings are a step up: they cure faster, are more flexible, and handle temperature extremes better than polyurethane. They’re increasingly common in professional installations and are worth considering if your garage sees harsh winters or very hot summers.
Apply the top coat in thin, even passes. Avoid overworking the coating — it self-levels better if you let it do its job. Allow it to cure for at least 24 hours before foot traffic, and 72 hours before driving a vehicle onto the surface.
Common Mistakes That Ruin DIY Epoxy Floors
I want to be honest with you here: most DIY epoxy failures aren’t product failures. They’re process failures. The coating did exactly what it was supposed to do — it just didn’t have the conditions it needed to succeed. Here are the most common mistakes worth avoiding.
Applying in the Wrong Temperature or Humidity
Epoxy is temperature-sensitive. Most products require the air and concrete temperature to be between 50°F and 90°F, with humidity below 85%. Applying in cold weather causes the epoxy to thicken and not level properly. Applying in high humidity can cause blushing, cloudiness, or adhesion failure. Choose your application day intentionally — ideally a mild, dry day in spring or early fall.
Not Mixing the Components Properly
Two-part epoxy requires precise mixing. Skimping on the mix time or not scraping the sides and bottom of the container leaves unmixed resin or hardener in the batch, which creates soft spots and tacky areas that never fully cure. Mix for the full time recommended — usually 3–5 minutes — and transfer to a second bucket and mix again for good measure.
Applying Too Thick
Thicker is not better with epoxy. Applying it too heavily causes heat buildup during the exothermic curing reaction, which can lead to bubbling, wrinkling, or cracking. Follow the manufacturer’s coverage rates and spread accordingly. Multiple thin coats will always outperform one thick one.
Cure Time: What “Dry” Actually Means
There’s an important distinction between dry to touch, walkable, and fully cured — and confusing them is one of the most common timeline mistakes in DIY epoxy projects. Understanding this helps you plan your project realistically.
The Cure Timeline Breakdown
Most water-based epoxy systems are touch-dry within 6–8 hours at 70°F. You can walk on them (carefully, in clean shoes) after 12–24 hours. But the floor won’t reach full chemical hardness — its maximum resistance to scratches, stains, and tire marks — for 5–7 days. During that first week, avoid parking vehicles and keep chemical exposure minimal.
Temperature significantly affects cure time. Cooler temperatures slow curing considerably — a floor applied at 55°F might take twice as long to reach each milestone. If you’re working in shoulder seasons, plan for a longer project window and resist the urge to rush the process.
DIY Cost vs. Hiring a Pro: A Realistic Breakdown
One of the most common questions I get about garage floor ideas is whether DIY is actually worth the effort when you factor in materials and time. The honest answer is: it depends on what you’re optimizing for. Let’s break it down so you can make the call that works for your situation.
What You’ll Spend on a DIY Project
For a standard two-car garage (approximately 400–500 sq ft), here’s a realistic material budget:
- Concrete degreaser and cleaning supplies: $20–$40
- Crack filler and patching compound: $15–$35
- Acid etch solution (or grinder rental): $20–$150
- Epoxy base coat kit (2-car garage): $150–$250
- Decorative chip flakes: $20–$50
- Top coat sealer: $80–$150
- Application tools (roller frames, squeegees, etc.): $30–$60
Total DIY estimate: $335–$735, or roughly $0.85–$1.85 per sq ft in materials. Add the value of your time — typically one full prep day and one coating day — and the real cost is closer to $3–$7 per sq ft when labor is factored in honestly.
What Professionals Charge
Professional garage floor coating installations typically run between $7 and $15 per sq ft, with premium polyaspartic systems pushing toward $15–$20. For a two-car garage, expect quotes between $2,800 and $6,000 for a full professional installation. The advantages are real — professionals use commercial grinders, apply commercial-grade coatings, and usually offer warranties. But the DIY version, done carefully, can look and perform remarkably close to the professional result at a fraction of the price.
Frequently Asked Questions
How long does a DIY epoxy garage floor last?
A well-applied DIY epoxy floor with a quality top coat typically lasts 5–10 years before it needs recoating or touch-ups. Proper surface prep, the right product choice, and a durable polyurethane or polyaspartic top coat are the three biggest factors in longevity. Floors with a full chip broadcast and two-coat system tend to outlast single-coat applications significantly.
Can I apply epoxy over existing paint or a previous epoxy coating?
Generally, no — not without thorough mechanical prep first. If the existing coating is well-bonded and in good condition, you can sometimes apply a new coat after diamond grinding, but delaminated or peeling existing coatings must be fully removed. When in doubt, grind it down and start fresh. Adhesion over an existing coating is always a gamble without proper prep.
What happens if it rains during the cure period?
Moisture exposure during the first 24–48 hours of curing can cause blushing, cloudiness, or adhesion problems in the top layers. If rain is forecast, postpone your project. Close the garage door during application and the initial cure window. Temperature drops that accompany rain can also slow curing significantly, so always check a two-day weather forecast before starting.
Do I need to move everything out of the garage before I start?
Yes — the entire floor needs to be clear, and everything must stay out until the floor has reached full cure (typically 5–7 days). Plan your project timeline around this. It helps to treat the weekend as a real project commitment rather than a quick Saturday task. Some people use the opportunity to completely reorganize and declutter the garage before moving items back in.
Will epoxy floor coating work in a garage with floor drains?
Absolutely — and it actually looks great finishing right up to a drain. Just mask the drain cover during application to keep it clear. Ensure the epoxy feathers smoothly toward the drain in the direction of any existing slope. Most standard DIY epoxy systems handle this well as long as the drain area isn’t a persistent moisture problem.
Is one coat of epoxy enough?
For most DIY applications, a two-coat system — a base coat plus a top coat sealer — is the minimum recommended approach. A single coat of base epoxy without a top coat will wear more quickly and stain more easily. If you’re doing a full chip broadcast, the top coat is especially important because it encapsulates the chips and creates the protective, cleanable surface you’re after.
Can I DIY an epoxy floor in cold weather?
Cold temperatures below 50°F will cause most epoxy products to thicken, self-level poorly, and cure extremely slowly or incompletely. If your garage isn’t heated, plan your project for warmer months — late spring through early fall is ideal. Some professional-grade polyaspartic systems have broader temperature windows, but consumer DIY kits are generally not cold-weather-friendly.
There is something genuinely satisfying about standing in a garage that looks and feels completely transformed — knowing you did it yourself, over a weekend, with careful prep and a little patience. Whether you’re in the planning stages or ready to roll (literally), I hope this guide gives you the confidence to take that first step. Start with your surface prep, choose your coating wisely, and don’t rush the cure. The floor you’ve been imagining is completely within reach. If you have questions along the way, drop them in the comments — I’d love to hear how your project turns out. ✨