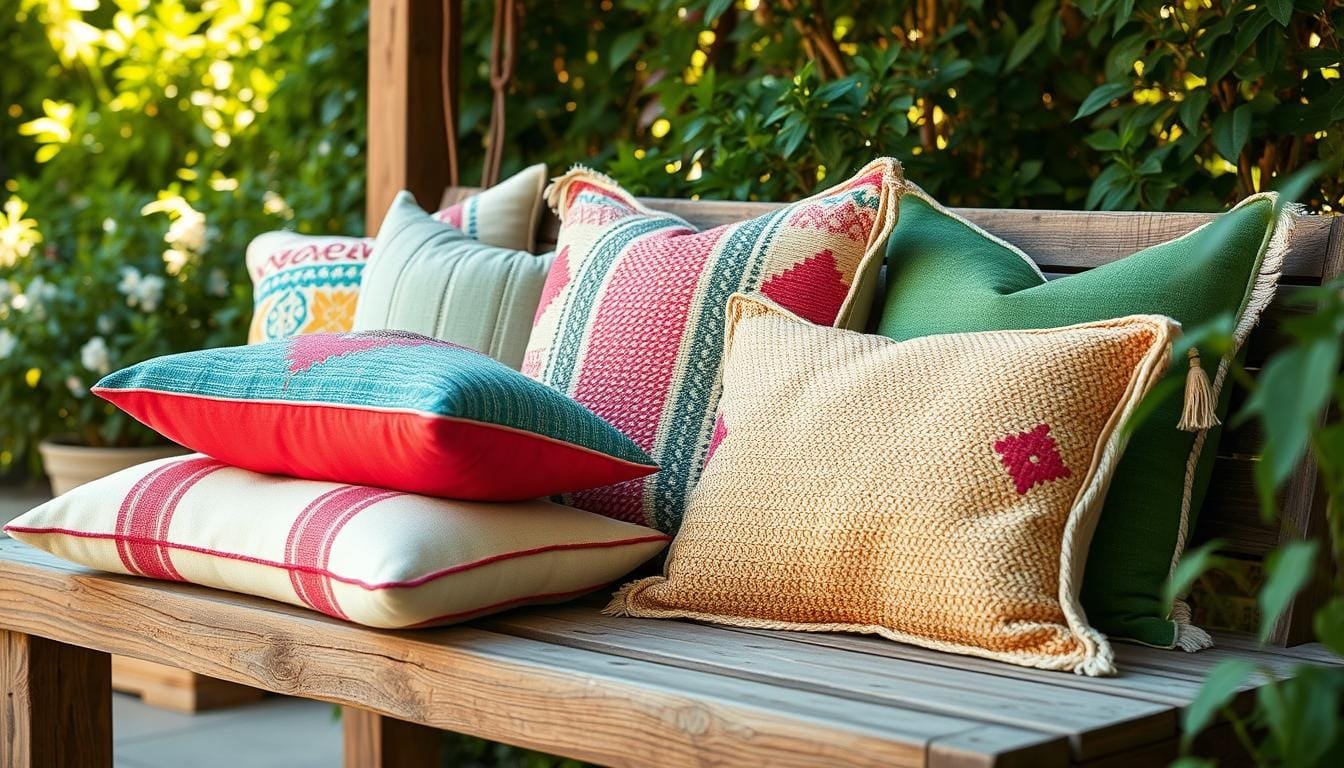
Transforming your outdoor living space into a cozy retreat is easier than you think! With a little creativity and some basic sewing skills, you can create beautiful, functional outdoor decor that perfectly matches your style and needs.
We will guide you through the process of making your own DIY outdoor pillows and cushions, from selecting the right weather-resistant fabric to finishing your professional-looking creations. Whether you’re looking to add a pop of color with small decorative pillows or create larger seat cushions for your outdoor furniture, we’ve got you covered.
By the end of this comprehensive guide, you’ll have the knowledge and confidence to craft beautiful, durable outdoor cushions that will enhance your patio, deck, or balcony, making it the perfect spot to relax and enjoy the outdoors!
Why Make Your Own Outdoor Cushions and Pillows
Making your own outdoor cushions and pillows gives you the freedom to choose the perfect fabric and design for your patio area. When you create your own outdoor decor, you can ensure that it perfectly complements your existing furniture and decor.
Benefits of DIY Outdoor Cushions
There are several benefits to making your own outdoor cushions. Not only can you save time and money, but you also get to enjoy the satisfaction of creating something beautiful and functional. Here are some key advantages:
- Complete control over the design and color scheme
- Ability to create custom sizes that fit your furniture perfectly
- Cost-effective compared to buying pre-made cushions
- Opportunity to repurpose or reuse existing materials
Customization Options for Your Outdoor Space
With DIY outdoor cushions, the possibilities are endless. You can choose from a wide range of outdoor canvas and weather-resistant fabric to match your desired color and style. Here’s a comparison of some popular fabric options:
| Fabric Type | Weather Resistance | Color Options |
|---|---|---|
| Sunbrella | High | Variety of colors |
| Outdoor Cotton | Medium | Multiple colors |
| Synthetic Fabric | High | Wide range of colors |
By making your own outdoor cushions and pillows, you can create a cohesive look for your patio or outdoor living area that reflects your personal style. And, with the right pillow insert, your outdoor pillows will be both comfortable and durable.
Essential Materials for Outdoor Cushions and Pillows You Can Make Yourself
Creating outdoor cushions and pillows that withstand the elements starts with choosing the right materials. To ensure your DIY project is both beautiful and durable, you’ll need to select the best weather-resistant fabrics, pillow inserts, and sewing supplies.
Weather-Resistant Fabrics and Their Properties
Weather-resistant fabrics are crucial for outdoor cushions and pillows. Options like Sunbrella, Outdura, and recycled canvas offer excellent protection against UV rays, moisture, and mildew. When selecting fabric, look for materials specifically labeled as “outdoor” or “weather-resistant” with a tight weave and water-repellent coating.

Pillow Inserts and Cushion Filling Options
For truly durable outdoor cushions, you’ll need weather-resistant pillow inserts with laminated fabric shells. For cushion filling, options range from high-density foam for seat cushions to polyester fiberfill for decorative pillows, offering different levels of support and water resistance.

Tools and Notions You’ll Need
Your basic sewing supplies should include a sewing machine with both regular and zipper feet, weather-resistant thread, fabric scissors, pins or clips, and a measuring tape. Outdoor-rated zippers are crucial for cushion longevity, as standard zippers can corrode when exposed to moisture and sun.

Step-by-Step Guide to Making Small Outdoor Pillows
Creating small outdoor pillows is a fantastic DIY project that can add a personal touch to your outdoor decor. We will guide you through the process, ensuring that you can make outdoor furniture accessories that are both functional and stylish.
Measuring and Cutting Your Fabric
To start, you’ll need to measure your pillow insert and add 1 inch to both dimensions to allow for a ½-inch seam allowance on all sides. For instance, if your pillow insert is 12″ x 18″, you should cut your fabric to 13″ x 19″. This ensures a snug fit and professional finish.
Cut two identical pieces of weather-resistant fabric according to your measurements. Ensuring clean, straight edges is crucial for professional results.

Installing a Zipper Closure
Place the two fabric pieces with the right sides together, determining which side will be the bottom of the pillow. Line up the zipper along the bottom edge and pin the fabric to mark where the zipper begins and ends. Use a zipper foot on your sewing machine for precise control when attaching the zipper to the fabric edges.
After installing the zipper, be sure to open it halfway. This crucial step ensures you’ll be able to turn the pillow right side out after sewing the remaining edges.
Sewing the Pillow Cover
Sew around the remaining three edges of the pillow with right sides together, using a ½-inch seam allowance. Reinforce the corners with additional stitching for durability. Before turning the pillow cover right side out, clip the corners at a 45-degree angle to reduce bulk and create sharper corners.
Inserting the Pillow Form and Finishing Touches
Insert your weather-resistant pillow form through the zipper opening, working the corners of the insert into the corners of the cover for a plump, professional appearance. Consider adding a water-repellent spray to your finished pillow for extra protection, especially if it will be exposed to direct weather elements.
With these steps, you’ll have a beautifully crafted small outdoor pillow that adds a touch of personality to your outdoor space.
Creating Larger Outdoor Seat Cushions
Creating larger outdoor seat cushions is a great way to enhance your outdoor living space with comfort and style. When making these cushions, precision is key, especially when it comes to measuring and cutting your fabric.
Calculating Dimensions and Cutting Fabric
To figure out the fabric dimensions for the cushion panels, take the width and depth measurements and add 1″ to both numbers to allow for a 1/2″ seam allowance all around. For box-style seat cushions, you’ll need to cut three pieces: a top panel, bottom panel, and a long strip for the sides. The side panel length is determined by adding the original measurements of all four sides together, then adding 1″ for seam allowance. The height of your side panel is the height of the cushion filling plus 1″ for seam allowance.

Adding Darts for Shaped Cushions
When working with thicker cushions, consider using darts at the corners to create a more tailored shape. To create darts, mark the height of your cushion from each corner and sew along these lines. This transforms flat fabric into a three-dimensional cover that accommodates the cushion’s thickness, ensuring a snug fit around your furniture’s corners.
Assembling and Finishing Your Seat Cushion
When sewing the side panels to the top and bottom pieces, pin fabric with right sides together and work in sections, easing the fabric around corners to prevent puckering. For a professional finish, consider installing a zipper closure, using a longer, heavier-duty zipper suitable for larger cushions. You can find various DIY projects, like DIY fabric pumpkins, that might inspire your outdoor decor. To secure your seat cushions to the furniture and prevent them from sliding or blowing away, consider adding ties or velcro to the bottom of the cushion covers.
By following these steps, you’ll be able to create beautiful, functional larger outdoor seat cushions that enhance your outdoor living space. The finished cover should fit snugly around your cushion insert—if it’s too loose, the cushion will look saggy; if too tight, the seams may strain and eventually tear.
Conclusion
By following this guide, you’ve gained the skills to make outdoor cushions and pillows that perfectly match your home’s style and your personal taste. Creating your own outdoor pillows and cushions is a rewarding DIY project that enhances both the comfort and aesthetic appeal of your patio area.
The time invested in making custom cushions pays off in durability, perfect color matching, and the satisfaction of having created something beautiful and functional. For more DIY inspiration, you can explore other guides like making your own outdoor cushions or refreshing your home with DIY projects.