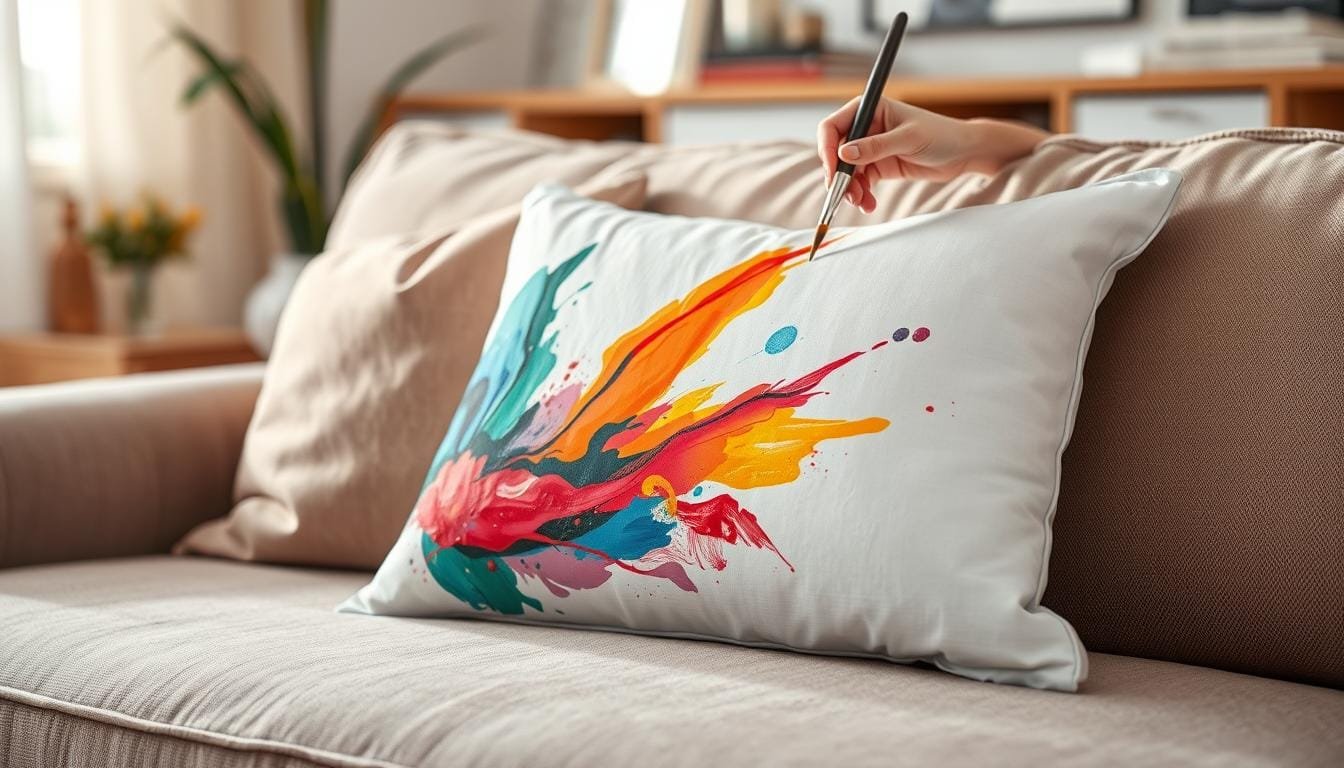
Remember a lazy Sunday when you wanted to refresh your living room? You noticed your plain pillows needed a change. That’s how you found fabric painting. Just some fabric paint and creativity can turn plain pillows into beautiful, unique pieces. They reflect your style and bring color to your room.
Give your old pillows a new look with fabric painting techniques that are straightforward and stylish. Even pillows from an old futon or plain ones from IKEA can be transformed with some paint. Use chalk paint or acrylics with fabric medium for vibrant colors that last.
Choosing the right fabric is exciting. Cotton absorbs well, linen adds texture, and silk gives a sheen but is delicate. Paint freely for creativity or use stencils for precision. You have endless possibilities for creativity in your living room.
Transforming pillows with paint is fun and fulfilling. Mixing paint with fabric medium and using a damp surface makes painting easy. Now, your pillows are ready for your art. Each brushstroke adds life, making a simple cushion into art!
Are you ready to start this project? Let’s turn simple cushions into statement pieces with our guide. Learn the basics of fabric painting and discover advanced techniques and ideas. Your journey to amazing pillow makeovers begins here!
Understanding Fabric Painting
Fabric painting lets DIY lovers make ordinary items special. It changes simple fabrics into art. This opens doors to decorate our homes or make unique gifts.
What is Fabric Painting?
Fabric painting uses special paints on textiles, like painting on a canvas. It includes methods like stenciling, freehand designs, and sponging. Each one lets us show our creativity in different ways.
Benefits of Fabric Painting
Customizing items is a big plus of fabric painting. We can make designs that fit our style and home perfectly. It lets us choose from lively flowers to cool shapes.
Painting on fabric can also be relaxing and rewarding. It’s a way to lose ourselves in colors and patterns, which is good for our minds.
Upcycling old fabrics helps the planet. Instead of throwing them away, we can turn them into beautiful new items. This supports a greener lifestyle.
Fabric painting is also gentle on our wallets. Instead of buying new decorations, we can refresh our space at a low cost.
Fabric painting is much more than a hobby. It changes our living areas, shows off our personality, and helps the earth.
Choosing the Right Type of Pillows
Selecting the right pillows is key when decorating with fabric painting. The material and size of the pillows can change how your designs look and feel. Let’s look at some important points.
Material Considerations
The choice of material is crucial. For fabric painting, materials that absorb paint well are best. Cotton and linen are great choices because they have good texture and absorbency. They help your paint stand out. Avoid synthetic fabrics like polyester, as they’re not as effective for painting.
Pillow Shapes and Sizes
Pillow shape and size matter a lot. Square or rectangular pillows are usually better for fabric painting. They provide a big, flat area for your artwork. Here are some sizes to consider:
- Large square pillows: 20×20 or 22×22 inches for the back of the sofa
- Medium square pillows: 18×18 or 20×20 inches for layering
- Small square pillows: 16×16 or 18×18 inches for added depth and variety
- Lumbar pillows: best for back support in modern or minimalist settings
Think about how you’ll use the pillows. For example, consider if they’ll be in the living room or bedroom and the support needed. Plush inserts like down are great for decoration. But, foam inserts are better for busy areas because they last longer.
Also, think about practical things like zippers or button covers. They make it easy to wash pillow covers, keeping the art looking new. It also lets you change covers with the seasons or trends.
| Criteria | Details |
|---|---|
| Material | Cotton, Linen |
| Preferred Shapes | Square, Rectangular |
| Sizes | 16×16, 18×18, 20×20, 22×22 inches |
| Inserts | Down, Down-Alternative, Foam |
The right mix of materials, shapes, and sizes helps create a space that shows your style. So, explore your options and find the best pillows for your creations!
Essential Supplies for Fabric Painting
When starting a fabric painting project, you need certain supplies for a great outcome. Start with high-quality fabric paints that last long and look bold. Look for acrylic paints you can mix with a textile medium or go for paints made just for fabric. You can find these at craft stores or big retailers.
Recommended Paints and Dyes
It’s important to use permanent fabric paint for projects you’ll wash. Regular craft paints won’t work. Test your ideas on a small fabric piece first to see if you like it. Let the paint dry completely before you touch the fabric again. Drying times vary by paint type.
Brushes and Tools You’ll Need
Choosing the right brushes and tools is crucial. Use stiff-bristled brushes or sponges for the fabric’s texture. Also, everyday items like pencil erasers for dots or plastic cup bottoms for circles are helpful. To paint straight lines, use painter’s tape or washi tape.
Choosing Quality Fabrics
Pick fabrics that paint sticks to well, like cotton or linen. They’re great for fabric painting projects like pillow covers. They ensure your creations last longer and perform better. Also, cover your clothes and workspace to keep things clean as you create.
| Supply | Description | Benefits |
|---|---|---|
| Fabric Paint | Acrylic or specially formulated fabric paint | Durable and vibrant colors |
| Brushes | Stiff-bristled brushes or sponges | Effective paint application |
| Painter’s Tape | Painters or washi tape | Precise and straight lines |
Preparing Your Pillows for Painting
Getting your pillows ready for painting is crucial for great results. You need to make sure they are clean and smooth. Whether you decide to use a stencil or paint freehand, here’s how to start.
Cleaning and Ironing Techniques
First, ensure your pillowcase is clean and free of wrinkles. Wash them to remove any dirt, oil, or previous fabric treatments. Then, iron the pillowcases to eliminate all wrinkles.
Tip: Spray the fabric lightly with water before ironing. This helps achieve a perfectly smooth surface for even paint application.
Using a Stencil or Freehand
You can choose between stenciling or freehand painting for your design. Stencils offer precision and can be used over and over. They are great for creating geometric patterns or adding text.
If you prefer putting your personal touch directly on the fabric, go for freehand painting. This method lets your creativity flow freely, allowing for unique designs.
Tip: Dampen the fabric lightly before painting. It makes the paint spread smoothly, giving a more professional finish.
| Technique | Advantages |
|---|---|
| Stenciling | Precise, reusable, ideal for patterns |
| Freehand | Allows creativity, unique, adds a personal touch |
Proper preparation is key to stunning, durable designs on your pillows. Whether you choose stencil accuracy or the freedom of freehand, embrace the technique and enjoy creating.
Basic Fabric Painting Techniques
Changing plain pillows with fabric painting is a fun way to make your home look better. We’ll look at three easy methods you can use to put awesome designs on your pillows.
Sponging: Adding Texture
Sponging is an easy and effective way to add texture. By dabbing paint on fabric with a sponge, you can create a lively background. This method is great for making a textured look that improves the look of your pillows. To begin, dip your sponge lightly in paint, and then press it onto the fabric. Mixing different colors can create more depth. You might want to try mixing paint with water to get the right texture.

Stenciling: Precision Designs
Stenciling is perfect for neat and symmetrical patterns. It’s loved for making it easy to repeat designs. You place a stencil on the fabric and paint over it to get clean lines and detailed shapes. Using spray paint additives helps make the paint better for spraying, leading to a professional look. Masking tape can ensure your edges are straight and your designs sharp.
Freehand Painting: Embracing Creativity
Freehand painting lets you be fully creative. This method is all about adding your own touch. You can draw simple things like vines or flowers to make your pillows look nice. Try using a pencil’s back end or an earbud for dot designs and mixing colors. Adding metallic outlines can give a touch of luxury. Freehand painting not only makes your decor unique but is also a fun hobby.
In conclusion, these basic fabric painting techniques can make your plain pillows colorful and personal. Whether it’s sponging, stenciling, or freehand painting, you’re all set to create wonderful home décor. So, go ahead and start making over your pillows with these fun methods today! 🎨✨
Color Theory: Picking the Right Colors
When you dive into color theory for fabric painting, you unlock endless creative paths. Choosing the right colors can turn your pillows into art. It lets them blend perfectly with your room. Whether you want a lively or calm room, fabric painting on pillows uses color theory for amazing effects.
To choose the right colors, first know about color palettes. A color palette is a set of colors that look good together. It’s based on the color wheel, which shows primary, secondary, and tertiary colors.
Understanding Color Palettes
The Color Wheel is key for using color in fabric painting. It shows how colors relate and helps create good-looking combinations. The basics are the primary colors—Red, Yellow, and Blue. Mixing these gives secondary colors—Orange, Green, and Violet. Tertiary colors are mixes like Red-Orange and Blue-Green. They add unique touches to pillow designs.
- Monochromatic schemes: Different shades of one color, great for subtle beauty.
- Complementary colors: Colors opposite on the wheel, like Blue and Orange, for bold contrast.
- Triadic themes: Three colors spaced evenly apart, making a balanced look, like Red, Yellow, and Blue.
- Tetradic schemes: Two sets of complementary colors, tricky but stunning if done right.
Light colors like pastels bring a soft, airy vibe, perfect for relaxing spaces. Dark, rich colors add warmth and coziness to a room.
How light affects colors is important. North-facing rooms get less light, so warm colors can make them feel welcoming. Bright rooms work well with cool colors to keep things balanced.
Harmonious Color Combinations
To create harmony, a good tip is the 60-30-10 rule. Use 60% of a room in a main color, 30% in a secondary, and 10% in accents. This rule can make fabric painted pillows look just right.
“Daylight is considered the perfect light because it shows true colors evenly. This natural light makes your colors look their best.”
Using similar colors in open spaces can tie them together. Different colors can mark different areas. Use things like molding or paint for clear borders. Light colors make small rooms feel bigger, and dark colors can make big rooms feel snug.
Textures and finishes change the final appearance. Matte hides flaws, while gloss reflects light, changing how we see color.
Color is personal, and your special touch is what makes it work.
Creating Patterns and Designs
When you paint fabric on pillows, the patterns show off your creative side. These designs can turn a plain pillow into something eye-catching or a subtle decoration in your room. Let’s look at some exciting patterns and ideas!
Floral Patterns: Nature-Inspired Art
Flowers in design bring nature’s beauty inside. Choose from gentle roses to striking sunflowers. Flowers painted on your pillows add elegance and a natural touch. Some people can paint floral patterns in less than 15 minutes. Mix green, pink, and yellow to create a garden scene on your cushions.
Geometric Designs: Modern Aesthetic
Geometric patterns add a modern flair. Trends are showing more tribal patterns, like mud cloth, on pillows. Create a modern look with simple shapes like triangles, squares, and lines. Indigo blue and white are popular for geometric designs. They match many styles and give a custom look without big expenses.
| Pillow Name | Available Sizes |
|---|---|
| Valencia Floral Designer Pillow | 14×20, 20×20, 22×22, 24×24 |
| Margot Floral Cotton Pillow Cover | 14×20, 20×20, 24×24 |
| Vintage Blue Floral Linen Pillow Cover | Multiple sizes |
| Ikara Pillow Cover | Multiple sizes |
| Dylan Pillow Cover | Multiple sizes |
| Sonora Stripe Indoor/Outdoor Pillow Cover | Indoor/Outdoor option |
| Onyx Pillow Cover | Durable option for indoor/outdoor |
| Champagne Velvet Pillow Cover | 100% Cotton Velvet |
Personalized Designs: Making It Unique
To make your pillows truly unique, think personalized designs. Use monograms or designs that show your style or family’s personality. Stencils help make detailed custom designs easily. Metallic paints on dark fabric or bright colors on light fabric make your pillows stand out. They’ll impress your guests and enhance your space.
Layering Techniques for Depth
Mastering layering techniques is key to adding depth and dimension. These methods can elevate your fabric painting projects. Through shadowing, highlighting, and color blending, your designs will become more lifelike and intricate.
Shadowing and Highlighting
Fabric painting techniques for depth include shadowing and highlighting. Shadows add depth, making artwork seem three-dimensional. Meanwhile, highlighting brings parts of your design forward, making them stand out.
To begin, pick a base color and add darker shades to create shadows. For highlights, use lighter colors, blending them smoothly into the base. This technique is great for realistic flowers and detailed patterns.
Blending Colors Effectively
Color blending is vital for fabric artists working on sophisticated projects. It creates smooth gradients and complex color stories. This skill requires mixing colors together flawlessly.
Apply one color, then add a second while the first is still wet. Use a brush or sponge to blend them together. Keep practicing with different colors and tools to improve.
| Technique | Description | Ideal Application |
|---|---|---|
| Shadowing | Using darker shades to create the illusion of depth. | Adding dimension to lifelike designs. |
| Highlighting | Applying lighter hues to accentuate and brighten areas. | Emphasizing focal points. |
| Blending Colors | Mixing two or more colors to create smooth transitions. | Creating gradients and color stories. |
Adding Finishing Touches
Finishing your custom pillow is more than just painting. The final details make your work pop. Using a sealant keeps colors bright and protects against wear and tear. Techniques for finishing help protect and refine your creation.
Sealing Your Design
After the paint dries, it’s important to seal it. This keeps your design looking good longer. You might use a spray or heat, based on the paint’s brand. It’s best to follow the instructions from your paint’s maker. Heat sealing often means ironing on the fabric’s backside or using a dryer.

Trimming and Edge Finishes
Trimming and edging can really make your pillows stand out. Adding things like piping or lace gives a pro touch. These details not only look good but also add to the pillow’s life by preventing frays and making it look well-crafted.
For a quicker finish, you can use hot glue and fabric tape, especially if you don’t want to sew. This can cut your project time in half. A good finish changes pillows into decor that can refresh any space in your home.
Machine Washing Your Painted Pillows
Want your painted pillows to stay beautiful for a long time? Just follow some easy care tips. By handling them carefully during wash, you can keep the colors bright and designs sharp. Here’s how to take care of your fabric-painted pillows and keep your hard work looking great.
Care Instructions for Longevity
To wash fabric painted items, be gentle with them. Flip your pillowcases inside out before starting the wash. Use a gentle cycle with cold water to avoid damaging the paint. These steps will protect the design for a long time. If you used special paint, look at the instructions from the manufacturer for more tips. Heat setting your paint also helps keep the colors looking new after many washes.
Avoiding Color Bleeding
Worried about colors running when you wash fabric painted items? To prevent this, wash your painted pillows separately. Choose a mild detergent and steer clear of bleach to keep the colors safe. For extra assurance against color bleeding, heat seal the paint. You can use a hot iron for this, but first, try it on a small hidden spot.
| Care Tip | Details |
|---|---|
| Turning Inside Out | Protects the painted surface from friction during washing. |
| Using Gentle Cycle | Reduces the risk of damage to both fabric and paint. |
| Cold Water Wash | Helps prevent paint from fading and colors from bleeding. |
| Heat Setting | Using a hot iron to improve color fastness. |
| Mild Detergent | Ensures gentle cleaning without harsh chemicals. |
Taking care of fabric painted pillows is easy if you know how. With the right steps, you can keep your unique items looking fresh for a long time. Enjoy painting and washing!
Troubleshooting Common Fabric Painting Issues
When you start fabric painting, it’s important to be ready for any problems that might pop up. We’re here to help you work through issues with fabric painting and fix any mistakes. This way, you can get a perfect look for your pillows and decor. Let’s look at some usual problems and how to solve them quickly.
Addressing Paint Fading
Seeing paint fade can be upsetting, but there are ways to fight it. Mix acrylic paint with a fabric medium at a 2:1 ratio to make the paint more flexible and last longer on fabric. Washing your fabric first can help the paint stick better by getting rid of sizing and chemicals. For darker fabrics, you might need to add up to three or more base coats to keep the colors bright.
Heat-setting your paint at 300°F for 30 seconds can make your design last 70% longer.

Fixing Mistakes and Stains
Even when you’re careful, mistakes can still happen. To fix fabric paint errors, act fast. A fabric eraser can get rid of many small errors, depending on the fabric. If you have tougher stains or smudges, using a small brush for spot treatment helps. It’s also a good idea to pick high-quality paints. While student-grade acrylics are cheaper, artist-grade acrylics have more pigment, giving better coverage and colors.
Taking good care of your painted fabric makes it last longer. Hand wash in cold water to keep the fabric looking good for 50% longer than machine washing. Make sure the paint has enough time to cure before you wash or wear it, waiting at least five days is ideal.
| Issue | Solution | Impact |
|---|---|---|
| Paint Fading | Apply fresh coat, use fabric brightener | Restores vibrancy and durability |
| Smudges | Spot treatment with a thin layer of paint | Conceals errors elegantly |
| Color Bleeding | Pre-wash fabric, use quality paint | Improves color fastness and adhesion |
Inspiration from Professional Designers
Looking at professional fabric painting tips and pillow design ideas can make your creative path better. Watching what famous fabric artists do and trying out successful DIY projects offers fresh ideas and skills. This can help improve what you make.
Notable Fabric Artists to Follow
Some fabric artists do amazing work that can inspire you. Kamal Dutta works on designs that are good for both indoor and outdoor settings. Alia mixes modern block prints with simple design. Swadesh gets ideas from the countryside and folk art, adding these themes to home decor. They keep old techniques alive but with a modern twist, mixing the past and present beautifully.
“Alia’s pillow covers seamlessly integrate traditional block printing with contemporary minimalism, making them perfect for modern homes.”
Successful DIY Projects
Looking at DIY projects can give you great fabric painting tips and ideas for pillows. Using techniques from these projects can make things faster and reduce mistakes. For example, you can make a DIY pillow cover in about 10 minutes now. This is way less than the hour it used to take by cutting just one piece of fabric per pillow.
If you want to start your own DIY project, remember the right fabric size for different pillows. For a 16×16 pillow, you need fabric that’s 17″ by 36″. And for a 22×22 pillow, you’ll need 23″ by 48″. Deciding whether to use smaller pillow covers or matching sizes for a fancier look changes how your pillows will look.
Inspiration can come from various designs like Mormukut’s geometric shapes or Anar’s bold flowers. Whether you like Swadesh’s rustic style or the historical touch of Badshah pillow covers, it’s key to find the right inspiration.
By seeking out and using these ideas, you’re on the path to making unique, standout pillows that can change any room’s look. For more tips and detailed guides on beautiful embroidery designs, see the top 10 pillow embroidery ideas at My Dear Design. Or find some amazing DIY farmhouse projects at Design and Dwelling.
Seasonal and Holiday Themes
Painting fabrics for different seasons lets you refresh your home’s look all year. Whether you love spring flowers or winter celebrations, making themed pillow designs is fun and rewarding. With various ideas, you can easily shift your decor for holidays.
Creating Festive Pillow Designs
Decorating pillows with holiday themes adds a unique charm to your space. You might choose autumn leaves for Thanksgiving, colored eggs for Easter, or scary designs for Halloween. Using no-sew methods makes this an easy start for beginners.
At The Village Country Store, there are many holiday pillow ideas perfect for any time of the year. Their Christmas collection features snowflakes and festive colors, turning your living area into a magical winter scene.
Trendy Seasonal Color Schemes
Staying updated with trendy colors ensures your designs are always in style. For example:

- Spring: Pastels like lavender, mint green, and baby blues.
- Summer: Bright colors like sunny yellows and ocean blues.
- Fall: Warm tones such as burnt orange, deep reds, and browns.
- Winter: Cool shades including icy blues, silvers, and classic reds.
Using these ideas keeps your decor trendy and personal. It also creates a cozy, inviting space that celebrates the holiday vibe!
Incorporating Fabric Painting into Home Decor
Fabric painting can really make your home decor pop with your own style. You can either aim for a matching look or add some unique flair to every space. Here’s how to blend fabric painting into your home smoothly.
Matching Pillows with Interior Themes
To make sure your painted pillows complement your decor, match them with your room’s theme. Choose colors that go well with your room. For example:
- If your living room has earth tones, go for green, brown, and beige pillows.
- For a lively room, pick bold and bright designs!
- And for a calm, minimalist room, choose simple patterns.
Adding details matters a lot. Trends show that 50% of DIYers love adding stuff like pom-poms or tassels to their pillows. Also, don’t forget to pre-wash your fabric to make your creations last longer.
Transforming Other Fabrics in Your Home
There’s more to fabric painting than just pillows. You can also spruce up other items around your house, like:
- Curtains: Adding custom designs can make your windows stand out.
- Upholstery: Give a new life to an old chair or sofa with cool patterns.
- Table Linens: Design special tablecloths or napkins for events.
DIY decor lets you brighten up your space in many ways. You might want to use custom banding tape to pull everything together. Trims can cost between $30 to $100 per yard. Using leftover fabrics can help you save money. A typical custom banding tape project might take 1-2 hours to complete, so plan well.
| Project | Cost Range | Fabric Recommendation | Time Required |
|---|---|---|---|
| Custom Banding Tape | $60 – $200 | Velvet, Cotton | 1-2 hours |
| Decorative Trim | $30 – $100/yard | Canvas, Denim | 30 minutes – 1 hour |
| DIY Pillow Covers | $15 – $50 | Organic Cotton, Hemp | 1 – 3 hours |
Follow these ideas to flawlessly merge painted designs into your decor. It will create a unified and personalized area that shows off your special taste.
Planning Your Fabric Painting Project
Starting a fabric painting project is an exciting journey when we plan and budget carefully. We need to set goals and figure out time and costs before we begin. Doing this helps us stay on course and get great results without surprises.
Setting Realistic Goals
Think about the size of your fabric painting project. Are you updating one pillow or decorating a whole set? Choose materials wisely—cotton and linen work best for paint, while polyester and nylon are trickier. Also, detailed designs or multiple colors add beauty but take more work.
Estimating Time and Cost
Planning your budget means considering both time and money. You’ll need acrylic paints and a textile medium for lasting colors, and fabric paint pens are great for details. Remember, fabric paints are sold in many stores. Fabric paints often need 12 hours to dry, and using heat helps them last longer.

Here’s a table to guide you in planning and budgeting for your fabric painting project:
| Consideration | Details |
|---|---|
| Material Type | Natural fibers (e.g., cotton, linen) vs. Synthetic fibers (e.g., polyester, nylon) |
| Paint Type | Acrylic with textile medium, Fabric paint, Fabric markers |
| Drying Time | At least 12 hours or as specified |
| Sealing Method | Heat set with iron |
| Cost | Varies by brands and supplies (shop at craft stores, hobby stores, big-box retail stores) |
By planning and budgeting carefully, you’re ready for a rewarding fabric painting project. Let’s prepare well to make our creative journey both fun and successful!
Conclusion: Embrace Your Creativity
Let’s wrap up our journey into fabric painting. It’s a chance to show your unique style! Fabric painting lets you personalize your space. It’s not just crafting, it’s making something that’s truly yours.
Encouragement to Experiment
Don’t be afraid to try new things. Experimenting helps you improve. DIY projects are rewarding and can save you money. By DIYing, you can save up to 50% and cut down waste by 70%. Go ahead, use that bold color or pattern you like. Fabric painting gives you endless possibilities.
Final Tips for Success
Here are some tips for success: Always prepare your fabric by pre-washing. This helps dye stick better, increasing absorption by 30%. Use mordants to keep colors bright longer, by up to 40%. Take your time and be persistent. Completing projects makes 45% of DIYers feel accomplished. Keep up with trends, like the cozy farmhouse style. Remember, there are no limits to your creativity.
We’re glad to have shared these tips with you. Fabric painting offers endless opportunities. Let’s start creating, one pillow at a time!