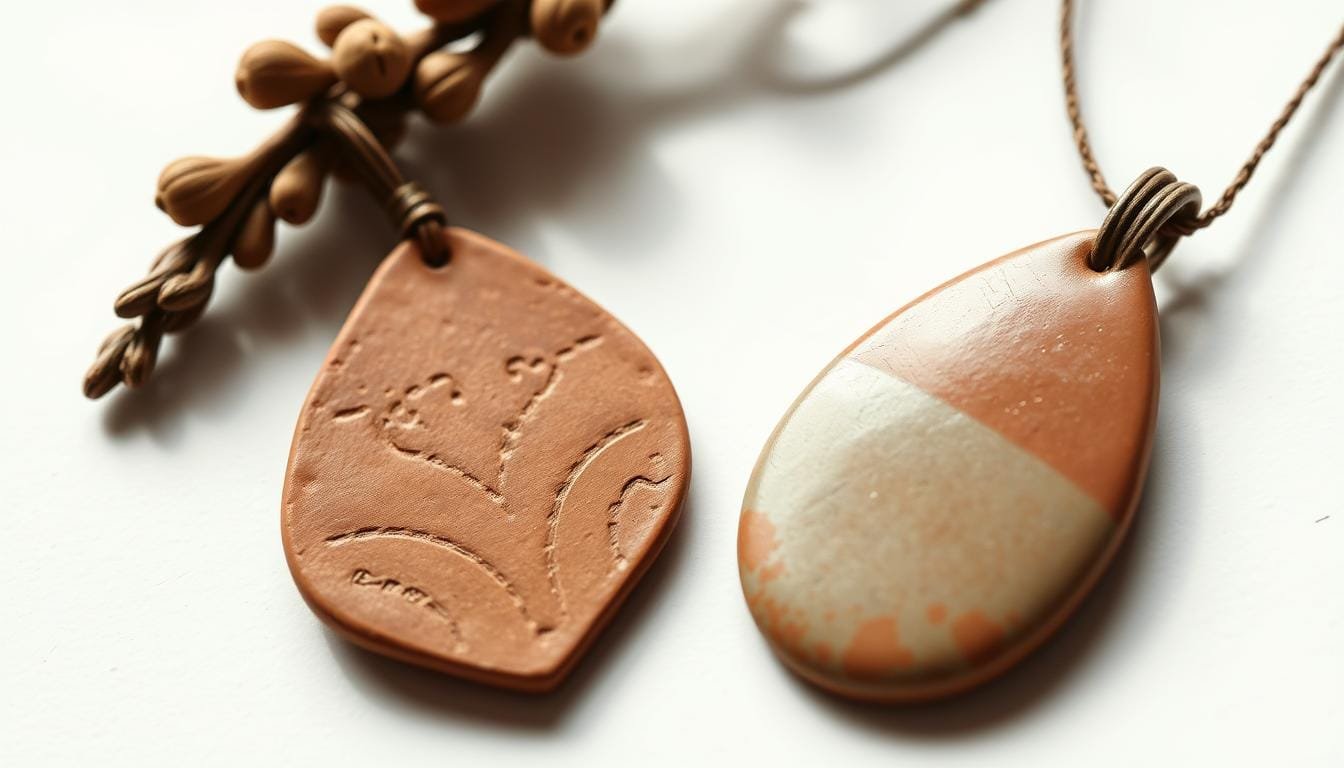
Have you ever felt that spark of creativity? That urge to make something special? I remember walking through a local artisan fair. The sun was bright and warm. I stumbled upon a booth with eye-catching handmade clay jewelry. The earrings and pendants were vibrant and unique. Each piece had its own story, showing the artist’s love and creativity.
That’s when I saw the beauty of handmade clay jewelry. It’s a way to show our unique style. People are getting into DIY jewelry making, like clay earrings and pendants. There are so many styles, from light and customizable to trendy bohemian designs. There’s a lot of creative freedom!
In this guide, we’re going to dive into the world of handmade clay jewelry. We’ll talk about finding materials, shaping, baking, and even selling your creations. So, grab your tools. It’s time to create something beautiful!
Welcome to our creative journey. Here, your ideas will soar, and your crafts will become treasured. Let’s explore the beauty of handmade clay jewelry together!
Introduction to Handmade Clay Jewelry
Handmade clay jewelry is a unique way to show off your creativity. It uses materials like polymer clay to make beautiful items. The personal touch of the artist makes these creations special. Let’s dive into this amazing craft and its many benefits.
What is Handmade Clay Jewelry?
Handmade clay jewelry uses different clays, like polymer, air dry, and cold porcelain. Artisans shape and sometimes bake these clays. They add details to make each piece unique. For example, Meghan Allen from Clay + Bloom creates expressive jewelry with her use of colors and shapes. Air dry clay has been around for a long time. Today’s versions, like paper and resin clays, are stronger and more flexible.
Benefits of Crafting Your Own Jewelry
Making your own clay jewelry is rewarding. It lets you show off your personal style with unique pieces. Crafting these pieces brings joy and a sense of achievement as clay becomes art.
Air dry clay is affordable and easy to use without baking tools. It’s light, great for earrings, and keeps details well. Crafting lets you play with colors, textures, and techniques. You can even add paint to the clay.
Creating clay jewelry is about enjoying the making process as much as the finished product. It’s a great way for anyone, beginners or experienced artisans, to explore their creativity. It offers a fun and rewarding experience.
Materials Needed for Handmade Clay Jewelry
To start making amazing Artisan Clay Jewelry, you need the right stuff. Good materials and tools mean your jewelry will look great and last long. Let’s talk about what you’ll need for beautiful Clay Jewelry Designs.
Types of Clay for Jewelry Making
Choosing the correct clay is key. Polymer clay is a top choice because it’s easy to work with. Sculpey Souffle is great for earrings since it’s soft. Also, FIMO and Cernit are known for being strong and having many colors.
Polymer clay lets you make any color or style you want. This guide is perfect for beginners and those with more experience in Clay Jewelry Designs.
Essential Tools and Equipment
The right tools help turn your ideas into real jewelry. Here are the must-haves:
- Clay rolling pin
- Clay cutters (at least two types for versatility)
- Jewelry pliers
- X-Acto knives and sewing needles
- Plastic toothpicks and ball styluses
- Scraper blades and foil pans
- Industrial-strength glue
- Wire cutters
- Various pliers
- Earring findings (jump rings, earring posts, jewelry glue)
A Dremel tool can give your Artisan Clay Jewelry a pro finish. It’s great for drilling holes after baking.
Additional Decorative Materials
To make your clay jewelry unique, add special touches. You can use:
- Beads
- Stones and gems
- Metal charms
- Glitters
Mixing clay colors also lets you customize. It helps you make standout Clay Jewelry Designs.

In conclusion, the best materials and tools are crucial for clay jewelry making. Now, let’s start making those gorgeous designs come to life!
Designing Your Clay Earrings and Pendants
Making beautiful Custom Clay Jewelry starts with using your imagination. Look around you: the natural beauty of the earth, the sharp lines of modern art, or the twinkles in the night sky. These can spark ideas for your unique Clay Jewelry Creations.
Finding Inspiration for Unique Designs
Our adventure begins with looking for inspiration. Go for a stroll in the park, check out an art museum, or surf online galleries. The natural world gives countless ideas, like the detailed patterns on leaves or the waves in the sea. Meanwhile, modern art can give you vibrant colors and bold outlines to play with. A creative mind is your tool for making amazing Custom Clay Jewelry.

Sketching Your Concepts
When you get an idea, sketch it out. Drawing lets you see your potential Clay Jewelry Creations before making them. You could draw circles, sparkly gems, or sharp lines. The point is to keep those great ideas by putting them on paper. And your sketches don’t need to be perfect.
Choosing Colors and Textures
Choosing the right colors and textures makes your Custom Clay Jewelry stand out. Try mixing different colors or use the marbling method for unique patterns. Also, explore various textures. You can aim for a leathery look or a glossy shine. This makes your pieces truly yours.
| Clay Type | Properties | Recommended Use |
|---|---|---|
| Sculpey Souffle | Soft, easy to condition | Beginners |
| Kato Polyclay | Durable, firm | Mature Crafters |
| Fimo | Wide range of colors | Colorful Designs |
| Cernit Translucent | Translucent, stone-like | Stone-Inspired Designs |
Following these steps, you’re on your path to making stunning and one-of-a-kind Clay Jewelry Creations. By seeking inspiration, drawing your ideas, and playing with colors and textures, you can make jewelry that shows off your style and creativity. Enjoy your crafting journey!
Step-by-Step Guide to Making Clay Earrings
Making Clay Jewelry is both fun and fulfilling. It doesn’t matter if you’re just starting or have lots of experience. Make sure your workspace is clean and you have all your tools ready. This makes crafting smooth and fun. Let’s go through the steps together!
Preparing Your Workspace
Start by getting your workspace ready. It should be clean and organized. Have everything you need close by – like polymer clay, cutters, rollers, earring posts, super glue, and an oven thermometer. Brands like Sculpey Souffle and Premo are great because they’re soft and come in many colors. A good setup helps you work better and have more fun.

Shaping and Molding Your Earrings
Now it’s time to be creative! Flatten your polymer clay until it’s about 1/16″ to 1/8″ thick. Cut the clay into shapes you like – circles, arches, or something more complex. People love boho rainbows and textured arches. Sharp cutters make your work easier later. To mix colors, remember a little black changes a lot, but you’ll need more white for light colors.
Baking and Finishing Techniques
Baking is very important in making Clay Jewelry. Preheat your oven to 275ºF and bake your pieces for 30 minutes to an hour, depending on how thick they are. Let them cool down until they’re hard to the touch. They should be flexible but not break. Then, use strong glue like Loctite or Gorilla glue gel XL for the earring posts. Hold them for 30 seconds to make sure they stick. Finish your jewelry by sealing it and adding decorations like paint or faux stones. Enjoy your crafting!
Step-by-Step Guide to Making Clay Pendants
Creating beautiful Clay Pendants is a fun way to show your creative side. You begin with picking the shape of your pendant. Then, make it special with stamps or carvings, and end by adding a glossy finish. Now, let’s explore each part of the process.
Creating the Pendant Base
Start by deciding on a shape for your clay pendant. The Sculpey Premo DIY Starter Kit is perfect for beginners. It comes with 4 neutral colors and tools you need, including a roller. First, roll your clay until it’s about 1/4 inch thick.
Next, choose a design, either from a template or your imagination, to cut into the clay. Bake the clay at 275°F for 30 minutes for each 1/4 inch of thickness. This makes sure your base is solid for the next steps.
Adding Personal Touches and Details
This is where you make your jewelry stand out. Add details to your pendant with stamps, carvings, or textures using a wooden tool. The Sculpey Premo kit offers fun techniques like marbling and Mokume Gane. These can help you add eye-catching patterns.
Here are some ways to personalize your pendants:
- Marbling: Mix colors to create a swirly effect.
- Terrazzo: Add small, colored clay chips to your base.
- Bulls Eye Cane: Create layers of circles for a bold look.
Take your time with this step to get the details just right!

Final Touches Before Wearing
After adding your creative details, it’s time for the finishing touches. You might want to paint your pendants with vibrant acrylics. Make sure they are completely dry before painting or adding any seal. A clear sealant will make your pendant shiny and protect your work.
For a smooth finish, try low-fire glazes and apply 3 coats for best coverage. The Kemper High Temp Wire is great for making loops, so you don’t need to drill.
Look over your pendants. Decide if they are “Ready for Jump Rings,” perfect for craft shows, or need more glaze. Enjoy the process of making your own Unique Clay Jewelry!
| Steps | Details |
|---|---|
| Creating the Base | Use Sculpey Premo kit, roll to 1/4 inch, bake at 275°F for 30 minutes per inch |
| Adding Details | Use stamps, carvings, or other techniques like marbling, Terrazzo, Mokume Gane |
| Final Touches | Paint with acrylics, seal with clear sealer, evaluate for quality |
Techniques for Adding Colors and Patterns
Adding colors and patterns can really make your Clay Jewelry Designs pop. They help them stand out and appeal to many people. Here are some effective techniques to use on your Clay Jewelry Creations:
Painting with Acrylics
Acrylic paints are great for adding bright colors to clay. You can mix them to make new shades. They’re good for detailed designs and can be put on in layers for texture.

Using Stamps and Imprints
Stamps and imprints make personalization easy. You can use rubber stamps, textured cloths, or items like lace for cool patterns. These tools let you add initials, favorite symbols, or textures to your clay, making your Clay Jewelry Designs stand out.
Incorporating Mixed Media Elements
Incorporating mixed media elements can take your Clay Jewelry Creations to the next level. Think about adding metal, glass beads, or crystals. This method not only adds variety but also makes your jewelry look more special and appealing.
Let’s look at some stats on how popular and effective these techniques are:
| Technique Highlighted | Percentage of Tutorials |
|---|---|
| Unique Techniques for Distinct Pieces | Approximately 70% |
| Using Multiple Colors of Polymer Clay | Over 60% |
| Use of Acrylic Paints or Alcohol Inks | Nearly 90% |
| Targeting Skill Levels (Beginner to Advanced) | 50% Beginner, 50% Advanced |
| Common Techniques | 45% Canes, 30% Layering, 25% Mixed Media |
Finishing and Sealing Handmade Jewelry
Making Handcrafted Clay Jewelry needs a strong, lasting finish. Sealing boosts their life and showcases your designs’ beauty. Let’s look at why sealing matters and the best products for Custom Clay Jewelry.
The Importance of Sealing Your Creations
Sealing clay jewelry protects it from wear, moisture, and damage. Imagine your handmade earrings or pendant fading over time. Sealing your Handcrafted Clay Jewelry keeps them as fresh and captivating as when they were made.
Recommended Sealants and Finishes
Choosing the right sealant is crucial. Varnish, resin, and Mod Podge Dimensional Magic are great for Custom Clay Jewelry. They enhance the finish and add a protective layer to prevent chips and fading. Make sure to follow application and drying instructions for the best results.
For more tips, check out this detailed article on finishing techniques. It offers insights on materials and methods for durable jewelry.
Keeping the fine details in your Handcrafted Clay Jewelry requires the right approach. Using the best sealants preserves these details, making your jewelry look vibrant and beautiful.
Focus on the finishing touches and sealants to ensure your Custom Clay Jewelry looks beautiful and lasts long. Each time it’s worn, it will inspire confidence and admiration. Enjoy your jewelry crafting!
Marketing Your Handmade Clay Jewelry
To effectively market your Handmade Clay Jewelry, start with amazing photos and an engaging online presence. These steps will draw in more buyers and help expand your brand.
Photography Tips for Selling Online
For your Artisan Clay Jewelry to pop online, you need great photography. Use natural light to show off true colors and textures best. Also, getting a macro lens will let you take amazing close-up shots that showcase your jewelry’s details.
Creating an Engaging Online Presence
Think of your online presence as your digital storefront. A lively website or social media can draw people in and keep them interested. Post regularly, share happy customer stories, and reveal new items often. Using tools like Facebook Marketplace or Instagram stories can really help too.
Crafting Compelling Product Descriptions
Good product descriptions share more than just the basics. They tell the unique tale behind each piece, including what inspired it, how it was made, and what makes it special. Descriptive words that touch on texture, color, and emotions can make items feel real. Don’t forget to include size, weight, and material to answer common questions.
| Platform | Details |
|---|---|
| Etsy | 7.4 million active sellers in 2022, with over 95 million shoppers. Fees: $15 setup, $0.20 listing, 6.5% transaction |
| Amazon Handmade | 15% referral fee with no hidden fees |
| Shopify | Nearly 2 million merchants, $29 monthly plan, 2.9% transaction fees |
| Facebook Marketplace | Over 1 billion visitors, free listings, 5% transaction fee (min $0.40) |
Selling Handmade Clay Jewelry
Selling handmade clay jewelry requires picking the right platform, building a solid brand, and setting prices wisely. These steps are crucial whether you’re starting out or want to grow your business. Here, we’ll share key tips to help you.
Best Platforms for Selling Jewelry
Many platforms are great for selling handmade clay jewelry. Etsy and Amazon Handmade stand out for supporting individual makers and unique crafts. These sites help you find customers who love handmade jewelry.
On Etsy, you can create a personal shop. This makes it easy for people to see what makes your jewelry special. Amazon Handmade uses Amazon’s huge customer base to get your products seen by many.
Building Your Brand Identity
When you make jewelry to sell online, having a strong brand is vital. Your brand’s look and message should capture what’s special about your jewelry. Pick a logo and colors that fit your jewelry’s style.
Talking about how your jewelry is handmade and eco-friendly can make your brand stand out. Brands like Catori Life and Alex Monroe show they care about the planet. This wins over customers who value the environment.
Pricing Your Jewelry Thoughtfully
Setting the right price for your jewelry is a balancing act. Think about material costs, the time it takes to make each piece, and extra costs like shipping and platform fees.
The quality and uniqueness of your work can allow for higher prices. Ananda Khalsa, for example, sells unique jewelry starting at $110. This is because of its unique hand-painted designs and use of recycled materials.
Pricing your items higher can make them seem more desirable. It’s key to value your own work. This confidence shows and helps customers see the worth of your jewelry.
| Vendor | Key Features | Starting Price |
|---|---|---|
| Ananda Khalsa | Hand-painted images, recycled metals | $110 |
| Yam | Deadstock and upcycled materials | $30 |
| Emi Conner | Made-to-order, wax band samples | $39 |
Your pricing should show the worth and effort of your artistry.
Care and Maintenance of Clay Jewelry
We all love our handmade clay jewelry and want it to stay shiny for years! Here, we will explore key tips for Clay Jewelry Care. These will keep your pieces looking beautiful, just like when you first made them.
Proper Storage Solutions
Storing your Maintaining Clay Jewelry right is very important. It’s best to put your items in a soft jewelry box or pouch. This helps avoid any scratches or dust. Also, keeping each piece separate stops them from tangling or getting damaged by mistake.
- Choose soft-lined boxes or pouches for storage.
- Store pieces separately to dodge scratches and tangles.
- Maintain a dry, cool environment for your jewelry.
Cleaning and Maintenance Tips
Keeping your clay jewelry looking great means cleaning it gently, without strong chemicals. Just use a soft, damp cloth to wipe off any dirt. For tough stains, a little mild soap in water works wonders. Always ensure your jewelry is completely dry before putting it away.
- Wipe gently with a soft, damp cloth.
- For more cleaning, use diluted mild soap.
- Stay away from strong chemicals and rough cleaners.
- Make sure it’s fully dry before storing.
By following these Clay Jewelry Care tips, your handmade pieces will stay in top shape. You’ll wear them with confidence and pride! Just a bit of care helps preserve their beauty for a long time.
Trends in Handmade Clay Jewelry
The handmade clay jewelry scene is booming with creativity and fresh ideas. People love unique, handmade items that pop out, different from what you see in stores. Because clay is a light and flexible material, artists can create beautiful, varied designs.
Current Popular Styles to Watch
Retro designs from the 90s and early 2000s are making a comeback in clay jewelry. Items like revamped beaded chokers, eye-catching colored pieces, and initial pendants are in demand. There’s also a trend of mixing metals, like silver and gold, for a bold look. Accessories such as choker necklaces, colorful rings, and threader earrings are becoming popular again.
Influencer and Celebrity Impact
Influencers and celebrities are helping to make popular clay jewelry even more in style. Platforms like Instagram and TikTok are full of posts showing off unique statement pieces and simple designs. Famous people wearing these handmade pieces shine a light on them, boosting their popularity. Favorites include zodiac-themed jewelry, pearl necklines with a twist, and gem-covered items.
Keeping up with these trends can help you make jewelry that people want to buy. Whether you’re drawn to vintage looks or what’s trending online, watching these changes is key. This way, you can craft jewelry that speaks to modern buyers.