One sunny afternoon, my partner and I found a charming but neglected house from the 1960s. It was spacious, with 3,400 square feet, including three bedrooms and 4.5 bathrooms. We saw it as a diamond in the rough, ready for a makeover.
Walking through the house, we noticed its potential. It had an almost-finished attic, three fireplaces, and a large dining room. However, it needed an update to bring all its mismatched pieces together. We were eager to start the transformation.
We planned to make the current master bedroom into a cozy bunk room for our kids. The master bathroom was also set for a major upgrade. We aimed to blend the charm of a mountain and lake house for the summer.
We wrote a checklist, figured out what needed to be done first, and set a budget. With $220,000 in hand, split into purchasing and renovation funds, we knew we had to spend wisely. Each dollar was crucial for the success of our project.
Deciding on a DIY makeover meant putting our stamp on our home. Through this home renovation guide, we’ll share our story with you. You’ll get every detail of our adventure, from the smallest win to the biggest challenge. Let’s make your home a masterpiece together!
Introduction to DIY Home Makeovers
DIY Home Makeovers are more popular than ever before. Thanks to shows like “Fixer Upper,” more homeowners feel inspired to try their own hand at renovating. Plus, the market for DIY home improvement is expected to reach $13.9 billion by 2025.
“Nothing beats the sense of accomplishment that comes from transforming your own space. Rolling up your sleeves and diving into a DIY project not only saves money but also breathes new life into your home.”
Why DIY Makeovers Are Popular
Why do we love DIY Home Makeovers so much? They can save you a lot of money, often 30-50% on labor costs alone. Around 70% of homeowners want to do DIY projects to make their homes nicer. You can start with something small, like fixing a leaky faucet, and work up to bigger things.
Easy-to-find online videos and tutorials make DIY renovations more accessible. These resources give 60% of DIYers the confidence and skills they need. They make people feel empowered and independent.
Benefits of DIY Home Renovations
Doing your own home Renovations has many benefits, with saving money being a big one. You can redo your kitchen or living room for much less money. Plus, you can make everything just how you like it.
Besides that, doing DIY projects helps you get better at handy work. This not only prepares you for future projects but can also raise your home’s value. Around 45% of DIY fans start with small projects before moving on to bigger ones.
And let’s not overlook the happiness and pride that come from DIY Home Makeovers. There’s a special joy in seeing your space transform because of your own effort.
| Benefit | Details |
|---|---|
| Cost Savings | Saves 30-50% on labor costs |
| Skill Improvement | Gains in practical skills and confidence |
| Customization | Tailored to your personal taste |
| Increased Home Value | Practical upgrades can boost market value |
| Personal Satisfaction | Joy from transforming your own space |
Essential Tools for DIY Home Improvement Projects
Starting your DIY Home Improvement journey means collecting the right tools. This step makes the work easier and safer. Whether it’s painting a wall or constructing a shelf, the right DIY tools are crucial.
Must-Have Hand Tools
A good toolkit is vital for any DIY success. Hand tools are a must. You’ll need sturdy hammers, diverse screwdrivers, and adjustable wrenches first. Choose brands known for their quality like Stanley or Craftsman. These tools are crucial for minor repairs and tweaks at home.
Power Tools You Can’t Do Without
Power tools make DIY projects quicker and less tiring. Important ones include drills, saws, and sanders. A cordless drill, especially from DeWalt or Bosch, is very useful. A circular saw ensures clean cuts. A good sander makes surfaces smooth. Quality power tools make tough tasks easier from the start.
Safety Gear and Precautions
DIY safety is top priority. Wearing the right safety gear prevents injuries. You should use gloves, goggles, and helmets. Also, use ear protection with loud power tools. A safe work area is key to successful DIY projects. Safety measures keep you safe and make DIY fun and confidence-boosting.

Our DIY experiences include renovating 1,800 square feet of wood floors, catching 14 mice in a day, and tiling a shower to save $500. We need about $25,000 more for updates. Having the right tools and safety gear is vital. Equip yourself with these essential DIY tools and tackle your projects with confidence and safety!
Planning Your DIY Project: From Vision to Reality
Starting a home makeover means planning well. Planning DIY Projects is crucial. You need clear goals, a budget, and inspiration to make it real. Let’s see how these elements make a DIY project smooth and successful!

Setting Clear Goals
Setting Project Goals is key for a DIY project. Think about what you want to end up with. Is it a cozy spot to read or a brand-new kitchen? Knowing your goal keeps you on track and excited. Making a list of small goals makes the project less overwhelming.
Creating a Realistic Budget
Now, let’s talk about DIY Budget Planning. Planning your money right stops you from overspending. Remember to include the costs of materials, tools, and any expert help you might need. A good budget lets you finish your project without running out of money. Think about a bathroom redo that costs less than $2,000, with smart buys like $450 shower screens.
Gathering Inspiration and Ideas
Looking for ideas is fun and necessary. Check out decor magazines, online sites, or home improvement shows. Keep track of what inspires you. Creating a mood board can help make your dream more clear. Sharing your journey online keeps you motivated and might bring new suggestions.
Planning DIY Projects can be exciting and fulfilling. Celebrate your progress and soon, your work will make your space shine!
Fixer-Upper to Fabulous: How to Tackle DIY Home Makeovers with Confidence
Feeling unsure about DIY home makeovers? You’re not alone. Starting a DIY project can feel big, but the right steps can make your fixer-upper fabulous. Let’s talk about how to plan well and celebrate the small wins on your DIY journey.
Step-by-Step Guide to Starting Your Project
Your DIY journey should start with a good plan. Whether you’re painting or laying down floors, planning is key. Dave and Jenny Marrs have turned many homes around with their careful planning. They know what they’re doing.
- Vision and Goals: Start with clear goals. Want a bigger kitchen? Dave and Jenny once added 65% more space by removing a door!
- Budgeting: Make a budget that works. Choosing materials like laminate can save money and still look great.
- Inspiration Seeking: Look for ideas everywhere. TV, magazines, and social media are full of them. Wallpaper can really change a room, even small ones.
Overcoming Common Challenges
Renovation challenges happen. From budget issues to unexpected problems, here’s how to handle them.
- Unexpected Costs: Extra costs are tough but planning for them helps. Good quality parts can also save money later.
- Structural Surprises: Checking things like the furnace and roof early on is vital.
- Material Choices: Think about cheaper alternatives. Porcelain tiles can mimic marble without the cost, and composite tiles are cheaper than clay ones.

Celebrating Small Wins
It’s important to enjoy the little victories. Each one brings you closer to your dream home. Staying motivated is key.
“Every small win, like a perfect tile or a new wall color, is worth celebrating. It’s the journey that matters!” – Jenny Marrs
Even small things, like moving plants or finishing the laundry room wallpaper, matter. These achievements make your space truly yours.
| Challenge | Solution | Benefit |
|---|---|---|
| Unexpected Costs | Set up a contingency fund | Ensures covering surprise expenses |
| Malfunctioning Furnace | Regular inspections and maintenance | Safe and efficient heating system |
| Lack of Inspiration | Utilize magazines, TV shows, and social media | Fresh, creative design ideas |
| Structural Issues | Professional inspections | Ensures a safe living environment |
Budget-Friendly Home Makeovers: Tips and Tricks
Changing your home with little money is possible. You don’t need to give up quality or style. These tips will help you do amazing budget-friendly makeovers using smart DIY projects.
Maximizing Your Budget
Maximizing your renovation budget is about being smart and planning well. Looking for sales at places like Lowe’s can save you lots. For instance, getting kitchen cabinets at a discount is a great deal.

- Cabinet Painting Supplies: $65
- Subway Tiles: $3 per square foot
- Pergo Flooring: $3 per square foot
Taking out drop ceilings can make rooms feel bigger. For our project, we removed a short ceiling and found a taller one. This kitchen makeover cost us $520, way less than a professional job would.
Repurposing and Upcycling
Using old things in new ways is key to budget-friendly makeovers. With a bit of concrete mix and stain, we made cool countertops. A good sealer gave them a final touch.
We turned basic materials into special kitchen features. Project boards became countertops with extra space for sitting. Adding shelves with strong brackets kept the kitchen looking open.
DIY Decor Projects That Save Money
Adding your own crafts can change a space without spending much. Making your own wall art is fun and unique. Using spare paint for shelves ties your room together nicely. We used three cabinet paint colors to make the room more interesting.
Cheaper lighting options can make a room nicer. A simple glass bell or vanity light can really brighten things up.
| Item | Cost |
|---|---|
| Cabinet Painting Supplies | $65 |
| Subway Tiles | 22 cents per tile |
| Pergo Flooring | $3 per square foot |
| Large Glass Bell Fixture | $119 |
| Cone Double Vanity Light | $54 |
| Concrete Mix | Under $20 |
| Concrete Stain | $25 |
With these tips, your budget-friendly makeovers will be great. Updating your place or adding handmade decor, remember being creative is your best tool.
Transforming Different Spaces: Room-by-Room Guide
When it comes to *transforming home spaces*, seeing each room as unique is key. We’ll share some handy room renovation tips next. They’ll help you improve your home, from the living room to the bathroom.
Living Room Makeovers
The living room is often your home’s heart, filled with memories. Just a new paint job can bring it to life. Add new curtains to let more sunlight in. Tip: Use soft blankets and pillows to make it cozy. New lights can change the mood, making it both pretty and practical.
Bedroom Renovations
Aim for a calm space in your bedroom by mixing textures and soft lights. Choose calm colors and luxe fabrics for a peaceful feel. Use smart storage to reduce clutter. This makes your bedroom a perfect place to unwind.
Kitchen Transformations
The kitchen bustles with activity, needing both style and use. Think about getting durable countertops, like Caesarstone’s Organic White quartz. A change in cabinets or paint can boost storage. Swapping old lights and taking down a breakfast bar can open up the room. This makes your kitchen look bigger and more up-to-date. For a great change, balance beauty and use in both kitchens and bathrooms.

Bathroom Updates
Bathrooms blend comfort with use. Upgrade with water-smart fittings, pretty tiles, and new vanities. These changes make it look better and save water. Big mirrors can make tiny bathrooms look bigger. A matching color scheme adds a calm, spa feel.
Take every chance to improve your home, one room at a time. With these room renovation tips, you’re ready for smart, stylish updates. These updates will make your home better to live in.
Home Decor Inspiration: Staying on Trend
Transform your home with the newest Home Decor Trends for a fresh and stylish look! Whether you love simple, minimal designs, the bohemian vibe, or industrial elements, there’s a theme for you.
Popular Styles and Themes
Staying trendy with home decor means knowing the top styles. Minimalism, with its clean approach, creates calm spaces. Bohemian decor mixes colors and patterns for a creative feel. Industrial design uses materials like brick and metal for an urban touch.
Color Palettes and Material Choices
Choosing the right colors sets the mood in your space. Here are our top picks:
| Color | Application | Notes |
|---|---|---|
| Sherwin Williams Alabaster | Walls, Trim | Popularized by Joanna Gaines, great for a fresh, clean look. |
| Sherwin Williams Silver Strand | Interior Walls | Versatile and calming, ideal for variety of rooms. |
| Sherwin Williams Oyster Bay | Built-ins, Bedrooms, Baths | Reflects a serene and elegant vibe. |
| Sherwin Williams Urbane Bronze | Doors, Shutters | Rich and dark, perfect for accent pieces. |
| Benjamin Moore Fieldstone | Kitchen Cabinets | Light gray without blue or purple undertones, very neutral. |
Use these colors with wood, marble, and metal for more depth and texture. From Repose Gray’s earthy tones to Benjamin Moore’s Lakeshore Green, you can find many ways to express your style in modern themes.
Try different styles and materials to make your home unique. Let’s follow the latest trends and design spaces that showcase our personal taste and lifestyle!
Case Studies: Real-Life DIY Makeover Success Stories
Starting a DIY project begins with finding inspiration. There’s nothing like real-life DIY Success Stories to spark your creativity. Let’s explore some amazing changes that you can easily make too!
Spa-Like Bathroom Transformation
Turning a plain bathroom into a spa-like sanctuary is doable with the right plan and effort. A notable makeover involved using calming colors, such as soft blues and greys. Natural textures like stone and bamboo were added too.
They installed a rain shower and a deep soaking tub for a relaxing oasis. Good lighting and fragrant greenery were key to making the atmosphere serene. With these Spa Bathroom Ideas, you can create your own retreat!
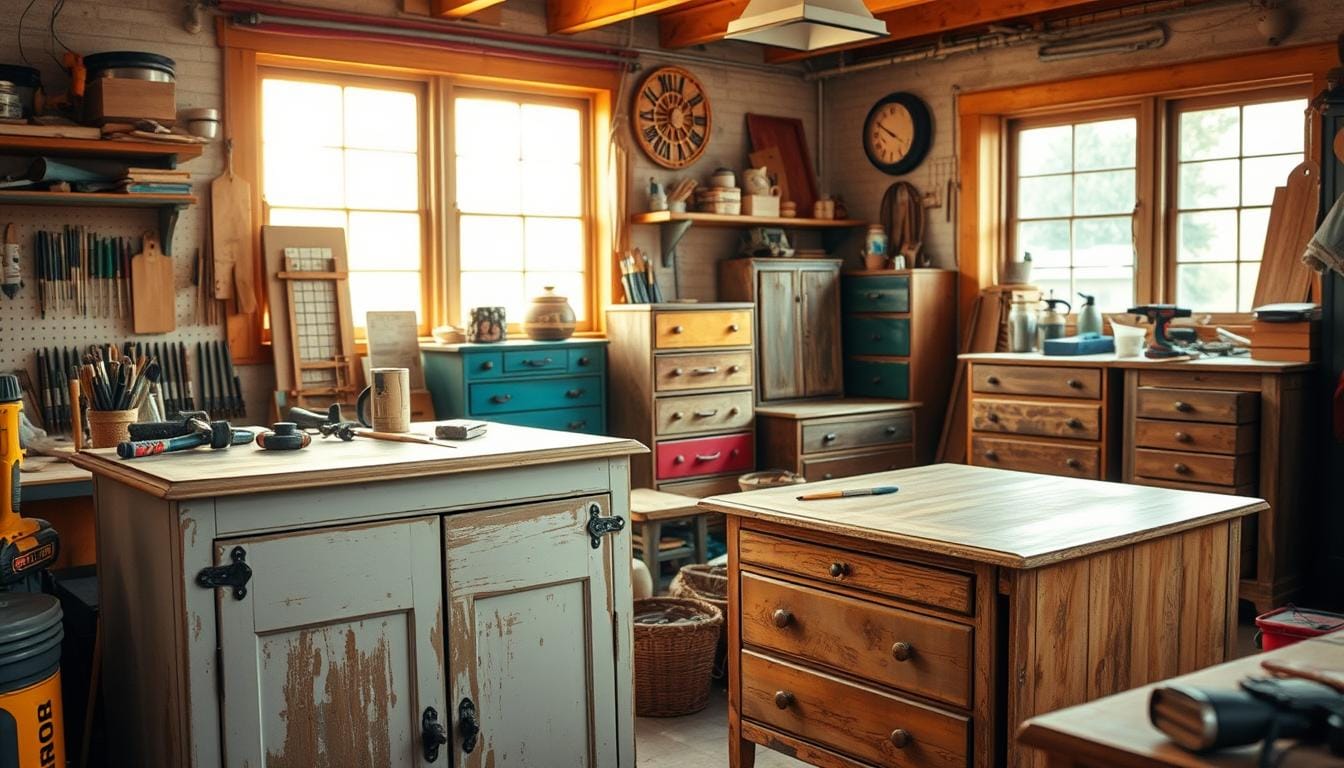
Vintage Furniture Repurposing
Old furniture can surprise you with its potential for beauty. An incredible project turned a worn-out dresser into a stylish vanity. They used chalk paint and vintage hardware to breathe new life into it.
No sanding was needed, thanks to a liquid deglosser. They applied paint over Zinsser Bulls Eye 1-2-3 primer for a smooth finish. Vintage Furniture DIY adds elegance and personality to any room!
| Task | Product/Tool Used | Time | Cost |
|---|---|---|---|
| Painting Kitchen Cabinets | HGTV Home by Sherwin Williams Infinity | 12 minutes with sprayer | Included in budget |
| Priming Surfaces | Zinsser Bulls Eye 1-2-3 | 30 minutes dry time | Cheaper than paint |
| Taping Off Areas | Painter’s Tape | 6 hours | Minimal |
| Complete Cure Time | – | 14 days | – |
Modern Farmhouse Inspo
For those who love a cozy yet modern look, modern farmhouse decor is perfect. A standout DIY update involved adding rustic chandeliers and sliding barn doors. This brought an authentic farmhouse ambiance.
They used reclaimed wood and neutral colors to make the space warm and stylish. This mix of old and new shows how well-chosen elements can make a difference. It’s great Modern Farmhouse Inspo.
These stories show the amazing results of creativity and hard work. They offer tons of ideas for your own projects. Let these successes inspire your next home improvement project!
Fixer-Upper to Fabulous: Tips from the Pros
Ready to elevate your DIY home makeover? Expert DIY Tips can save you cash, time, and frustration.
Advice from Top DIY Experts
Mastering DIY can be really empowering. Experts suggest planning well before starting your projects. This planning can lead to happier results for 60% of home renovators.
For instance, doing a built-ins project yourself can cost $850, much less than the $2000 if a pro does it. That’s a saving of $1150! Such advice helps you keep costs low and quality high.
Lessons Learned from TV Shows
We enjoy watching home makeover shows, and they offer more than entertainment. Lessons in Home Makeover from these shows deal with real challenges and wins. For instance, it’s common to doubt decisions midway through a project, with 35% of DIYers feeling this way.
TV experts stress the need for patience and tweaks, as 85% of projects might need some changes. This trial-and-error method boosts your confidence, releasing the pressure to be perfect from the start.
Moreover, many women push their partners to try the DIYs from these shows, making it a team effort. Yet, doing it yourself brings huge emotional rewards. Every DIYer feels satisfaction and empowerment from their work. Remember, patience and being open to changes are vital. Most design aspects only come together in the final stages, as 75% of makeover participants note.
Dealing with DIY Disasters: What to Do When Things Go Wrong
Even the best-planned projects can have problems. When handling DIY disasters, knowing common mistakes and how to fix them can save your project and budget. Let’s look at some effective DIY mistake solutions to keep your work going smoothly.
Common Pitfalls and How to Avoid Them
Timing is a big issue for DIY fans, especially with materials that need time to dry. We had a project where we lost 13 hours because we didn’t wait 24 hours for Waterlox to dry. Always follow the manufacturer’s instructions to avoid mistakes.
Climate control is also very important. Working in temperatures around 100 degrees Fahrenheit is tough. For big projects, like a 10-month breakfast room remodel, consider an extra air conditioner to stay comfortable.
Not maintaining your tools can also cause issues. For example, not draining your air compressor can lead to moisture, which affects paint quality. Checking your tools regularly can help avoid these problems.
- Ensure proper drying times for all materials.
- Maintain a comfortable working environment.
- Regularly maintain tools and equipment.
Fixing Mistakes Without Breaking the Bank
Mistakes happen, but finding cheap fixes is key. If your paint job isn’t perfect, lightly sanding with 220-grit sandpaper before the final coat can make a big difference. This won’t cost much.
Repurposing materials can also save money. This approach helped us stay on budget with our guest bedroom remodel, which took 14 months. Plus, using DIY decor hacks to save money can be a big help.
Here’s a snapshot of the comparative durations of different DIY remodels:
| Room | Duration |
|---|---|
| Kitchen Remodel | 7 months |
| Hallway Bathroom Remodel | 6 months |
| Living Room Remodel | 6 years |
| Entryway Remodel | 3.5 years |
| Breakfast Room Remodel | 10 months |
| Walk-in Pantry Remodel | 2.5 years |
| Guest Bedroom Remodel | 14 months |
Reflecting on these times shows us the usual ups and downs. Our journey shows the hard work and creativity in DIY projects. Remember, even with mistakes, there’s always a way to fix them without spending too much!
Conclusion
We’ve come a long way in our DIY home makeover journey together. We started with big dreams and worked hard to make them real. Every step, from planning to painting, has boosted your confidence and skills.
Think about all you’ve learned. Working with concrete taught us about precision and patience. Facing challenges with paint showed the need for proper prep work. Each project improved our skills and taught us valuable lessons.
Every DIY task was a chance to learn and grow. Overcoming obstacles, like fixing air pockets or waiting for paint to dry, has taught us a lot. As we finish, let’s celebrate the victories and the value we’ve added to our homes. Let’s keep moving forward, using what we’ve learned to make our spaces reflect our true selves. We’ve traveled this DIY journey together with love and enthusiasm. Thank you for being a part of it!