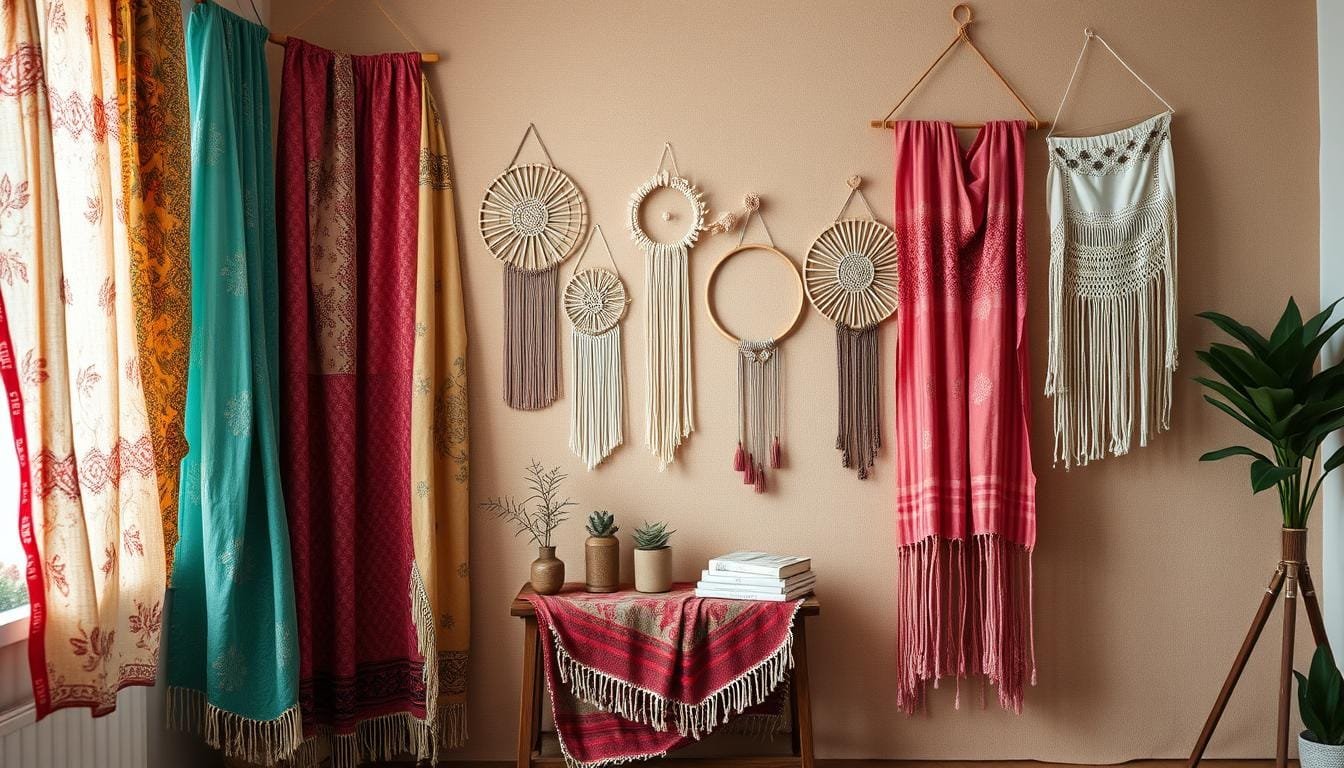
Walking into an art-filled living room, the walls were alive with colors and textures. I felt a warmth that only personalized, handcrafted art creates. Each piece showed memories and creativity, making the decor rich. This showed me the power of DIY Fabric Wall Art in making spaces unique and personal.
I was curious to try it myself. So, I took some thrifted fabrics and simple tools. My walls transformed into canvases full of life. The process was easy and fun, turning old textiles into new art. And it didn’t cost much to make my home look professional. A survey found 45% of DIYers feel using textiles in home decor is rewarding and stylish!
If you’re ready to begin, we’re here to help! We’ll show you how to quilt, frame, and pick the best fabrics. Imagine making your home a gallery that changes with the seasons or your mood. Also, fabric art is great for recycling old textiles—75% of these projects reuse materials!
Let’s explore the world of unique wall art. Discover how to create textile pieces that make your home special. Ready to show off your story with beautiful displays? Let’s start!
Introduction to DIY Fabric Wall Art
Enter the creative world of DIY wall art, where fabric turns walls into breathtaking displays. If you’re starting with textile wall hangings or trying fabric wall decor, this journey is both affordable and fun. We aim to support you at every stage, helping you feel both skilled and inventive as you start these DIY fabric projects.
The DIY Room Décor: Painted Fabric Wall Art class is popular, with 489 ratings. It offers a brief 11-minute introduction to making fabric art, appealing to beginners and experts. The 376 ratings for the DIY Fabric Shoelaces class also show the wide interest in DIY fabric projects.
Courses on fabric dyeing like the Easy Indigo Dyeing: Make Indigo Dyed Pillows class (315 ratings) and the Painted Canvas Pillows class (129 ratings) indicate a big interest in home décor projects. Projects such as the Crocheted Rag Rug class (583 ratings) demonstrate a trend towards making useful items from fabric.
Why pay $100 per wallpaper roll when you can make beautiful fabric wall decor with easy materials? Using lightweight cotton and a liquid starch mix can give professional results. You’ll need a 1:1 starch-to-water ratio, with three buckets usually enough for a small room. And fabric panels need just 1-2 inches extra at each end for trimming.
Joining the DIY community often gives you access to patterns and templates, making DIY wall art even more enjoyable. As we try these projects, remember each one adds a special touch to your home. It shows off your style and creativity. Let’s start and see the limitless options in DIY fabric projects!
Benefits of Using Fabric for Wall Art
Using textiles in your wall decor brings many benefits. They add color and personality to your space. They also make it feel more welcoming. Let’s look closer at these benefits.
Versatility of Textiles
Fabric wall decor stands out for being incredibly versatile. It suits any interior style, from vintage quilts to modern prints. You can easily switch themes, making it a versatile home decor choice for changing tastes.
A 2025 survey by the Craft & Hobby Association (CHA) shows 75% of crafters love personalization. Fabric art allows for endless custom choices. Using different fabric weights like cotton duck can change the look and feel. Upcycling materials adds sustainability and charm to your projects.

Texture and Depth
The feel of textile art adds texture that you can’t get from other mediums. Fabric on walls plays with light and shadow, adding depth. This makes spaces more interesting and inviting.
The IACC says earthy greens and warm terracotta will be big in 2025’s interior design. Combining these colors with textured fabrics creates a cozy feel. For DIYers, trying new fabric techniques like impasto opens up creativity. It’s easy to show your unique style with home decor today.
For more on decorating on a budget, visit these DIY decor hacks. They share great tips for enhancing your space affordably.
Essential Materials for Your Fabric Art
Starting a DIY Fabric Wall Hanging project is very rewarding. It’s key to choose the right materials for success. Let’s look at what you need to bring your fabric art to life.
Choosing the Right Fabric
The main part of a great DIY Fabric Wall Hanging is the fabric. Pick fabrics that look good and have the right feel for hanging. Fabrics like those for upholstery or curtains work well because they’re thick. Canvases and quilting cotton are good too because they don’t stretch and are strong.
If you want a coordinated look, try fabric bundles from places like Interior Goods Direct. They come in “fat quarters,” which are big enough for most projects and not too expensive. Remember to cut your fabric 4-5 inches larger than your frame for a perfect fit.
Tools You’ll Need
Having the right tools makes a project fun instead of frustrating. Here are the tools you’ll definitely need:
- Staple Gun: A strong staple gun, around £5 at Hobbycraft, is essential to attach fabric to the frame. Start with one staple on each side, then add more until it’s secure.
- Spray Adhesives: These help stick fabric to tough surfaces, keeping your art looking professional and strong.
- Canvas Panels: They give your fabric art the structure it needs.
- Scissors and Rotary Cutters: For clean, precise cuts, these tools are a must.
- Measuring Tape: To ensure the fabric fits well, measure properly, leaving a 2-inch margin.
Getting these tools ready not just prepares you for the current project but also for future ones. Using high-quality materials means your fabric wall hanging will be beautiful and last a long time.
Preparing Your Wall Space
Starting your crafting setup means getting walls ready for your art, which is key for a great look. We want our textile art to stand out. So, let’s make your wall perfect for displaying!
Selecting the Ideal Location
Think about the room and where the light falls. Place your fabric art where there’s plenty of light but away from direct sun to avoid fading. Choose a spot that makes the room look better. A well-chosen spot can turn your art into a room’s highlight. Examples like “Freedom, Freiheit, Liberte” show how right placement can grab attention.

Cleaning and Priming the Surface
Now, we need a clean surface. A big tip for home DIY is to start with a clean wall. Wipe off dust and dirt with a wet cloth, then let it dry. If needed, put on a primer for a smooth art backdrop.
- Measure your fabric dimensions (50 inches wide x 40 inches tall) and check your wall space.
- Tape your poster boards (40 inches wide x 30 inches tall) together, using tape every 6 to 8 inches.
- As you place it on the board, leave an extra 5 inches of fabric on each side.
Even small pieces need careful hanging. Use Command Strips, fishing line, or box framing for steady hanging. The right hanging stuff means your art stays put, looking good either in a show or at home.
Getting walls ready for art helps create an impressive showcase. Enjoy your crafting!
Techniques for Creating Fabric Wall Hangings
Making beautiful fabric wall hangings is fun and express your style through textile art. You might love quilting’s detailed patterns, appliqué’s playful charm, or how frames make everything look classic. Let’s dive into these methods and turn your fabric ideas into eye-catching art!
Quilting Techniques
Quilting connects fabric and thread into a beautiful, textured work of art. By sewing layers together, you create complex patterns. This technique lets you play with ideas, making your wall hangings rich and cozy.

Appliqué and Patchwork
If you like something fun, try appliqué and patchwork. Appliqué means sewing fabric pieces onto a bigger piece to make designs. Patchwork is about joining small, colored pieces. They’re great for stories or adding fun to your space.
Framing Fabric Art
Framing makes fabric art look worthy of a gallery. Frames with mats can hide rough edges and look sleek. An Hermès scarf, big at 35 by 35 inches, often needs professional framing. Yet, framing it yourself saves money, instead of spending $500 to $1,000.
Think about framing different textiles like towels or baby blankets. Display big textiles by themselves for a strong effect. Use Picture Hanging Strips for light fabric. For heavy items like quilts, Velcro is best. It keeps fabric edges safe. Proper framing turns your place into a unique art gallery.
Incorporating Color and Patterns
Making DIY textile wall art? Color and pattern play big roles. Color theory shapes mood and feel. Patterns bring decor together. Mixing colors and patterns makes plain fabric stand out.

Understanding Color Theory
Color theory is key for beautiful spaces. It helps bring out emotions, balance, and mood. Bright textiles can make rooms seem brighter, a big plus for small areas. Many people use textiles to make their spaces cozy.
Let’s look at color theory basics:
| Color | Emotion Evoked | Best Use |
|---|---|---|
| Red | Energy, passion | Accent pieces for vibrancy |
| Blue | Calm, relaxation | Bedrooms and bathrooms |
| Yellow | Happiness, warmth | Kitchens and dining areas |
| Green | Balance, renewal | Living rooms, home offices |
Choosing Complementary Patterns
Picking the right patterns is art. About 60% of designers say patterns add visual interest. Make sure patterns match in scale and style. Mix a big floral with a small geometric for balance.
Patterns bring depth and texture. They make your wall art vibrant. Textiles also soften spaces, increasing comfort. These tips help you design spaces that show your style.
Using Fabric to Tell a Story
Fabric is a powerful way to storytelling through art. It’s more than patterns and colors. It’s about the stories woven into each thread. Your personalized wall hangings can show personal and cultural tales. This makes your home decor stand out.

Personal Narratives in Textile Art
Adding fabric art to your home is like sharing your life story. Each piece is like a page from your life’s book. For instance, a quilt from your wedding or a tapestry of baby blankets. These personalized wall hangings are pieces of your life. They weave together memories, feelings, and milestones.
Cultural Reflections Through Fabric
Cultural textile art shares stories from far and wide. It connects us to traditions and histories beyond our own. Imagine your room showcasing African, Japanese, or Peruvian textiles. It’s not just decor. It’s a celebration of culture and tradition. Each fabric tells a story, bringing ancient tales into your home.
DIY Fabric Wall Art Projects for Beginners
Starting with fabric wall art is fun and not too hard. We’ll look at a few beginner projects that will make your walls look great. Plus, these projects will help you feel more confident in your crafting skills. These easy DIY wall art projects are perfect for beginners.
Simple Fabric Banners
Making fabric banners is a great first project. You just need colorful fabric, wooden dowels, and sewing tools. First, cut the fabric into a banner shape. Then hem the edges to make them look neat. Also, sew a pocket at the top for the dowel.
Tip: Choose fabrics with bold patterns and bright colors to make your fabric banners stand out!
Next, put the dowel in the top pocket and tie a string on it for hanging. Now, you have a cool, custom decoration that brings color to any space. This project is fast, easy, and lets you get creative with your design.
Fabric Collage Art
For a bit more creativity, try making a fabric collage. This project is great because you can use leftover fabric bits. You’ll need fabric scraps, a sturdy base’s canvas, and fabric glue to start.
First, plan your design with the fabric pieces. Pick a theme or color scheme to tie everything together. After planning, stick the fabric pieces down, one by one. This process is a fun way to learn about design and gives new life to leftover fabric.
Your collage can show anything from geometric shapes to abstract art. This project lets you play with your creativity and learn fabric basics.
Advanced Techniques for Experienced Crafters
If you’re a seasoned crafter ready for new challenges, try advanced DIY projects like fabric wall art. You can explore making 3D textile art and wall-mounted fabric sculptures. These projects add a unique touch to any room with your creativity and skill.
3D Fabric Art Displays
3D textile art brings your fabric creations to life, adding depth. This method goes beyond simple flat canvases. You’ll use techniques like fabric manipulation and materials like wire mesh to get a 3D effect. These projects push your skills and make your art stand out.
Wall-mounted Fabric Sculptures
Creating wall-mounted fabric sculptures is another advanced technique. It mixes sculpture with the softness of textiles. You might use methods like hand-tufting and bobbin lace with high-quality materials. These artworks change the feel of a room, drawing attention and adding character.
Diving into advanced DIY fabric art projects brings a personal touch to your decor. This kind of art opens up new possibilities, letting you add texture, create depth, and tell stories. Challenge yourself with these intricate techniques to enhance your home’s look.
Maintenance Tips for Fabric Wall Art
Keeping your fabric wall art looking great is key. Let’s look at the best ways to take care of fabric art. Doing this makes sure it stays bright and striking for many years.
Cleaning and Care Recommendations
Cleaning your wall decor often is important. Soaking your fabric art overnight in OxiClean and warm water helps remove stains well. If your fabric can go in the washing machine, use the “delicate” setting. But skip the soap to prevent damage. And don’t put it in the dryer as it might shrink. Instead, lay the fabric out to dry in the air.
When you iron, use the cotton setting. Always start on the backside, then gently iron the front. If there’s a small tear, iron-on patches work great. Just choose one a bit bigger than the hole for a good fix.
Preventing Fading and Wear
Fabric can fade quickly if it’s in the sun too much. This is especially true for fabrics with natural dyes, except for mud cloth. Keep your fabric art away from direct sunlight. Use LED lighting because it hardly gives off UV rays.
If your fabric art is framed, pick a glaze that blocks at least 90% of UVA and UVB rays. For very delicate pieces, the glaze should block at least 98% of UV rays. Also, change where you display them often. This reduces damage and keeps your fabric art looking its best.
Taking good care of your fabric wall art means it’ll always be an important part of your home’s look.
Seasonal Fabric Wall Art Ideas
Make your home shine with seasonal DIY decor. Use holiday fabric art and bright patterns to show the season’s spirit. Each season is a chance to make your home look new and lovely.
Transforming Your Space for Holidays
Seasonal fabric art makes any room festive and warm. Picture your walls decorated with autumn leaves for Thanksgiving. Or with cozy fabrics for winter. These decorations make your holiday gatherings lively and your home cheerful.
Fabric Displays for Different Seasons
Seasonal DIY decor celebrates the year with style. Use breezy linens for spring or warm textiles for winter. Whether it’s quilt pieces or fabric scraps, this art brings beauty and comfort all year.
Where to Find Inspiration for Fabric Wall Art
Looking for DIY inspiration for your fabric wall art project is fun! You can find lots of resources for any level of experience. Whether you’re just starting or have been crafting for years, looking at different sources can sharpen your vision and make your unique ideas real.
Online Resources and Communities
The internet is full of ideas and how-tos for DIY fabric wall art. You can find online communities where crafters share projects, ideas, and guides. Sites like Pinterest and Instagram have beautiful fabric art pictures to inspire you. These places let you see amazing work and meet others who love crafting too.
Also, forums like Reddit’s r/DIY and craft forums are great for tips. They talk about all kinds of fabric art techniques. Being part of these forums gives you lots of knowledge and support.
Visiting Art Exhibitions and Craft Fairs
Going to art exhibitions and craft fairs is another way to get inspired. Art shows often have textile art by both new and known artists. Seeing these pieces in person can make you appreciate the craft more and give you new ideas.
Craft fairs are great for inspiration too. They let you see and touch different materials and techniques. Talking to artists and exhibitors gives you insights and tips to try in your projects.
By using online sources and real-world experiences, you’ll find plenty of inspiration and support. Enjoy your crafting!
Conclusion: Getting Started with Fabric Wall Art
Starting your fabric wall art project is an exciting step. It allows you to show your style in an affordable way. Start with 1 to 2 yards of fabric. This amount is often enough. Choose materials like cotton, linen, or canvas for their ease of use and durability.
Your Unique Artistic Journey
Your creations reflect your personal style and creativity. Using simple tools, such as fabric glue or a staple gun, makes the process easier. A wooden dowel helps your art hang straight. Whether you love bold patterns or soft textures, it’s all up to you.
Encouragement for First-Time Creators
When you start making fabric wall art, embrace the imperfections. They add to your art’s charm. Whether it’s a large piece or a small collage, it shows your journey. Look for inspiration online or at craft fairs. Let your walls show who you are!
Making your first piece can cost around $55 to $75, including tools. But, the cost for more projects usually falls between $25 and $35. Starting materials like a canvas or fabric are not expensive. Plus, you can reuse many supplies. Dive in and let your home reflect your creativity! 🌟