It’s a chilly December afternoon. The smell of fresh cookies fills the air in your home. Your family is around the kitchen table, looking at craft supplies. The kids are excitedly talking about their ideas, and you’re smiling. This is the holiday spirit. 🎄
In our family, making DIY gift wrap is a special tradition. It lets us be creative and makes each gift special. Did you know that 70% of people like getting gifts in personalized wrapping paper more than regular store-bought paper? It’s not just for looks; it brings joy to make something meaningful together. With 60% of parents doing DIY projects during the holidays, making your own wrapping paper is a fun way to connect and save money. Buying materials for DIY wrapping paper costs about $10, much less than the $30 for fancy paper from the store.
This guide will show you how to make your own hand-stamped wrapping paper, step by step. You’ll learn that this process is easy to change and often involves making it up as you go, which makes it even more special. Let’s start this fun adventure, making sure your gifts look unique and feel extra special under the Christmas tree. Are you ready to make something wonderful together? Let’s begin!
Introduction to Hand-Stamped Wrapping Paper
Making your own hand-stamped wrapping paper adds a special touch to your gifts. This guide makes it easy for anyone to start, even if you’re new to crafting. Discover how Handmade Gift Wrap Techniques can turn any gift into something truly one-of-a-kind.
What Is Hand-Stamped Wrapping Paper?
Hand-stamped wrapping paper uses stamps to create custom designs with ink or paint. It’s a DIY way to be super creative with your gifts. You can use different stamps, like rubber ones or even ones you make yourself. Swede, for example, is a great choice for making durable stamps.
Benefits of Hand-Stamping Your Own Paper
Hand-stamping your paper lets you match it to the occasion perfectly. It works for birthdays, weddings, or any holiday. You can make your wrapping feel more personal and eco-friendly, especially when using nice materials. Plus, it’s a fun way to show off your creativity!
Overview of the Process
Making your own hand-stamped paper is fun and simple. Here’s a quick guide to start:
- Choose your paper: Go for strong brown paper, about 7 meters long.
- Select a printing block: You can pick from rubber stamps to ones you carve yourself, with swede being a solid choice.
- Gather your inks and paints: Tap the paint on for an even look.
- Try before you apply: Practice on spare paper first.
- Apply the stamp: Spread out your designs to cover more space.
- Use double-sided tape for a clean look.
- Allow drying time: Wait 48-72 hours if you’re doing fabric projects like table runners.
- Store properly: Keep your paper in a cool, dry spot to keep it nice.
This guide encourages you to try different wrapping techniques to show off your style. Have fun crafting!
Choosing Your Materials
When making Personalized Wrapping Paper DIY, the materials you choose are key. Explore the must-haves for gift wrapping that truly stands out.
Types of Paper for Wrapping
The base of your Personalized Wrapping Paper DIY is the paper. Light papers are easier to wrap with and look neat. Here are some suggestions:
- SH Recycling Grey at 100 gsm
- Crush Grape at 90 gsm
- IQ Color Lavender at 80 gsm
- Fluo Poster in neon green at 90 gsm
These options give you different feels and colors. They make your Unique Gift Wrapping Ideas better and last longer.
Inks and Paints: What Works Best?
Your inks and paints choice affects the end look. Water-based acrylic paints dry fast and are great for thin layers. Pick inks that are good for paper and show up well to get a professional look.
It’s smart to add paint every 2-3 papers during printing. This way, every sheet looks good, making your Personalized Wrapping Paper DIY even and pretty.
Tools You’ll Need: Stamps and Block Printing Tools
You need the right tools for a great project. You will need:
- Pattern roller (vintage rubber rollers at 15 cm width)
- Foam paint roller
- Applicator
- Paper
- Acrylic or water-based paint
- Plastic plate for paint
Try test rolls on scrap paper before the real deal, to perfect your designs. For fresh ideas, check out Hero Arts. They team up with designers to bring new themes in stamps. This can spark Unique Gift Wrapping Ideas.
| Material | Weight (gsm) | Recommended Use |
|---|---|---|
| SH Recycling Grey | 100 | Basic wrapping, durable |
| Crush Grape | 90 | Stylish, eco-friendly wrapping |
| IQ Color Lavender | 80 | Lightweight, colorful |
| Fluo Poster in neon green | 90 | Eye-catching designs |
With suitable materials and tools, your Personalized Wrapping Paper DIY will be both fun and rewarding. You’ll get unique gift wrappers that really pop. Happy crafting!
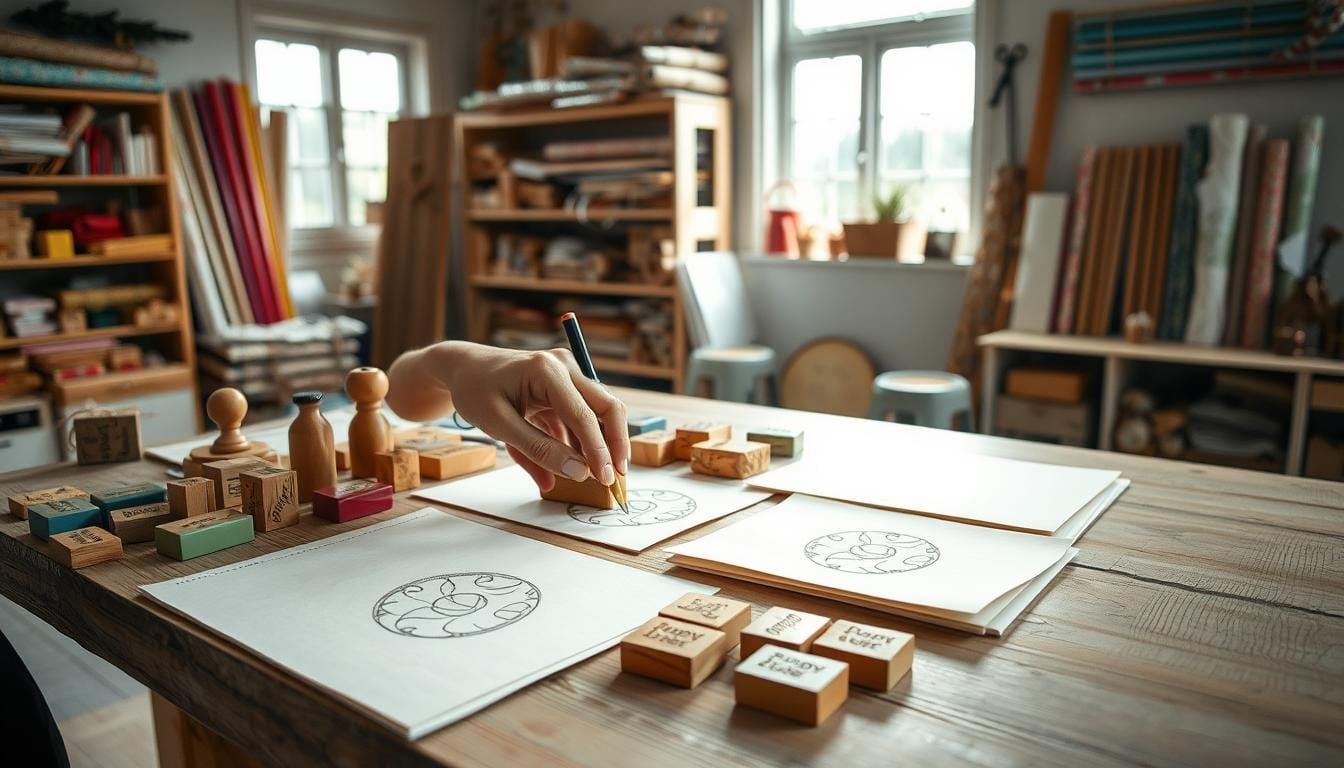
Techniques for Making Stamps
Learning to stamp wrapping paper is fun with many creative methods. You can carve your own stamps, use store-bought ones, or try out different materials. Each way lets you add your personal touch to wrapping paper. Let’s look at some popular methods to get you started on this craft.
Carving Your Own Stamps
Making custom stamps is both satisfying and creative. You can use items like potatoes to carve unique designs. Potatoes are great for making geometric shapes, but they only last about 3-4 hours. To start, cut a potato in half and carve your design into it, about ½ inch deep. This method is great for all kinds of wrapping paper and tissue paper.
Making and using potato stamps takes a few steps, but it’s quick. The whole process, from carving to drying, can take from 30 minutes to an hour. If you use speedball carving tools, the job gets easier and more precise.
Using Store-Bought Stamps
If you want something easy and varied, store-bought stamps are great. Craft stores have lots of designs for easy and quick stamping on your wrapping paper. These stamps save time and give you consistent results, perfect for all occasions. For more ideas to make your gifts stand, look up some inspiring DIY wrapping paper projects.
| Method | Pros | Cons | Materials Needed |
|---|---|---|---|
| Carving Your Own Stamps | Highly customizable, cost-effective | Time-consuming, limited lifespan | Potatoes, carving tools, ink |
| Using Store-Bought Stamps | Quick, variety of designs available | Less personalized | Pre-made stamps, ink, paper |
Alternative Stamping Methods
If you like to be unique, alternative stamping methods can make your wrapping paper stand out. Try using leaves or celery stalks for natural textures and patterns. Leaves create delicate designs, and celery stalks give a bold effect. These methods are creative and good for the environment.
Trying different methods to stamp wrapping paper makes gift-wrapping special and personal. Carving your own stamps, using store-bought ones, or alternative materials each add a unique touch. Enjoy stamping!
Creating Your Unique Designs
When we talk about Creating Your Unique Designs, you can really get creative. You might find inspiration in nature, like the look of a snowflake or how a pinecone feels. Designing your own wrapping paper turns simple gifts into treasures. With things from around the house like orange peels or even pink erasers, you can make Creative Gift Wrap Designs without spending much money.🏡✨
Inspiration and Ideas for Patterns
Turning a plain gift into something special just takes some creativity. You could start with nature for ideas, looking at leaves, flowers, or butterfly wings. Or find inspiration in your house. Did you know potatoes, carrots, and bubble wrap are great for Homemade Wrapping Paper Ideas? They can be shaped or carved to make all kinds of patterns. For holiday themes, think about using stamps with trees, snowmen, or reindeer.
Combining Colors and Techniques
Mixing colors and techniques makes your wrapping paper unique. Try different inks and paints for depth and texture. Using stamps in contrasting colors creates a vivid, layered look. Go for bold reds and greens for something festive, or choose gentle pastels for elegance. There’s no wrong way to do it—just show your style.😊
Using Stencils for Added Creativity
Stencils can take your Creative Gift Wrap Designs to the next level. Stamps give basic shapes, but stencils add elaborate details or personal messages. Mixing a snowflake stencil with snowmen prints can make a winter wonderland theme. It’s also a fun craft to do with kids, making great memories together.
Imagine the joy when someone unwraps a gift you decorated. This hands-on approach adds a personal touch to your presents and is very rewarding. Happy crafting! Let your creativity fly!✨

Preparing Your Workspace
Getting ready to start your DIY gift wrap project is super exciting! First up, we need a tidy space. Here’s the best way to get it ready:
Essential Tools for Stamping
Before the fun begins, let’s pick out our tools. You might use store-bought stamps or even make your own from soft linoleum. Having the right items on hand is key. You’ll want:
- Paper (like construction paper, old grocery bags, or blank rolls)
- Stamps (either DIY rubber stamps or ones you buy)
- Inks or paints (for cool color combinations!)
- Something to cover your workspace
Starting with inexpensive items, like pink erasers for homemade stamps, helps save money. Brands like Speedball offer great carving tools. And don’t forget, adhesives like E6000 will keep your stamps in place!
Setting Up for Efficiency
To stamp like a pro, organize your space so everything’s close by. Be sure to have:
- Your paper ready and flat
- Stamps and inks all arranged
- Carving tools and workspace coverings set up
When making your stamps, press lightly to avoid mistakes. The iron-on transfer method is a clever trick for designs. And consider your gift’s size – bigger gifts might need larger stamps, affecting your paper choice.
Cleaning Your Workspace After Stamping
Clean up well to avoid ink stains or messes left behind. Here’s a quick guide to cleaning:
- Keep washing fluid and cloths handy
- Clean stamps and tools right after you use them
- Take off any coverings and throw away trash properly
Cleaning is vital, especially when using many ink colors or egg tempera paint. A clean workspace and tools ensure high-quality DIY gift wrap in the future.
By setting up and keeping your space clean, stamping wrapping paper will be fun and rewarding! Let’s dive into creativity 🥳!
Step-by-Step Guide to Hand-Stamping
DIY personalized wrapping paper is fun and gives your gifts a unique vibe. We’ll cover *simple steps* to make hand-stamping easy and enjoyable.
Preparing the Paper
Start by spreading your paper on a flat, clean surface. Use medium-weight paper, like sketchbook or butcher paper, for best results. Ensure your paper is big enough for your gift, or use a larger roll for more projects.
Inking the Stamp
Dip your stamp in ink or paint next. You can use acrylic, poster, or tempera paints. Avoid putting too much ink to prevent smudges. Re-ink your stamp every few stamps for clean prints.
Applying the Stamp: Tips for Even Application
Press the stamp down slowly and firmly. This careful approach gives you sharp results. Create patterns that match or vary the spacing for different looks.

Try using stencils for extra flair. Apply paint with a flat brush for neat edges. Do test prints to get even ink coverage. This makes your DIY wrapping paper look great and the crafting fun!
Hand-stamping lets you personalize your gift wrapping beautifully. Each gift will feel special and unique. Enjoy your crafting! 🎨
Curing and Drying Your Wrapping Paper
After you’ve stamped your paper, it’s essential to let it dry completely to avoid smudging. This part of our Custom Wrapping Paper Tutorial will show why drying matters, how to cure ink correctly, and the best ways to store your paper creations.
Importance of Proper Drying
Letting your paper dry fully means your designs stay perfect. If it doesn’t dry right, you may get smudges or spots, ruining the look. In humid or wet weather, drying takes longer, so you need to be patient to see the best outcome.
Best Practices for Curing Ink
A hairdryer on a low, cool setting can speed up drying. But keep it far enough away to prevent ink from splattering. Using air conditioning can also help dry the ink faster, similar to making custom soap. Generally, you should let the ink air dry for at least 24 hours until it’s totally dry.
Storing Your Finished Wrapping Paper
When your paper is dry, roll it up and store it in a cool, dry area. This avoids creases or damage. Many custom wrapping paper guides suggest storing your papers in a sealed box to keep them in top shape. This way, your Unique Gift Wrapping Ideas will always be ready for special moments.
Personalizing Your Wrapping
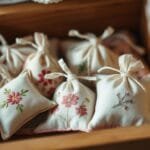
Adding a personal touch to your hand-stamped wrapping paper makes any gift stand out. By choosing Creative Gift Wrap Designs, you can give memorable and touching gift presentations. These are perfect for birthdays, weddings, or any celebration, making your gifts one-of-a-kind.

Adding Personal Messages
A simple way to personalize your wrapping is by writing on it. You can pen down a heartfelt note or use elegant calligraphy. This makes the gift more personal and touching for the person who receives it.
Incorporating Photos or Drawings
Adding photos or drawings is another great idea. You can attach memorable photos or doodle around your stamped designs. This can really make your wrapping part of the gift, adding so much thoughtfulness.
Seasonal Themes and Celebrations
Designs that match the season or specific celebrations add extra creativity. For example, snowy scenes for Christmas or bright flowers for spring. Tailoring your gift wrap to the occasion shows you really care.
Here’s a quick overview of what you’ll need and some relevant stats for making your own wrapping paper:
| Aspect | Details |
|---|---|
| Prep Time | 10 minutes |
| Active Time | 1 hour 30 minutes |
| Dry Time | 30 minutes |
| Total Time | 2 hours 10 minutes |
| Yield | 5 gifts |
| Cost of Materials | $5 |
| Skill Level | Beginner |
| Suggested Materials | Kraft paper, packing paper, thicker chunky glitter |
| Printing Resolution | 300 pixels per inch |
| Common Size | 16×20 inches |
By adding your own touch, you turn simple hand-stamped paper into something unique. With these personal touches, your gifts will look warm and creative. Now you’re ready to make your gifts memorable with your own style!
Using Hand-Stamped Wrapping Paper in Gift Giving
Using your own wrapping paper for gifts adds a special touch. Your handmade techniques make any gift feel more special. Mastering the wrapping process will make your gifts stand out.
How to Fold and Wrap Gifts
After making your unique paper, it’s time to wrap your gift. Measure and cut the paper to fit your gift. Try using Furoshiki, a Japanese method that’s not only pretty but eco-friendly too. Good folding takes practice but makes your gift look amazing.
Creative Ways to Present Your Gifts
Trying different ways to present gifts is exciting. You might roll your gift in paper and tie it with a ribbon. Adding something extra like candies or a note makes it even better. Layering papers or adding flowers can make your gift unique.
Adding personal touches with your wrapping paper shows thoughtfulness. For more ideas, check out this DIY guide on hand-stamped wrapping paper.
Tying It All Together: Ribbons and Tags
Use ribbons and tags to finish wrapping your gift. A shiny ribbon adds a festive feel, while jute string gives an earthy look. Make a tag from your stamped paper or a different color to personalize your gift further.
The details in gift wrapping matter a lot. Every fold, ribbon, and tag makes your gift special. With these tips, your wrapped gifts will impress and delight everyone. Enjoy wrapping!
Eco-Friendly Practices
As we learn about our effect on the earth, using eco-friendly ways to wrap gifts becomes essential. We will discuss how to make your DIY Gift Wrap Ideas better for the planet. We’ll focus on choosing the right materials and how to reduce waste, ensuring your gifts look great and are planet-friendly.
Sustainable Paper Options
Start with picking green wrapping paper. Go for recycled or paper from sustainable sources. Regular wrapping paper usually ends up in landfills, which is bad for the planet. Try using brown grocery bags for a unique, rustic look that also reuses resources. Also, consider using cloth wraps like Furoshiki from Japan, known for being reusable and looking good.
Natural Inks and Dyes

Choose natural inks and dyes made from berries, vegetables, or coffee for beautiful colors without toxic chemicals. These are great for your eco-friendly wrapping projects. Also, use natural beeswax paper, which is compostable. This way, your gift wrap won’t harm the earth after it’s thrown away.
Reducing Waste in the Wrapping Process
One big issue with wrapping gifts is managing waste. Measure and cut paper carefully to use less and waste less. Keep small scraps for smaller gifts or make them into gift tags. Using reusable items like canvas bags or old boxes can also lower waste. This approach helps us use things more than once, which is good for our planet.
In the U.S., households use about 25 pounds of wrapping paper during the holidays, leading to 1 million tons of extra trash each week. By adopting eco-friendly wrapping methods, we can cut holiday waste in half. This makes our holiday celebrations better for the environment.
Troubleshooting Common Issues
Learning how to stamp wrapping paper can have its ups and downs. We’re here to guide you through common problems with useful tips. This way, you’ll get great results every time.
Dealing with Ink Smudges
Ink smudges are a common issue, but you can easily avoid them. Let each layer dry longer before you add another. Using too much ink can cause smudging.
To fix this, try a lighter touch on scrap paper first. This helps avoid too much ink and smudges.
Fixing Alignment Problems
Problems with alignment can make your work look off. A simple trick is to use a grid for guidance. Draw light grid lines on your paper’s back or use a transparent grid.
This method helps keep your stamps neat and lined up. It makes your custom wraps look tidy and professional.
Handling Faded Prints
Sometimes prints might look faded. This is usually from not using enough ink or uneven pressing. To fix faded prints, simply add more ink and press the design again.
Choosing a slightly darker ink shade can also make your design pop.
Follow these tips, and you’ll become a pro at how to stamp wrapping paper and improve your custom wrapping paper tutorial skills quickly. Happy stamping! 🎨✨
Celebrating Special Occasions
Showing you care with *creative gift wrap designs* is perfect for any special event. From holidays and weddings to birthdays, your gift wrapping can really stand out. It’s all about making your presents unique and eye-catching.
Seasonal Ideas for Hand-Stamped Wraps
Seasonal themes make *handmade gift wrap techniques* shine. In winter, think snowflakes and cozy motifs. For fall, use leaf and pumpkin stamps to add a festive flair. Creative wraps are known to make gifts feel more special, says 65% of consumers. Make your gifts stand out by matching them with the season’s spirit.

Customized Wrapping for Weddings
Weddings call for wraps that scream romance. Think hearts and flowers to create something beautiful. Adding the couple’s initials or special date makes it unforgettable. Techniques like embossing add a touch of luxury. With 50% of people loving personalized presents, your efforts will be cherished by the couple.
Unique Designs for Birthdays and Holidays
Birthday wraps should mirror the person’s likes, like dinosaurs for kids or elegant themes for adults. Holidays too get a special touch with themed wraps. Adding fun elements like balloons makes wrapping a blast. Since 75% of parents enjoy crafty activities, making stamps at home could be a fun project for gift wrapping.
Resources and Further Reading
Starting your crafting journey with homemade wrapping paper ideas is fun and fulfilling. We have gathered some great resources for you to boost your skills and creativity. Explore books, tutorials, and online classes designed for DIY crafting and meet people who love crafting too.
Recommended Books and Tutorials
Want to get better at unique gift wrapping? There are many books and online tutorials that can help. “Hand Printing from Nature” by Laura Bethmann shows you how to make your own stamps and patterns. You can find easy-to-follow tutorials online on YouTube and Craftsy, suitable for any skill level.
Online Classes for Crafting Enthusiasts
Improve your crafting skills with online classes. Skillshare and Udemy offer lots of courses on homemade wrapping paper ideas. These classes teach you everything from basic to advanced stamping and new ways to wrap gifts.
Community Forums and Social Media Groups
Meet other DIY fans for more ideas and support. You can join forums and social media groups like Reddit’s r/DIY and Facebook’s Craft and Create. These are great places to share your projects, get advice, and be part of a creative and encouraging community.
Conclusion: The Art of Personal Touch
We’ve learned that making hand-stamped wrapping paper adds a special touch to gifts. It shows that putting love and care into your gifts can change the whole experience. It’s not just about looking good, but about making each gift a special memory.
Adding your personal flair with stamps and patterns shows you care. Even small things like personalized tags or notes add to the feeling. Every detail plays a part.
Embracing Creativity in Gift Giving
Personalizing your wrapping means more than just covering a gift. It wraps up emotions and memories too. Adding personal touches like photos or favorite colors makes gifts even more special. It’s about making the present truly mean something to the one receiving it.
For example, use old maps for someone who loves to travel or sheet music for a music lover. This shows you put real thought into it. Your care in choosing and wrapping the gift shines through.
The Lasting Impact of Personalized Wrapping
Personalized wrapping makes your gifts unforgettable. It goes beyond just opening the gift. Your gifts will stand out and be remembered. Using things like fabric scraps or newspapers for wrapping is good for the planet too. It shows you care not just about the gift, but about the world as well.
Your personal touch turns ordinary wrapping into something special. Fun patterns and bright colors can make opening the gift an even happier moment, especially for kids.
Encouragement to Try Crafting Your Own Wrapping Paper
We hope you’ll try making your own wrapping paper. It’s a rewarding project that can make giving gifts even more exciting. With some creativity and sustainable materials, your gifts can stand out. You can personalize them in so many unique ways.
For ideas and tips on making your gifts look amazing, check out this guide on gift wrapping beautiful presents. Start now and experience the joy of giving gifts that are wrapped with love and creativity!