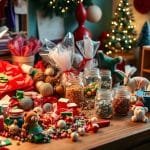
As the menorah candles light up, they do more than just brighten our homes. They spark memories, traditions, and joy unique to Hanukkah. Celebrating with DIY decor adds a special touch. It makes every corner of the home reflect the holiday spirit. We’re thrilled to share 6 easy DIY decorations. These will not just brighten your celebration but also create lasting memories.
Let’s dive into DIY crafts like paper dreidels and festive garlands. These projects are both affordable and fun. You can use simple materials like craft sticks, tissue, and paint. These can turn your home into a colorful Hanukkah display. Our DIY ideas are perfect for everyone. Whether you love crafting or are trying it for the first time, they’re easy and engaging.
Picture your kids’ joy seeing their crafted menorah shine, or your pride in hanging homemade garlands. This Hanukkah, let’s unleash our inner creators. Let’s decorate our homes with pieces as meaningful as they are beautiful. Let’s make this holiday unforgettable with DIY decor that sparkles with creativity and tradition.
Introduction to DIY Hanukkah Decorations
Welcome to the creative world of DIY Hanukkah decorations! Making your own decor adds personal touches to your celebration. It lets you save money and make special memories. With these crafts, you can add a unique flair to your holiday that you can’t find in stores.
Importance of Personal Touch
Personal touches in your Hanukkah decor mix tradition with creativity. Imagine a menorah made from craft sticks and paint. Or a Star of David ornament, made by connecting triangles. Each piece shows your style and holds cherished crafting memories.
Using traditional colors or adding your own designs makes your decor unique. These ideas ensure your Hanukkah is meaningful and one-of-a-kind.
Budget-Friendly Crafting
Crafting can be affordable, using simple materials. Many projects use recycled items, like paper rolls. About 1 in 5 crafts might use these.
For a DIY menorah, you might need 72 craft sticks and 9 candles. You can make festive ornaments on a budget. Adding pop culture to your crafts can update your celebration. Crafting saves money and sparks creativity, giving you many decorating ideas.
Let’s gather our craft supplies and family. Together, we’ll make this Hanukkah memorable with personal and affordable decorations!
Simple Paper Dreidels
Making paper dreidels is a fun way to decorate for Hanukkah. These crafts add color and joy. Plus, they help families spend time together. So, let’s start creating!
Materials Needed
- Colorful paper
- Scissors
- Glue
- Markers
With these easy-to-find items, you’re set for a creative adventure. These materials let everyone join the fun.
Step-by-Step Instructions
- Start by cutting the colorful paper into squares.
- Draw the dreidel pattern on the paper squares. Get creative with various designs and colors!
- Using scissors, carefully cut out the dreidel shapes.
- Fold each dreidel along the lines, ensuring crisp and clean edges.
- Glue the edges together to form a three-dimensional dreidel.
- Decorate with markers, adding details like Hebrew letters and festive designs.
These *easy Hanukkah decorating ideas* do more than just prettify your home. They help kids learn about Hanukkah too. For more holiday DIY projects, check here. Enjoy crafting!
Festive Hanukkah Garlands
Making Handmade Hanukkah garlands is a fun craft for families. You can use materials like cotton yarn and card stock. Here are some tips to make your garlands special.
Creative Ideas for Garlands
Try adding symbols like Stars of David to your garlands. You can crochet or use paper cutouts. Adding ribbons or felt can also make them unique.
- Stars of David: Crochet ten stars with cotton yarn. Use blue, white, and a bit of silver. Mix glue and water to stiffen them. Let them dry for a day.
- Paper Cutouts: Make cutouts of dreidels, menorahs, and Stars of David. This adds fun shapes to your decor.
- Ribbons and Felt: Using blue and white ribbons or felt can personalize your garlands. You can add names or Hebrew letters.
These ideas make your home look festive. Also, they are great for family bonding and making memories.
How to Hang Your Garland
Finding the right spot for your garlands is key. Consider placing them in windows or on mantles. They also look great on stair banisters.
- Windows: Hang garlands here for a warm look outside. It shows your festive spirit to others.
- Mantles: They add beauty to your living room, especially on fireplace mantles.
- Stair Banisters: Putting garlands on banisters makes your home festive and elegant.
Choosing good spots makes your decor stand out. It brings warmth and joy to your home during Hanukkah.
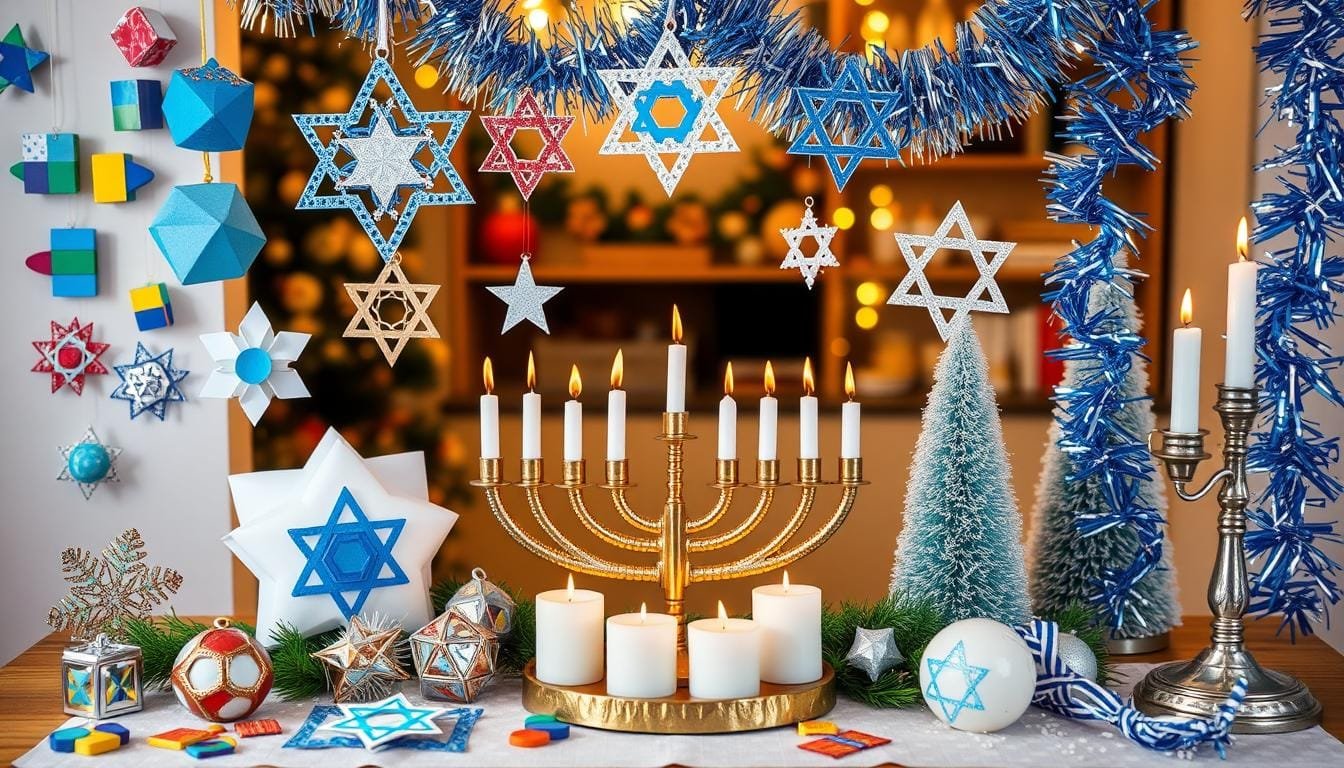
Beautiful Menorah Centerpieces
A beautiful menorah centerpiece adds warmth and style to your Hanukkah. You can go classic or modern. The materials you pick are key.
Choosing the Right Materials
Pick high-quality materials that match your home’s look. Think about using glass, wood, or marble. These materials are stylish and last long. Always match your menorah with your Hanukkah decorations in color and texture.

Assembling Your Centerpiece
Building your menorah is a fun project. Start with nine jars and one extra lid. Here are the steps:
- Clean the jars well.
- Decorate each jar with food coloring or water-based paint.
- Glue the lids on with E6000 glue.
- For safety, consider using LED lights.
Make sure your menorah looks good and is safe. This is important if using real candles. The special shamash candle needs to stand out in the middle.
When storing your centerpiece, make sure it’s dry to stop mold. By following these tips, your menorah will be a beautiful focal point. It will bring light and happiness to your holiday.
DIY Star of David Ornaments
Making Handmade Hanukkah decor adds depth to our holiday joy. DIY Star of David ornaments are great for showing your art skills and respect for tradition. Let’s look at how to make these wonderful decorations.
Materials You Can Use
You have many choices for making Star of David ornaments. You could use:
- Clay
- Paper
- Upcycled materials like old CDs
- Colored sand
- Foil tape
Try glass tea-light holders, aluminum foil tape, or colored paper for something special. Handmade Hanukkah decor’s beauty comes from being unique. You can use things from home or a dollar store.
Decorating Techniques
With your materials ready, start decorating. Here are techniques to make your ornaments pop:
- Paint and Glitter: Add paint in blue and white. Then, add glitter for sparkle.
- Embellishments: Decorate with beads, sequins, for a special look.
- Upcycling: Turn old CDs into star shapes. Decorate them with markers or gems.
These DIY Hanukkah crafts are perfect for all ages. They let you personalize each ornament. This adds a special touch to your holiday look.
Use this guide to make meaningful Handmade Hanukkah decor. Your decorations will be beautiful and full of holiday spirit. Enjoy your crafting!
Easy Candle Holders
Turning everyday things into decor saves money and feels good. We can make simple glass jars into elegant candle holders. These serve as cheap Hanukkah decorations and make our celebrations special. Let’s get started! 😊
Repurposing Glass Jars
First, give old glass jars a new purpose! Clean them well to take off any labels and sticky stuff. These jars are great for holiday DIYs. You can find them at home or buy them from places like Hobby Lobby.
We turn these jars into lovely candle holders. They add a warm glow to our holidays. It saves money and creates sustainable, one-of-a-kind decorations. 🌟
Painting and Embellishing
Now, it’s our turn to be creative! We can paint the jars any color we like. Blues and whites are perfect for Hanukkah. After the paint dries, add decorations like stars, menorahs, or glitter.

Use stencils or draw freely. This makes our jars special. Make sure each paint layer is dry before adding more. ✨
These DIY candle holders make our holidays brighter for less money. It’s a great project for anyone wanting cheap Hanukkah decorations that look good and mean a lot. Enjoy crafting!
Crafting with Children
Creating Hanukkah party decorations with kids is fun and educational. This time teaches them about Hanukkah traditions and stories. There are many Jewish holiday crafts that everyone can enjoy.
Fun Ideas for Family Involvement
Start with easy crafts like a pop-up dreidel or a paper plate menorah. Use simple materials like construction paper, paint, glue, and glitter. These are perfect for kids.
Another cool project is making stained glass Star of David ornaments. Use tissue paper and craft sticks for this. Kids will be proud to decorate the house with their art.
Safety Tips for Kids
When crafting with kids, always prioritize safety. Supervise them with scissors or hot glue guns. Use soft materials like felt or foam for younger children. These are safe and easy to handle.
Avoid small parts that could cause choking. Keeping a craft area clean and organized prevents accidents. Let’s make Hanukkah both memorable and safe with these crafts!
Colorful Hanukkah Table Settings
Setting a colorful table for Hanukkah is all about picking the right elements. You want to make your table a festive centerpiece. Let’s explore how to do that!

Choosing a Color Palette
Pick a color palette that celebrates Hanukkah. Blue, white, and silver are perfect for reflecting the holiday’s spirit. Consider using:
- Blue and white tablecloths or runners: These set the decor stage. Tie-dye designs are trendy and add fun.
- Silver accents: Silverware and chargers bring sparkle. Gold chargers are an affordable option, costing about $6 for six.
- Decorative elements: Silver-and-blue boxes can be unique place cards. They also make great gifts for your guests.
DIY Tablecloth Ideas
Make your Hanukkah decorations special with DIY tablecloths. Here are some ideas to start:
- Dip-dye tablecloths: Use fabric dye for a gradient look. It’s easy and budget-friendly for custom colors.
- Patterned runners: Create designs with stencils or stamps on plain runners. You can add festive symbols easily.
- Repurposing plain white items: Add foil tape in Star of David shapes to white trays or stands. It’s a simple but effective idea!
Add other creative touches to your table settings. Crystal glassware brings elegance. Gold vases and flowers add beauty. Use glass tea-light holders with water and blue food coloring for a menorah effect. Secure them with double-stick tape.
These DIY ideas make your Hanukkah table both festive and personal. Enjoy decorating! 🎉🕎
Handmade Gift Wraps
Giving gifts is more special with a personal touch, especially during Hanukkah. Handmade wrapping makes presents even more joyful. It shows the love and effort you put in. Let’s explore creative ideas for your Hanukkah gift wraps. Add special sparks too!
Unique Wrapping Paper Techniques
Making your wrapping paper is fun and meaningful. Using stamps and stencils personalizes your Hanukkah gifts. Carve Jewish-themed stamps like Menorahs or Stars of David. Then, print beautiful patterns on craft paper.
- Stamps and Stencils: Use simple Hanukkah motifs on potato stamps. Or, ready-made stencils for easy, elegant designs.
- Marbled Patterns: Make unique wrapping paper with shaving cream and food coloring. Each wrap will be one-of-a-kind.
- Customized Prints: Print family photos or holiday quotes on kraft paper for a personal touch.
Adding Special Touches
With your wrapping paper ready, it’s time to add unique touches to your gifts. Here are ideas:
- Unique Bows: Make bows from fabric scraps for a homemade feel. Or, use metallic ribbons for elegance.
- DIY Gift Tags: Create personalized tags with Hanukkah themes. Use cardstock and glitter pens.
- Natural Elements: Add rosemary or eucalyptus sprigs for a rustic touch.
The love in your Holiday DIY projects shines in your wraps. Each gift becomes a creative statement of Hanukkah joy! 🎁✨
Fun and Functional Place Cards
Hosting a Hanukkah celebration is always fun. You get to make your home warm and welcoming. Personalized place cards make everything look better and feel more personal. They show your guests you’re glad they’re here. Let’s look at some great DIY Hanukkah crafts for your place cards.

Design Ideas for Place Cards
Designing place cards can be very creative! Here are some ideas to help you get started:
- Model Magic Frames: Use Crayola® Model Magic for the frames. Shape them into cool forms. Let them dry before painting.
- Themed Embellishments: Decorate with things like seashells or tiny holiday items. Use yellow and blue for a Hanukkah theme.
- Photographs: Adding photos of your guests makes it even more special.
| Materials Needed | Quantity |
|---|---|
| Crayola® Model Magic | As needed |
| Card stock | 4 sheets of assorted blue |
| Pencil | 1 pack of colored pencils |
| Scissors | 1 pair |
| Hot glue gun & glue sticks | 1 set |
| Acrylic craft paint and brushes | Variety |
| Photos of guests | As needed |
Including Messages for Guests
Adding personal messages or blessings makes your decorations warmer. Here’s what you can include:
- Hanukkah Blessings: Choose special blessings or prayers.
- Personal Notes: Write a small message to thank your guest.
- Fun Facts: Include a fun Hanukkah fact or trivia to start conversations.
Make each place card show how special your guests are to you. This makes your Hanukkah crafts stand out. It also creates a warm, memorable gathering.
Creating a Hanukkah Countdown Calendar
Make your Hanukkah more exciting with a DIY countdown calendar. It’s a fun project that adds to the holiday cheer. This calendar also brings Jewish traditions into your decoration. Want to know how to make one with things around your house? Let’s get started.
Using Household Items
Start with a shoe organizer that has 10 pockets for the base of your calendar. This is a green choice and can be used every year. You’ll need a few things: a Cricut, colored smart iron-on material, a heat press, a tool for weeding, scissors, and stickers or markers for numbers. Each pocket stands for one night of Hanukkah, filled with surprises.
Remember, the countdown calendar doesn’t just mark the days; it’s a cherished part of the holiday that enhances the excitement and joy for everyone in your home.
Filling the Calendar
Time for the fun part! Load each pocket with small gifts to celebrate Hanukkah’s spirit. Here are some suggestions:
- Dreidels
- Hanukkah gelt
- Small toys
- Candy and snacks
- Stickers and crayons
- Notes of encouragement or compliments
- Clothing or accessories
- Toiletries, such as lip balm or hand sanitizer
To save money, shop at dollar sections or buy in bulk. You could also add personal notes about peace, reflection, and joy. Opening each pocket raises excitement and the holiday mood.
Don’t forget to share your calendar creation on social media. Use the tag @thesupermomlife to connect with other creators who love this tradition.
DIY Hanukkah Banners
Making Hanukkah banners is fun. It adds a personal touch to your holiday decor. With simple materials and creativity, you get beautiful banners. They make your home brighter and celebrate Hanukkah’s spirit.
Selecting Materials
Choose durable materials like felt or heavy cardstock for your banners. These materials last longer and look neat. You can find these at craft stores or online easily.
- Felt: Comes in many colors. Blue, white, and silver are top picks for Hanukkah.
- Heavy Cardstock: It keeps your banners in shape and looking good.
- Additional supplies: Scissors, glue, decorations (like glitter), and string for hanging.

Personalizing Your Banner
Creating unique banners is key. Add family names, holiday wishes, or symbols like the Star of David. Use markers, paints, or stick-on letters. Include your family in making these for fun! 🎨✨
- Cut shapes or letters.
- Glue them onto your banner.
- Add glitter, sequins, or pom-poms for extra flair.
- String them together and hang to show your holiday spirit!
Hanukkah banners are a great way to be creative and improve your decor. They’re not just pretty but also make memories. Enjoy crafting! 🕎✨
Decorating with Lights
Hanukkah is a time to bring light and warmth into our homes. There’s no better way to do that than with lighting. Whether you’re highlighting your menorah or adding a cozy glow, the right lights can transform your space.
Ideas for Light Placement
Placing your lights carefully maximizes their impact. For instance, wrap Eco-friendly Hanukkah lights around your windows and doorways. This creates a welcoming entrance and highlights Hanukkah decorations near these areas.
Outdoor spaces shine with luminaries or lanterns, too. They create an inviting atmosphere for guests and passersby.
- Illuminate your windows with string lights to show off decorations.
- Line your walkway with lanterns or luminaries for a festive welcome.
- Wrap LED lights around garlands and wreaths for a magical touch.
- Place your menorah in a well-lit area to make it the centerpiece.
Eco-friendly Lighting Options
It’s important to think about the environment when choosing lights. Eco-friendly Hanukkah lights, like LED or solar-powered, reduce energy use. They offer a warm, festive glow and save money over time.
Here are some popular eco-friendly lighting options:
| Type | Benefits | Suggestions |
|---|---|---|
| LED Lights | Energy-efficient, long-lasting | Perfect for indoor and outdoor use |
| Solar-Powered Lights | Renewable energy source, no electricity cost | Ideal for outdoor decorations |
| Battery-Operated Lights | Portable, versatile placement | Great for tablescapes and accent lighting |
By using eco-friendly lights in your Hanukkah decorations, you create beauty and help the future. Let’s light up this festival with creativity and care! 🕎
Eco-Friendly DIY Decorations
Celebrating Hanukkah sustainably shines a light on the holiday’s themes of renewal. Choosing *sustainable Hanukkah decorations* cuts our environmental impact. It also makes your celebration unique. In this guide, we’ll explore creating eco-friendly decor with recyclable materials.
Using Recyclable Materials
Let’s make *eco-friendly holiday decor* with recyclable stuff. Here are a few ideas to get you started:
- Paper Dreidels: Craft them from old newspapers or scrap paper. Decorate with leftover paint or markers for a special touch.
- Natural Fabrics: Turn old fabric or clothes into table runners, menorah mats, or pouches. It’s a great way to reuse and cherish memories.
- Biodegradable Embellishments: Use twine, jute, or dried fruit for eco-friendly decor. They’re ideal for garlands or sprucing up your menorah.
Benefits of Sustainability
Choosing *sustainable Hanukkah decorations* has many perks for the holiday spirit:
| Benefit | Description |
|---|---|
| Reduced Environmental Impact | Recyclable and natural materials lower waste. They support green living for a better planet. |
| Cost-Effective | Using what you have saves money. It lets you be creative without spending a lot. |
| Unique Personal Touch | *Eco-friendly holiday decor* is unique and personal. It adds special value to family traditions. |
| Educational Value | Sustainable crafts teach kids about caring for the environment. They learn the value of mindful living. |
Conclusion: Celebrate with Creativity
As we end our DIY Hanukkah series, remember it’s more than just making your home look good. It’s about making the holiday special and adding a personal touch to your celebration. By being creative, you make lasting memories with your loved ones.
Encouragement to Share Creations
We want you to show off your handmade items. It could be a menorah or colorful garlands. Your creativity might inspire others. Share your projects online, or host a small get-together. It’s great to see how each person adds something special to Hanukkah.
Inviting Family and Friends to Join
Get your family and friends to help with the decorations! Crafting together is fun and brings everyone closer. Why not have a craft night? People of all ages can help. From making dreidels to setting the table, it’s all about being together. Let’s celebrate Hanukkah in a way that brings joy to everyone!