Imagine walking into a cozy beach house, surrounded by beautiful shells and soothing ocean vibes. The decor is tasteful, elegant, and distinctly beachy. We’re here to help you achieve this look with your own DIY beach-inspired projects!
Collecting shells from the beach is a cherished vacation memory for many. But turning those treasures into decor that feels sophisticated, not tacky, can be a challenge. We’ll show you how to transform your beach finds into beautiful, elegant pieces that enhance your home.
With our guidance, you’ll learn how to balance natural elements with refined design, creating DIY ideas that are both beachy and beautiful. Whether you’re a seasoned crafter or just starting out, we’ll empower you to create stunning shell decor.
Elevating Beach Treasures: Why Seashell Crafts Get a Bad Rap
Elevating seashell crafts from kitschy to sophisticated requires an understanding of design principles. Many crafters struggle to create beautiful, cohesive pieces due to common mistakes that lead to tacky results.
Common Mistakes That Lead to Tacky Results
One of the most significant errors is relying on hot glue, which can be unreliable and cause burns. The lack of permanency in hot glue can lead to shells falling off over time, ruining the overall surface of the craft. To avoid this, it’s essential to choose the right adhesive for your project.
Design Principles for Sophisticated Seashell Art
To create stunning seashell crafts, consider the following key elements:
- Balance: Distribute shells of different sizes, shapes, and color to create visual harmony.
- Negative space: Leave areas uncovered to allow the eye to rest and appreciate the form of the shells.
- Scale and proportion: Select shells that are appropriately sized for your project.
- Texture mixing: Combine smooth, ridged, and spiral shells to add dimension.
By applying these principles, you can transform your seashell crafts into beautiful, sophisticated pieces that showcase your beach treasures.
Essential Materials for Elegant Seashell Crafts
To elevate your seashell crafts from tacky to sophisticated, you need the right materials. The quality of your craft depends not just on the shells, but on the bases, adhesives, and complementary elements you choose.
Choosing the Right Adhesives: Beyond Hot Glue
When it comes to bonding seashells, hot glue is just the beginning. For more durable and long-lasting results, consider using adhesives like E6000, Gorilla Glue (now available in clear), or JB Weld for non-wood items. Two-part epoxies and silicone adhesives are also excellent choices, offering flexibility and strength. For a strong bond, it’s essential to choose the right adhesive for your project’s specific needs.

Quality Bases and Complementary Materials
The base you choose can make or break your seashell craft. Wooden bases are classic and sturdy, accepting various adhesives well and can be pre-finished to match your decor. For a more elegant look, consider glass or mirror surfaces, perfect for trays, coasters, or wall art. Canvas is another versatile option, allowing for dimensional designs that can be hung on walls. To enhance your shell compositions, incorporate complementary materials like sand, small pebbles, or sea glass. Natural fibers such as jute or sisal add texture, while metallic accents like copper wire or silver leaf create sophisticated contrast.
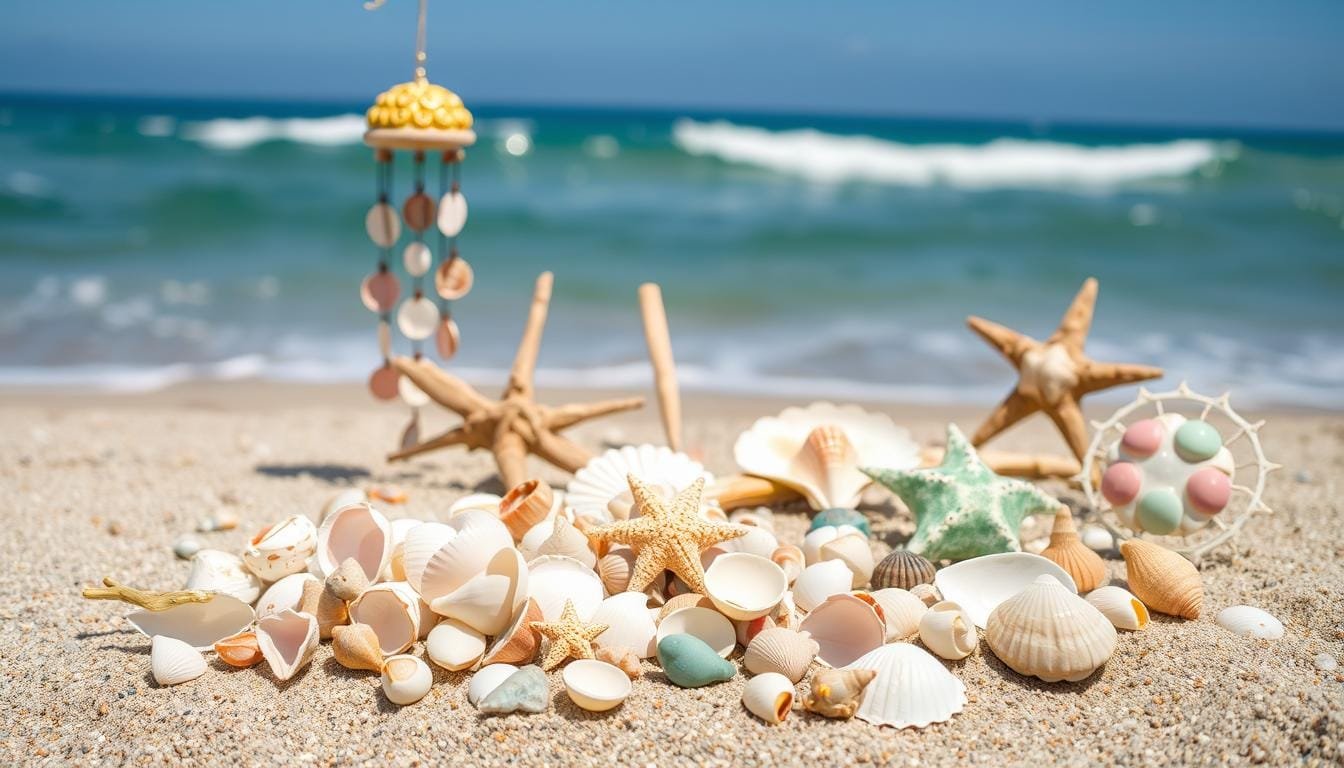
Selecting and Preparing Your Seashells
The art of creating beautiful seashell crafts starts with the careful selection of seashells. We guide you through the process of choosing and preparing your seashells to ensure your crafts are both elegant and long-lasting.
Best Types of Shells for Different Projects
Different types of seashells are suited for various projects. For instance, scallop shells are ideal for seashell wall letters due to their fan-like shape and textured ridges, which add dimension without overwhelming the surface. Cockle shells bring a natural softness with their rounded, heart-like shape. If you’re looking for versatility, clam shells can be broken into smaller pieces without losing their beauty. To add height and movement, consider including a few auger shells or other spiral varieties. Tiny shells or shell chips are perfect for finishing touches, while delicate shells like sand dollars require extra care.

Cleaning and Preserving Your Beach Finds
Properly cleaning and preserving your seashells is crucial for maintaining their quality. To start, gently rinse your shells to remove loose sand and debris. Soaking them in a gentle solution helps dissolve remaining salt and organic matter. For shells with barnacles or unwanted growth, carefully remove these without damaging the shell surface. After cleaning, dry your shells thoroughly to prevent cracking. You can also use natural or chemical bleaching methods to whiten your shells if desired. Finally, apply preservation treatments to seal the surface and prevent deterioration over time. By following these steps, you’ll be able to enjoy your seashell crafts for years to come.
- Initial rinsing removes loose sand and debris without damaging delicate structures.
- Soaking shells in a gentle solution helps dissolve remaining salt and organic matter.
- Drying techniques prevent cracking while ensuring shells are completely moisture-free before crafting.
- Preservation treatments seal the surface and prevent deterioration over time.
Gilded Seashell Decor: Adding Metallic Elegance
Discover the art of gilding seashells to add a luxurious finish to your DIY projects. Gilded seashell decor is a beautiful way to bring a touch of metallic elegance into your home. We will explore two techniques to achieve this look: liquid gilding for textured shells and gold leaf application for smooth shells.
Liquid Gilding Technique for Textured Shells
For seashells with intricate textures, liquid gilding is an excellent choice. This method involves applying a metallic paint specifically designed for crafts. You can choose from a variety of metallic colors to match your decor. To apply, simply use a paintbrush to coat the shell with a thin layer of paint, making sure to cover all the nooks and crannies.
The result is a beautifully gilded shell that adds a touch of elegance to any room. You can use this technique to create decorative items like mirrors, frames, or other home accessories.
Gold Leaf Application for Smooth Shells
For smooth seashells, applying genuine gold leaf creates a luxurious, high-end finish. To start, you’ll need a metal leafing starter kit, which includes all the necessary supplies. First, coat the shell with a thin layer of adhesive size, a thin, ultra-sticky glue. Allow it to dry for 20 to 40 minutes until the surface is tacky.
Gently lay a sheet of gold leaf over the shell, using a soft, dry paintbrush or a soft rag to burnish the gold leaf onto the surface and remove any excess. You may need to apply multiple layers to achieve full coverage. Finally, seal your work with a clear sealer to protect it from tarnishing over time.
With these techniques, you can transform your seashells into stunning pieces of art that add a touch of sophistication to your home decor. Whether you choose liquid gilding or gold leaf application, your gilded seashells are sure to be a hit!
Seashell Crafts That Aren’t Tacky: Designer-Worthy Projects
With a few simple techniques, you can turn your seashell collection into sophisticated home decor and accessories. We’ll guide you through creating beautiful pieces that showcase your shells in elegant ways.
Minimalist Seashell Wall Art
Creating minimalist seashell wall art is a great way to add a touch of the beach to your home without looking too kitschy. Start with a small amount of shells in a uniform shape or color to achieve a cohesive look. Arrange them in a simple pattern or create a shell-covered frame to give your wall art a clean, sophisticated appearance.

Sophisticated Shell-Adorned Home Accessories
Shell-adorned home accessories can add a beautiful, coastal touch to any room. To create sophisticated pieces, focus on using high-quality shells and combining them with complementary materials like wood or crystal. For example, you can decorate a plain mirror or vase with shells to give it a unique, elegant look. Experiment with different ways to arrange your shells to find a design that works best for you.
Elegant Jewelry and Personal Items
Transforming shells into elegant jewelry and personal items is a fun and creative way to enjoy your beach finds. To make wearable art, you’ll need to drill holes in your shells safely and combine them with quality findings. This can result in beautiful pendants, earrings, or other accessories that look stylish and professional. By preserving and protecting your shells, you can ensure they remain a lovely part of your jewelry collection for years to come.
Creating Custom Seashell Letters and Monograms
Add a personal touch to your coastal decor with custom seashell letters and monograms. Making seashell wall letters is a fun and rewarding way to bring coastal charm into your home. With the right shells and a few creative touches, you can craft a beautiful, personalized piece.
Step-by-Step Guide to Shell-Covered Letters
To create your own shell-covered letters, start with wooden letters as your base. You can find these at craft stores or online. Begin by applying a thin layer of adhesive to the letter, then carefully arrange your seashells to cover the surface. For a more polished look, use a combination of shell sizes and shapes. For example, you can use larger shells for the main coverage and smaller shells to fill in the gaps.
To add extra dimension, consider incorporating other beach finds like small starfish or sea glass into your design. Once your shells are in place, allow the adhesive to dry completely before handling the letter. You can then mount your finished letter on the wall or display it on a shelf.
Design Variations and Display Ideas
There are many ways to customize your seashell letters. You can create monochromatic designs using shells in similar colors for a sophisticated look, or achieve an ombré effect by arranging shells from light to dark across the letter. Consider grouping multiple letters to spell out names, initials, or meaningful words. You can also create themed letters for special occasions like weddings or holidays.
When it comes to displaying your finished letters, you have several options. You can hang them on the wall, place them in a shadow box frame, or stand them on a shelf. To showcase your letters in a gallery wall or other home decor grouping, consider pairing them with other coastal-themed items like driftwood or nautical ropes. Don’t forget to photograph your finished letters to share on social media or preserve in a craft portfolio.
Elevating Your Designs with Mixed Media
To take your seashell crafts to the next level, consider incorporating mixed media elements that add texture and visual interest. Mixed media can introduce new dimensions to your designs, making them more captivating and sophisticated.
Incorporating Sand and Driftwood Elements
Adding sand and driftwood to your seashell crafts can enhance their natural beauty. A small amount of sand can be used to fill gaps between shells or create a textured background. Driftwood, with its unique shapes and weathered color, can serve as a base or accent piece, adding an organic touch to your designs. Experiment with different combinations to achieve a balanced look.

Adding Pearls and Vintage Jewelry for Elegance
For a more luxurious feel, consider adding pearls and vintage jewelry to your seashell crafts. Pearls can be scattered among the shells to fill gaps or used as focal points, adding a subtle shine and a touch of elegance. Vintage jewelry pieces, such as brooches or earrings, can be repurposed as decorative elements, introducing new color palettes and textures. When done thoughtfully, these additions can elevate your designs multiple times, making them truly special.
For more inspiration on combining different elements in your home decor, check out 12 Inspiring Color Palettes for a Stylish Living. This resource can help you create a cohesive look that ties your seashell crafts to your overall interior design.
| Mixed Media Element | Effect on Design | Tips for Use |
|---|---|---|
| Sand | Adds texture and natural feel | Use a small amount to avoid overwhelming the design |
| Driftwood | Introduces organic shapes and weathered look | Choose pieces that complement the color of your shells |
| Pearls | Adds elegance and subtle shine | Use flat-back pearls for easier attachment |
| Vintage Jewelry | Brings new colors and textures, adds luxury | Select pieces that match your design’s theme or color palette |
Displaying Your Seashell Creations with Style
The art of displaying seashell decorations is just as important as creating them. Your beautiful shells deserve to be showcased in a way that highlights their unique charm and adds to your home’s aesthetic.
Interior Design Principles for Beach-Inspired Decor
When it comes to decorating with seashells, the key is to create a cohesive look that brings the beach into your home. Start by choosing a theme or color palette that resonates with your beach finds. Use your shells in a way that complements your existing decor, perhaps by grouping them in a decorative bowl or using them as a centerpiece on your coffee table. Consider the display area carefully to ensure it’s visually appealing.

Creating Cohesive Groupings and Vignettes
To create impactful displays, group your seashell crafts in intentional arrangements. The rule of three can be a helpful guide, creating visually pleasing vignettes that draw the eye. Vary the heights, sizes, and textures within your groupings for dynamic compositions. When taking a photo of your arrangement, consider the lighting and background to capture the beauty of your display. Rotating your shell crafts periodically keeps your decor fresh and allows you to enjoy all your creations at different times. This approach not only keeps your decor looking new but also gives you a chance to appreciate each piece in a different area of your home.
For a stunning visual effect, consider creating themed collections that tell a visual story, making a stronger statement than random arrangements. You can also use trays, books, and other styling tools to define your display area and create cohesion. Don’t forget to capture your beautiful arrangements through photo to share or remember past displays.
Conclusion: From Beach Souvenirs to Timeless Treasures
Seashell crafting is more than just a hobby; it’s a way to connect with nature and create meaningful family traditions. By applying the techniques and principles we’ve discussed, you can transform your beach souvenirs into elegant decor that tells a story. Whether you’re working on a solo project or involving the whole family, the process of creating with seashells and shells allows for personal expression while crafting beautiful items for your home or as heartfelt gifts.
For more inspiration on elevating your seashell decor, consider exploring different techniques like gilding your seashells to add a touch of luxury to your craft. As you continue on your crafting journey, remember that the true beauty lies not just in the final product, but in the memories and connections made along the way. By embracing this craft, you’re not only creating timeless treasures but also celebrating the natural beauty found on the beach.