Easter is almost here, and everyone is getting excited! Recently, I was chatting with a friend at Starbucks. She told me about a fun craft her kids made for their door. It was a cute DIY Easter wreath made of colorful yarn. This gave me an idea – to make a DIY Easter Bunny Wreath with Pom-Poms.
Picture this: you’re at home, with good music playing, making an Easter Bunny wreath. With just $12, we can create something unique, not bought from a store. This cost is the same as a store-bought wreath, but ours will be special.
So, let’s gather our craft supplies and get the family together. It’s time for a fun crafting adventure. We’ll end up with a cute wreath for our door and make great memories. Are you ready to start? Let’s go!
Introduction to DIY Easter Bunny Wreath
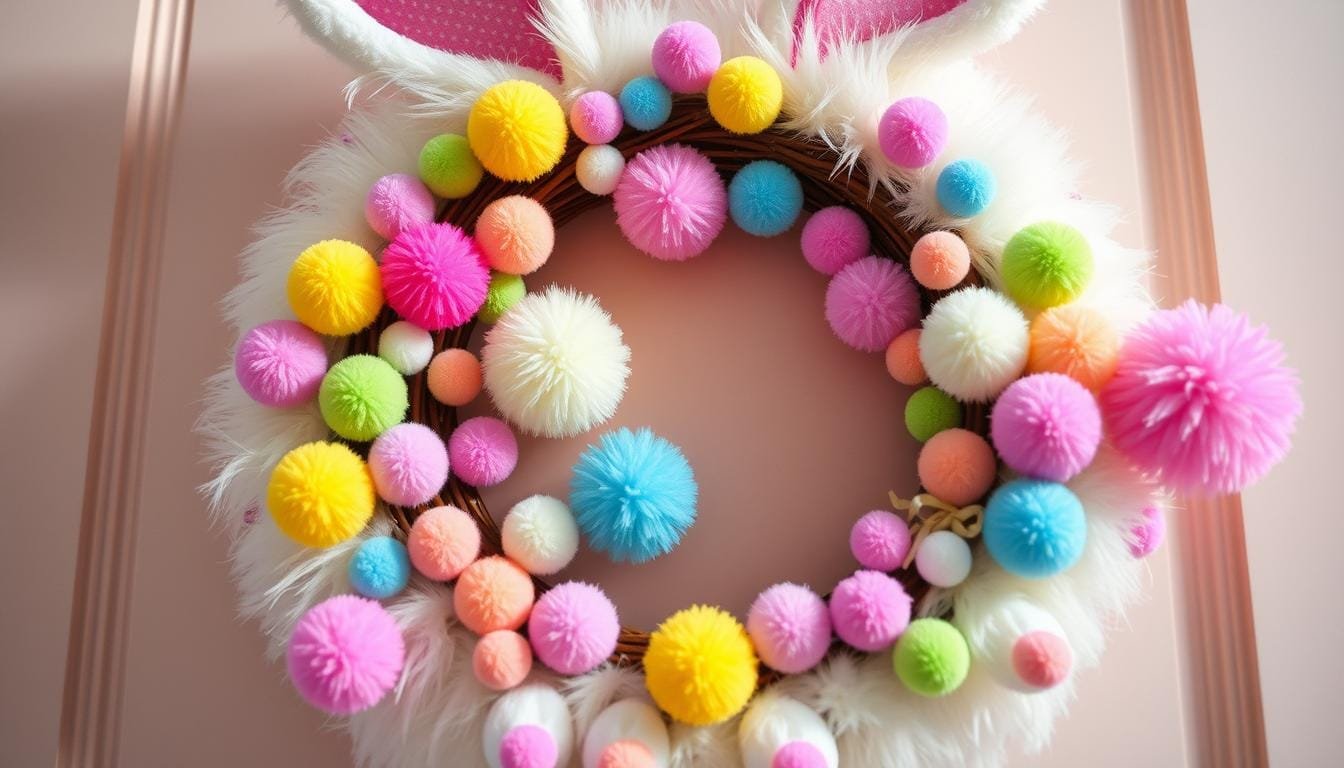
Hey there, Easter crafting friends! Want to bring whimsy and spring charm to your place? Making an Easter Bunny Wreath with Pom-Poms is easy and adorable. We’ll use items like a Dollar Tree bunny head wire wreath and white pom poms. With burlap fabric and chunky yarn, we’ll make a fantastic wreath. This project is great for anyone wanting to add handmade charm this season.
Let’s start with making the Bunny wreath. It blends two textures—soft yarn and burlap—for beautiful decorations. You’ll find supplies at Dollar Tree for about $1.00. This makes the project affordable. There are seven easy steps to follow. This craft is suitable for all, from DIY pros to beginners.
If you like special details, try adding wooden beads or pastel yarn. You can finish this project in less than an hour, costing around $10. It’s a budget-friendly Easter decoration. For more ideas, we offer over 25 DIY wreath projects. Use faux flowers, speckled eggs, or even Peeps for creativity. Happy crafting!
Supplies You Need for Crafting an Easter Bunny Wreath with Pom-Poms
Making your own Easter Bunny Wreath is fun and easy! Before starting, let’s get all the craft supplies for Easter wreath together. You will need these items to bring your DIY Easter décor ideas alive:
Essential Materials
- A 14-inch wire wreath form or wreath frame
- White craft paint
- Microfiber duster cloths (white)
- Playful bunny ears headband
- Assorted large and small craft pom-poms
- Pre-made yarn pom-poms
- Optional yarn for custom pom-poms
- Felt Bunny Feet
- Hot glue gun and glue sticks
The craft supplies for Easter wreath are easy to buy and cheap. You can find them at Dollar Tree, Amazon, or Hobby Lobby. The total cost is under $20. With these tools and supplies, your Spring wreath tutorial project will be fun and easy! It should take about 45 minutes to finish. 🐰✨
| Material | Details |
|---|---|
| Wreath Form | 14-inch wire wreath form |
| Paint | White craft paint |
| Cloths | Microfiber duster cloths (white) |
| Pom-Poms | 4 large pom-poms, assorted small pom-poms |
| Adhesive | Hot glue gun and glue sticks |
| Yarn | 18 yards or 6-7 ounces, optional for custom pom-poms |
Putting together your Easter Bunny Wreath adds joy to your home. Keep in mind, though, it’s not for outdoor use without protection. Happy crafting! 🎨🌸
Preparation: Painting the Craft Ring
The journey to make an Crafting an Easter Bunny Wreath with Pom-Poms starts with the craft ring. Pick a paint color that matches your room. We chose white to make our pom-poms pop. Painting provides a perfect base for your festive look.
First, paint the craft ring well. It looks nicer and protects the ring too. Your project sits better on it. Wait for the paint to dry, which takes under an hour. Then, you can keep going fast.

A dry, painted ring makes everything stick better. It ties the whole wreath together. Remember, prepping can make a big difference in a project. Now, grab your brushes, and let’s dive into fun Easter crafting!
Attaching the Bunny Ears
Putting bunny ears on your wreath is a fun step. It makes your creation look like an Easter bunny! You can use ready-made headbands or make your own ears. Each way makes your wreath look great. Let’s look at how to do both.
Using Pre-made Headbands
Using headbands is the fastest way to get bunny ears on your wreath. You can find them at craft shops or online when Easter is near. To attach them, just put the headband on your wreath. Use hot glue to make it stay. This way, you can move on with your project fast.

Creating Custom Bunny Ears
If you like making things your own, try making bunny ears. Start with wire shaped into ear forms, about 2 meters long each. Then, pick fabric or felt that goes with your Easter decor.
Wrap the wire with your chosen fabric and glue it. Next, put the ears on your wreath at the top. Make sure they look even. Use hot glue to make them stay. If needed, add more glue on the back for support. Your wreath will look special with handmade ears.
Either using headbands or making your ears, both ways make your wreath shine. It’ll be a lovely part of your Easter decorations. Enjoy making it!
Making Yarn Pom-Poms
Creating fluffy, fun pom-pom crafts is key in our Spring wreath tutorial. It’s great for crafters at any level. 🌸 Let’s learn how to make yarn pom-poms for our Easter Bunny wreath.
Steps to Make Yarn Pom-Poms
Starting the Easter Bunny Wreath with Pom-Poms? You’ll need yarn, scissors, and a pom-pom maker or your hands. Here’s the summary:
- Wrap the yarn around your hand or a pom-pom maker 10-25 times for the best fluff.
- Gently remove the yarn and tie the middle tightly with a small yarn piece.
- Cut the loops on each side and trim to make a round shape.
- Fluff and trim to get the perfect pom-pom look and size.

For a step-by-step guide, see this tutorial on making a cute Easter Bunny from DIY pom-poms. A project fun for everyone—even kids can help!
Alternatives to Making Pom-Poms
If you’re short on time, try pre-made pom-poms from craft stores or Etsy. They’re fluffy, colored, and come in various sizes. 🧶 Mixing them with homemade pom-poms adds a special touch to your wreath.
This guide encourages quick and creative wreath making. You can finish in less than 30 minutes for under $5. For more ideas, check out these 12 DIY holiday wreaths!
Assembling the Wreath: Large Pom-Poms
We’ve got our supplies ready and made our pom-poms. Let’s put the wreath together now. A strong base is the first step for a beautiful Easter wreath.
Glue Large Pom-Poms to Wreath
Start by spacing your big pom-poms around the craft ring. You’ll need 17 big white pom-poms for the wreath.
Use a hot glue gun to attach each pom-pom firmly. This make sure they stick well and give your decor lots of volume and depth. When making a bunny wreath, it’s important that the pom-poms make a solid, pretty base for smaller parts that come later.

Try using different colors and sizes of pom-poms to match your taste. This can make your Easter decoration really stand out, whether you’re going for a simple look or something colorful. Below is a table showing some wreath types and how long it takes to put them together:
| Wreath Style | Main Material | Assembly Time |
|---|---|---|
| Jordan Almond Wreath | Jordan Almonds | 1-2 Years when stored properly |
| Carrot Wreath | Plastic Carrots | Less than 1 Hour |
| Easy DIY Easter Wreath | Dollar Store Supplies | 5 Minutes |
| Mossy Nest Wreath | Wire Wreath Form & Ribbon | Multi-Step Process |
Filling Gaps with Small Pom-Poms
After attaching the large pom-poms, focus on the small ones to fill gaps. They help achieve a lush look for your Easter Bunny Wreath. We cover any visible base to enhance texture and depth. This extra effort makes a big difference!
Try using various sizes and shades of small pom-poms. Place them carefully between the bigger ones for a snug fit. This makes your wreath look like it was done by a pro, even at home.

For Pom-Pom craft lovers, this step allows your creativity to blossom. It’s similar to other DIY projects like Easter Carrot Wall Art. Filling gaps is crucial for a unified look.
Small pom-poms add beauty and make your decoration last longer. By spreading them evenly, you ensure every part of your wreath is covered. This makes your decoration warm, fluffy, and welcoming.
Stick to your chosen color theme for consistency. Yet, adding contrasting colors adds fun. Experiment with spring colors to keep it exciting.
As you make your Pom-Pom Easter Bunny Wreath, step back now and then. This helps you see if you need more pom-poms or rearrangements. Enjoy crafting!
Adding Decorative Elements
Once your wreath base is made, it gets fun: adding special touches. These elements make your Easter decoration pop. Mini Easter eggs and vibrant fabric scraps add a charming, personal touch.
Mini Easter Eggs and More
Mini Easter eggs make your wreath colorful and fun. Choose from pastel or glittery eggs. They create an exciting look for your wreath tutorial.
Try adding small bunny figures or fake flowers to enhance your wreath. Keep it balanced. Fill in the gaps left after adding all the pom-poms.
Using Fabric Scraps
Fabric scraps bring color and creativity. Use 4×6 inch fabric pieces for bows or small flags. For bunny ears, use two 6×8 inch heavy fabric pieces. Add a 1/2 inch seam allowance to avoid fraying. Use fusible interfacing for a clean edge.
This step shows off your style, making your wreath unique. Adding these details brings your wreath to life. It turns into a joyful Easter decoration filled with your craftsmanship.
Tips for Securing Pom-Poms
Keeping your pom-poms in place on your DIY Easter Bunny Wreath is key. You can use hot glue or other adhesives to make sure they stick. We will tell you the best ways to do this 💡!
Hot Glue Tips and Tricks
Hot glue is top choice for pom-pom crafts. It sets fast and is strong. For the Bunny wreath, put a lot of hot glue on each pom-pom. Then press it on the wreath frame. Hold it for a few seconds. If you’re using yarn, pick a low-heat setting. This way, your wreath stays put for all of Easter and longer! 🐇✨
Alternative Adhesives
If you’re not into hot glue, that’s okay! You can still make sturdy DIY Easter decorations. Try Beacon’s Fabri-Tac for a strong, flexible connection. Just put a tiny bit on the yarn, then press it on the frame. Wait for it to dry well. You might want to use fabric adhesives for a flexible hold, too. Or try 20 Gauge Trimits Beading Wire for something less permanent. Wrap the wire around the pom-pom bases and twist onto the frame. This lets you move things if you want. Pick the method you like best! 🌸