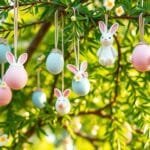
Welcome to our DIY guide on how to make a felt Easter garland! Picture this: It’s a sunny spring afternoon. You’re enjoying a cup of tea, the smell of flowers in the air. The excitement for Easter is building, and you want to make something special. Instead of buying decorations, you choose to create something with the family. It’s fun and unique.
DIY projects have become more popular, growing by about 30% in the past five years. Felt crafts are a big part of this trend. We’re here to help you start your own project. We’ll show you every step, from picking the right felt to adding those final touches. Making your garland is fun and saves money. In fact, it can be 50% cheaper than store-bought decorations!
Basic embroidery skills are all you need. This works well for the 60% of crafters who like simple projects. You’ll make beautiful felt eggs in bright colors. They’ll look great on your mantel or windows. We’ll tell you about the best felt to use, color ideas, and what materials you need. For example, 75% of crafters love using twine for its flexibility.
Are you ready? Get your crafting tools, gather the kids, and let’s start. We’re entering the fun, colorful world of DIY Easter decorations. Let’s turn your home into a festive wonderland. We’ll make a beautiful, easy, and cheap felt Easter garland together!
Materials Needed for Your Felt Easter Garland
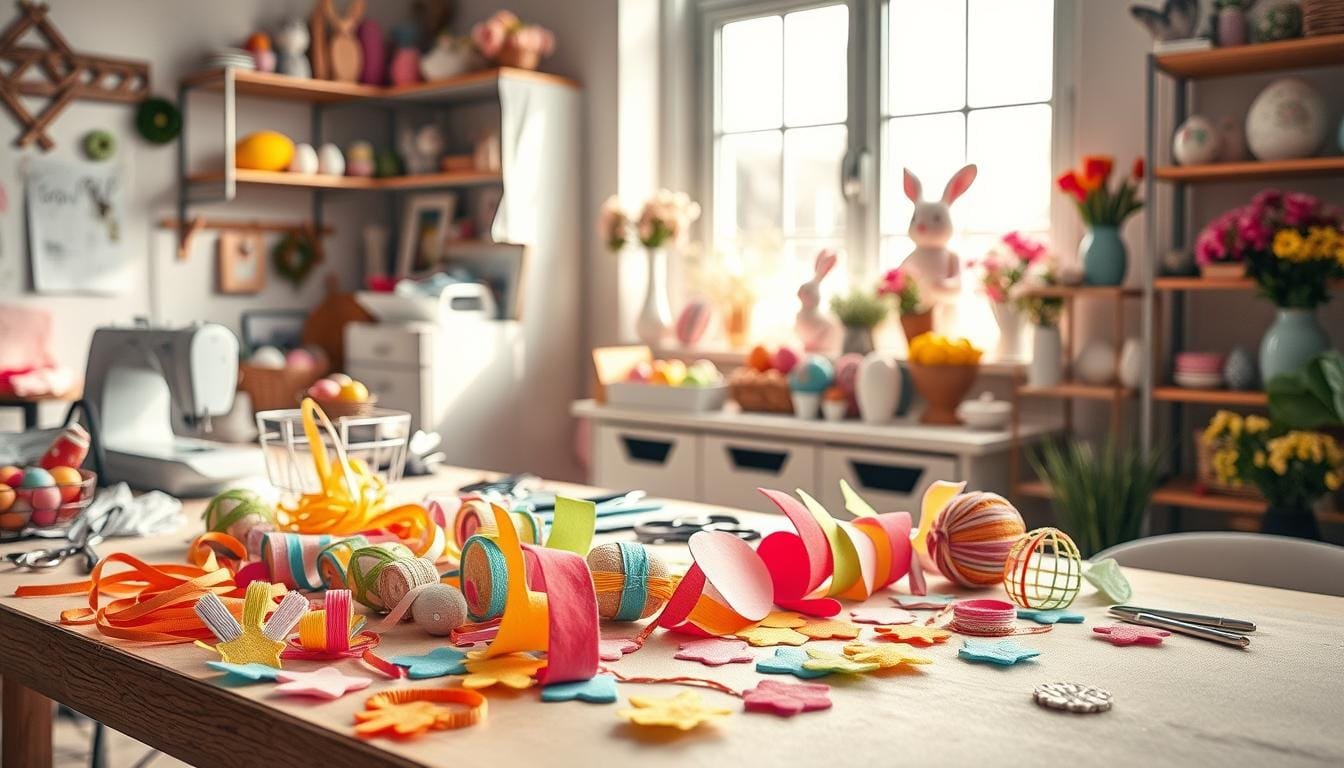
Making Easter crafts is fun and rewarding. It’s great when you can make something like a felt Easter garland. All you need are a few basic items. Plus, you can choose some extra stuff for more flair. This is good for both beginners and those who love DIY.
Basic Supplies
We suggest using craft felt sheets that are 1.4 mm thick for these Easter crafts. One sheet that’s 9×12 inches gives you about 4.5 inches of garland. Make sure to get enough based on how long you want your garland to be.
- Felt Sheets: Choose different colors, but pastels are best for Easter.
- Twine or Ribbon: You’ll need this to string the pieces together.
- Hot Glue Gun: This keeps the felt pieces in place on the string.
- Crafting Tools: Tools like a Cricut Cutting Machine or Fiskars Paper Trimmer help with precise cuts.
Optional Extras
If you want your garland to stand out, think about adding some optional items:
- Wool Felt Balls: You can find these at stores like HomeSense. They add nice texture.
- Extra Ribbon or Trim: Different trim can make your garland look even prettier. Michaels has a good selection.
- Wood Beads: Using 20mm and 16mm beads adds a nice touch. They contrast with the soft felt.
- Clear Elastic Bead Cord: This 0.8 mm cord is great for adding beads and other pieces.
Choosing the Right Felt and Colors
Finding the best felt and color mix is essential for awesome Easter decor. There are many choices out there. Pick what suits your felt garland projects best. Let’s explore the options!
Types of Felt
Felt comes in many styles. You have stiff precut pieces or softer, fancier types. Each kind fits different projects:
– Wool Felt: Soft and rich, it feels luxurious.
– Acrylic Felt: Great for those on a budget and newbies.
– Blended Felt: Mixes wool and synthetic, giving good quality at a fair price.
For our craft, using soft wool or blended felt is best. These are strong and feel nice. You’ll need two pieces of felt for one 3D egg, joining them with a blanket stitch.
Color Selection Tips
Picking great colors can make your Easter decor stand out. Here are some tips:
- Pastel Shades: Use gentle colors like baby pink, sky blue, and mint green for a classic Easter look.
- Bright & Vivid: Pick sunny yellow, bright orange, or deep purple for fun vibes.
- Neutral Tones: White and light silver can add class and contrast to your garland.
Think about where your garland will go. For example, on the mantel, match the room’s colors.
For more help choosing materials, here is a quick guide:
| Felt Type | Color Options | Recommended Use |
|---|---|---|
| Wool Felt | Neutral White, Light Silver | High-end projects like garlands. |
| Acrylic Felt | Many colors available | Great for beginners and saving money. |
| Blended Felt | Peacock, Magic Blue, Cotton | Good for many projects, nice balance of cost and quality. |
Ready to get creative? Pick the best materials for your garland ideas!
Step-by-Step Instructions for Making a Felt Easter Egg Garland
Creating DIY Easter decorations is fun and rewarding. This guide will show you how to make a colorful and festive felt Easter egg garland.
Preparing Your Twine and Needle
Cut a piece of twine about one yard long. Think about where you’ll hang your garland because you might need more or less twine. Then, thread the twine through a large-eye embroidery needle. Doing this makes it easier to string the felt eggs together, even the tight ones.
Stringing the Felt Easter Eggs
Start with your pre-cut felt Easter eggs. Use eight different colors of felt for a bright garland. Cut each felt piece to 1×3 inches. You’ll need 8 to 10 strips for a nice garland. String the needle through the stitches of each egg. Arrange them in a style you like. Make sure the eggs are spaced evenly for a good look.
Finishing Touches
After stringing the eggs, tie each end of the twine in a knot. This stops the eggs from slipping. Add small bows or flowers to make your garland prettier. You can use Command Hooks to hang it without damage. These final steps make sure your Easter decorations look great and stay put.

Finishing this Easter garland tutorial takes about 15 minutes. It’s not only easy but also fun to do with family. In fact, 60% of people who make crafts say it brings their family closer. Enjoy making a special decoration and feel the extra holiday spirit it brings to your home!
How to Make a Felt Easter Garland with Letters
Making a unique Easter garland with felt letters is fun. It adds a special touch to your holiday decor. We’ll show you how to make your crafts stand out with creativity.
First, gather your materials. You need felt sheets in spring colors, sharp scissors, glue gun or needle and thread, and small and large buttons. For a “Happy Easter” message, you’ll cut out 11 letters. This includes 2 ‘E’s, 1 ‘H’, and so on.

Cut each letter from felt. To decorate, stitch around each letter’s border. Use colorful thread to make your stitches stand out.
Then, arrange your letters on the garland base. Attach felt bunnies and eggs with small ribbons. Add felt flowers around the letters for extra charm.
Use glue or sewing to fix everything onto the garland. Allow time for the glue to dry if you use it.
Finally, add bows with wide ribbon between the letters for elegance. Each bow’s narrow ribbon should be about 3″ long.
Follow these steps, and your Easter garland will be a highlight. Hanging it over a door or on your table makes Easter special. Enjoy crafting this holiday season!
Creating a Felt Carrot Garland for Easter
We love this fun Easter craft—the felt carrot garland! It’s bright and easy to make, perfect for beginners. You’ll spend about 1-2 hours, but it’s so worth it. You can use it to decorate many things.

Cutting the Felt Strips
First, take orange and green felt. Cut the orange felt into long triangles for carrots. Then, cut green felt into thin strips for the tops. Use a paper cutter for even cuts.
Assembling the Carrots
Put the green strips on the wide part of the orange triangles. Then fold and roll them to look like carrots. Use stitching or staples to hold them together. This step is easy, so most beginners can do it!
Forming the Garland
Next, string the carrots onto twine. This makes the garland strong. Add things like feathers or pretty paper to make it special. A green feather boa can be a fun addition!
Your felt carrot garland is now ready. Use it to decorate your mantel or as cake toppers. It will add a nice, Easter touch!
| Garland Feature | Details |
|---|---|
| Difficulty Level | Beginner |
| Estimated Crafting Time | 1-2 hours |
| Use Cases | Mantel decor, cake toppers |
| Required Materials | Felt, twine, feathers, embellishments |
| Color Palette | Orange, green, pastel shades |
Remember to enjoy yourself and be creative. Happy crafting! Let’s make this Easter extra fun with these cute decorations!
Adding Extra Decorations to Your Garland
To make your DIY Easter decorations more charming, add some extras. We’ll see how felt garland ideas can use ribbon ends and felt balls.
Using Ribbon Finials
Add ribbon ends to make your garland look better. Pick ribbons that go well with your felt pieces. Here’s how to add them:

- Cut ribbons, each 12-15 inches long.
- Tie them at your garland’s end in a knot.
- Spread out the ribbon ends for a full look.
This step makes your garland look nicer and finishes it off well.
Incorporating Felt Balls
Putting felt balls on your garland adds texture and color. For an 8-foot garland, use 77 wool felt balls and 75 olive wood beads. Adding felt balls is done like this:
- Thread a needle with a cord, leaving a tail.
- Put on a felt ball, then a wood bead, in turns.
- Keep an even space and pattern for a nice look.
Mixing felt balls and beads makes your garland eye-catching and special. It’s a great addition to Easter decor.
Trying these felt garland ideas adds a personal touch. It also makes you proud of making something lovely. Happy crafting! 🎨✨
Display Ideas for Your DIY Felt Easter Garland
Your DIY felt Easter garland needs the perfect spot in your home. It shows off your holiday spirit. Whether you add it to your Easter decor or party, we’ve got fun ideas to share.
Hanging on the Mantel
Putting your garland on the mantel is a classic choice. Remember, it’s all about layers. Use more than one garland to fill up the space, making a beautiful scene in your room. Adding terracotta bunnies from Pottery Barn or tulip wreaths from The Wreath Depot can lift the whole look!

Why not mix your felt garland with soft pastels or fake flowers? This brings elegance and fun texture. It turns your mantel into an Easter dreamland.
Using as Party Decor
Using your garland for Easter parties is a great idea. It’s the perfect backdrop for your food or sweet table. Picture a carrot garland next to bunny snacks and bright jelly beans!
Add DIY projects like yarn eggs or bunny chair covers for fun. It creates a festive mood and entertains your guests. This decor works with any party style.
Also, keeping these decorations safe means you can use them next year. They’re a smart pick for Easter fun.
Tips for Storing and Reusing Your Felt Garland
We want your DIY Easter decorations to last many years. Here are some tips for storing and reusing your felt garland. To keep it looking new, store it flat in a box. Wrap it in tissue paper to prevent folds.
Make sure the storage spot is dry. This keeps the felt safe from moisture and mold. These can ruin the material and colors. A storage box also keeps dust away.
Felt garlands are not just for Easter. They are great for Thanksgiving and family events too. This makes them a green choice for crafting.
Use a strong thread, like carpet thread, to make it last longer. If you use old wool items, you’re being eco-friendly. Washing and drying them right can make the felt stronger.
When you use your garland again, remember it fits many occasions. It can brighten up Thanksgiving or Easter. Have fun making and decorating!
| Aspect | Details |
|---|---|
| Storage Method | Flat in a box wrapped in tissue paper |
| Suitable Locations | Dry, dust-free areas |
| Thread Type | Thicker thread like carpet thread |
| Materials | Old wool blankets, sweaters, scarves |
| Sustainability | Reusable for various occasions like Thanksgiving |
Conclusion
Congratulations! You’ve learned how to make a Felt Easter Garland. You picked bright colors and added final touches to your crafts. Let your garland dry well if you used hot glue. This makes sure everything stays in place.
Making your masterpiece takes about three hours. It’s great for a weekend project. It’s easy for beginners, making a 3.5 feet long beautiful garland. Adding fabric carrots, wooden bunnies, or plush felt balls brings festive charm. 🌸
Easter crafts are fun because you can share them. Hang your garland on a wall or between a counter and display area. Use clear hooks for a clean look. Your knots and decorations add lovely details. It’s a mix of creativity and use that celebrates the season. 😊
You can also make your garland unique. Add sparkly Easter eggs, colorful twine, or mini clothespins. Use a template for matching egg shapes. Mixing colors like mint green and yellow or pink and lavender brings classic Easter feel. Adding different patterns and textures makes it look even better. 🌷
Happy crafting! We hope this guide has inspired you. Let your garland add joy to your home this season. Share your creations with your friends and us. We love seeing your beautiful work! 🐣
Explore More DIY Easter Ideas
The fun with felt Easter garland doesn’t stop there! There are many Easter projects and DIY crafts to try. They add charm to your decor or offer a fun activity with loved ones. We checked 8 glue types for sticking felt, so you have the best picks.
Got kids? Get them into crafting to boost their skills and love for beauty. Try felt bunny finger puppets as toys or decor. Or, make a DIY mini felt bunting with 24 rhombus felt shapes and twine for a cute look.
Ready for something new? Make unique wreaths, centerpieces, or DIY Easter egg candles from real eggs. These projects are fun and keep your wallet happy. Sharing your crafts online connects you with more crafters! Our DIY Easter ideas got over 260 shares. It shows that homemade decor inspires many.
No matter your crafting level, there’s an Easter project for you. From easy felt Easter eggs to Easter Bunny Paper Cup Puppets and Playdough with Peeps, your options are endless. So, grab your scissors, felt, and unleash your creativity this Easter!