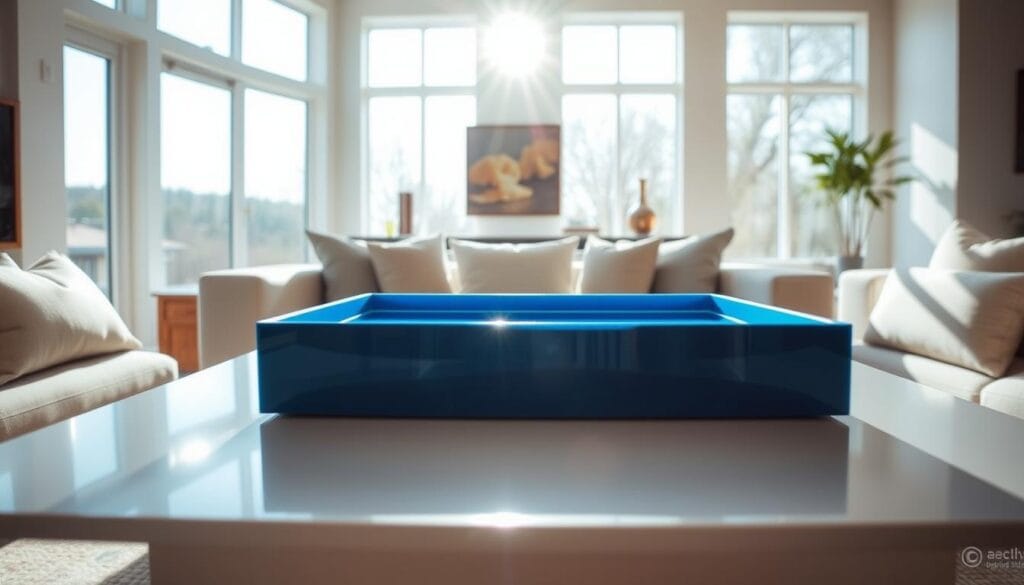
Picture this: It’s a lazy Saturday afternoon. You’re feeling crafty while sipping coffee. Your eye catches the coffee table, craving for a personal touch. As music fills the air, you find inspiration on Instagram. A post from DMR Crafts Co catches your eye. It shows a beautiful resin tray, blending usefulness with beauty. This post, with its 173 likes, also offers tips for styling your coffee table!
Then, another idea from a post with 87 likes comes to mind. Why not make your own resin tray? It will give your room a unique vibe and you’ll feel proud. Our guide is perfect for both skilled crafters and beginners. It details every step of this fun DIY project.
Let’s explore the world of resin crafting together. We’ll teach you how to mix epoxy resin and choose the best mold. You’ll make a tray that’s not just a tray, but a story. A story about your home. Let’s start this creative adventure and make your custom resin tray!
Introduction to Custom Resin Trays
Welcome to the world of DIY Resin Trays! Ever thought about making a custom tray for your coffee table? You’re in the perfect spot. We’ll help you learn the process, making it both fun and fulfilling.
Custom resin trays mix art and usefulness, great for your home’s look. They can hold snacks or just decorate your room. This guide aims to spark your imagination and make you confident to create beautiful, useful DIY pieces.
These trays can match any decor, from simple black and white to wild colors. Our guide will show you how to mix epoxy resin, add colors, and get a smooth finish. You’ll learn all the steps to make trays that fit your style.
Imagine the look on your friends’ faces when they see your custom tray. You’ll feel proud of your work. We’ll give you tips and tricks to make sure your tray comes out great.
It’s time to start making your own custom resin trays. With some patience and creativity, you’ll make beautiful trays that are all yours.
Benefits of Using a Resin Tray
A custom resin tray can really upgrade your coffee table look. These trays are not just stylish but super tough too. They can handle daily use without a problem. Let’s look into the Benefits of Custom Resin Tray and how they can make your home look better.
Aesthetic Appeal
One major Resin Tray Advantages is their amazing look. They come in many colors and cool effects, like shimmer and marble. Whether you like simple colors or bright patterns, a custom resin tray lets you show your style.
Durability and Longevity
These trays are very strong and last a long time. They’re made from top-quality epoxy resin, so they don’t chip easily. They take a few hours to a few days to set, but after that, you get a product that lasts. They’re great for any home because they don’t get damaged easily.
Easy to Clean
Coffee Table Resin Decor is also easy to keep clean. Resin trays are smooth and don’t soak up spills, so they’re easy to wipe down. Just soap and water will do, making them great for those who want pretty and practical home items.
Making your own resin tray is also a fun weekend project. It’s not just enjoyable; it can also save you money compared to buying one.
Materials Needed for Your Resin Tray
Creating a custom resin tray for your coffee table starts with the right supplies. Let’s review the essential materials you’ll need for this project.
Epoxy Resin
Epoxy resin is crucial for making a DIY resin tray. Use a resin mix of two parts A to one part B for strength and clearness. After mixing, let the resin dry overnight to reduce bubbles. Start with three tablespoons for the first layer and four for the second.
Silicone Mold
A good silicone mold is key to shaping your tray. Choose a mold a bit larger than your final tray size, about 1-2 inches on each side. This ensures you have enough space for detail. Your base should be cut from 3/4” melamine with sides taller than the wood by at least 1”.
Colorants and Pigments
To make your tray stand out, add some color. You can use different pigments or food coloring. Just a little will change the look of your tray. Be sure to mix them in well for a uniform and stunning result.
Protective Gear
Working safely with resin is very important. Make sure to wear gloves, goggles, and a mask to avoid fume exposure. Prepare a clean, airy space for your work, ideally laying down a cardboard box with wax paper. This setup will catch spills and keep dust away.
| Material | Purpose | Quantity |
|---|---|---|
| Epoxy Resin | Main ingredient for DIY resin tray | 7 tablespoons (three for first pour, four for second) |
| Silicone Mold | Forming the shape of the tray | One (slightly larger than desired size) |
| Colorants and Pigments | Adding visual appeal | A couple squirts of food gel coloring |
| Protective Gear | Safety during crafting | Gloves, safety goggles, mask |
| Cardboard Box & Wax Paper | Clean workspace setup | One box, lined with wax paper |
Choosing the Right Mold for Your Tray
When you start making resin crafts, choosing the right mold is very important. Silicone molds are great because they’re flexible and easy to use. We will look at the different kinds of molds, how big they should be, and the designs you can make.
Types of Silicone Molds
Silicone molds come in many shapes and styles. You can pick simple shapes like rectangles or circles, or go for something more complex. High-quality silicone molds make your work easier and look better, especially if you’re following a guide.
Size Considerations
In your Custom Resin Tray Tutorial, think about the mold size. Consider where you’ll use the tray and what it will hold. Big molds are great for coffee tables because they have lots of room. But smaller molds are easier to handle and great for detailed designs.
Design Options
When thinking of Resin Tray Design Ideas, you have endless possibilities. Choose a mold that fits your style or adds a cool twist. You might like a smooth marbled look or a vibrant galaxy theme with blues and purples. The mold you pick will shape how your tray turns out.
Choosing your mold with care is the first step to making a beautiful, custom resin tray. It will make your space look great.
Preparing Your Workspace for Resin Crafts
Getting your space ready for DIY Resin Projects is key. We’ll look at how to prep for safe and smooth crafting. You’ll learn about keeping safe and organizing your stuff. Let’s dive in!
Safety Precautions
Crafting safety tips are vital when using resin. Here’s what you need to do:
- Ventilation: Make sure your area is airy to avoid breathing in fumes. Open windows or use a fan.
- Protective Gear: Always have on gloves, safety glasses, and a mask. This keeps your skin, eyes, and lungs safe.
- Fire Safety: Be careful with heat tools. Keep them 6-8 inches away from molds to safely remove bubbles.
Setting Up a Clean Area
A dust-free space is essential for perfect resin projects. Follow these steps:
- Covered Surfaces: Use plastic or parchment paper to catch drips.
- Dedicated Area: Have a special spot for crafting to keep it dust-free.
- Equipment: Clean your tools well to keep your resin pure.
Organizing Materials
Being organized helps a lot with DIY Resin Projects. Here’s what you can do:
- Storage: Store your resin supplies in marked bins or drawers.
- Accessibility: Keep everything within reach to work smoothly. It helps avoid a mess.
- Workspace Preparation Tools: Use scales for exact measurements and an epoxy calculator for the right mix amounts.
For more ideas and a complete guide, visit this amazing link on DIY farmhouse projects. It’s full of home decor tips that go well with resin crafts.
Step-by-Step Guide to Creating Your Resin Tray
Ready to start making your resin tray? Let’s jump into this exciting craft. We’ll guide you through making a beautiful tray for your coffee table. By following these steps, your project will be fun and successful. Let’s get going!
Mixing the Epoxy Resin
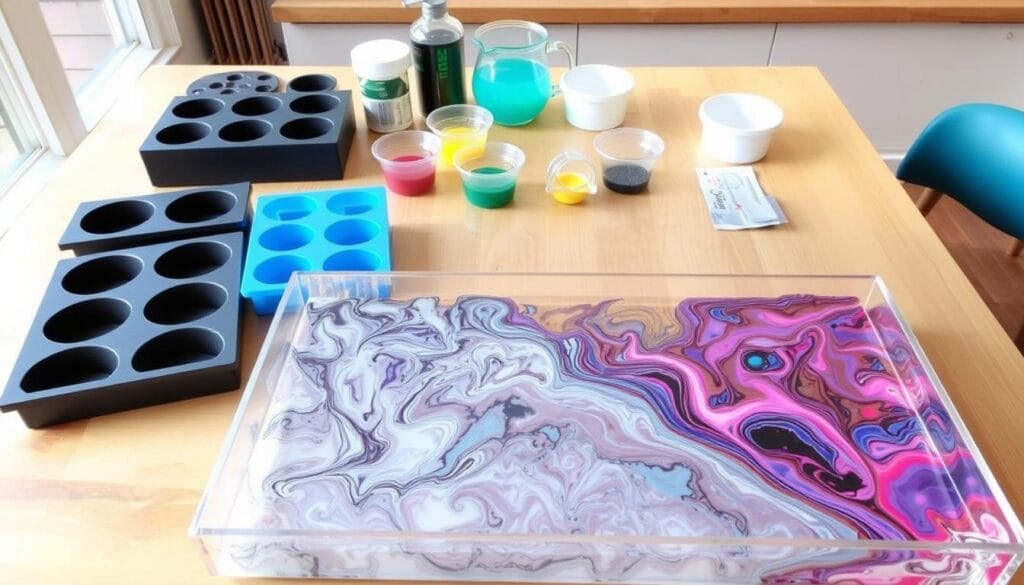
First, get the epoxy resin and hardener. It’s important to mix them in a 1:1 ratio. We’re going to mix 8 ounces in total, split into five cups. Getting the mix right is crucial. Pour the resin and hardener equally into each cup, mixing slowly for three minutes. Mixing slowly helps avoid bubbles in your tray.
Adding Color and Other Elements
Now, let’s add some color to your tray. Begin by putting just a little dye into each cup. Too much dye can mess up the setting. Then mix well. You can also add things like glitter or gold leaf flakes for extra beauty. This is your chance to be creative and add your style.
Pouring the Resin into the Mold
It’s time to pour! Carefully fill the silicone mold with your resin, spreading it out evenly. Go slowly to avoid spills and bumps. Wait around 20 minutes, then use a heat gun to remove any bubbles. Cover the mold to keep dust out and let it harden for 24 to 48 hours. Don’t tighten any hardware too much later on. It could affect the tray.
Follow these steps, and you’ll be a resin tray-making pro. Enjoy creating and your amazing tray!
Curing and Finishing Your Resin Tray
After you pour your resin, let it cure. The curing step is key to a great resin tray. It affects the tray’s look and strength.
Curing Time Explained
Different epoxies cure at different speeds. Fast-cure epoxy sets in a few hours. But traditional epoxy might take up to 72 hours. Let each layer cure for 24 hours for the best outcome. Using a heat gun or torch from 6-8 inches away helps remove bubbles. This makes the tray look better.
Removing from the Mold
Once cured, take the tray out of the silicone mold carefully. Move slowly to keep the tray safe. If you used our tips, it should come out easily.
Sanding and Finishing Touches
Now, for the fun part – finishing it up! Start with a gentle sanding for smoothness. A second coat of epoxy gives it a glossy look. Mica powders and dyes can make your tray pop. Using the right finishing steps is crucial.
| Supplies | Price |
|---|---|
| Art ‘N Glow Resin | $24.95 |
| Silicone mold | $19.95 |
| Additional supplies (e.g., scissors) | $5.00 |
Follow these DIY resin tips to make an amazing tray. Your friends and family will be impressed. Happy crafting!
Personalizing Your Resin Tray
Making a resin tray is more than just pouring epoxy. It’s about creating something that shows who you are. You can add your own special touch in many ways. The best part of this DIY project is putting your personal stamp on your design.
Adding Decorative Elements
To make your tray special, add decorative elements. You can really get creative here. Use anything from glitter and metallic flakes to dried flowers and trinkets. The options are endless! This step in the Custom Resin Tray Tutorial lets you include personal items or play with fun themes. Picture a tray shining with gold flakes or filled with seashells from your beach trip. Remember, with Personalizing Resin Trays, anything goes.

Stenciling or Painting Designs
Love detailed designs? Then stenciling or painting your tray is a great choice. You can use stencils for patterns or draw your own designs. This customization doesn’t just look good. It also shows off your artistic side. The key is to create something that makes you happy every time you see it.
Embedding Objects
Embedding objects in resin makes your piece truly one-of-a-kind. You can embed anything from flowers and leaves to photos and coins. Anything that’s meaningful to you. By doing this, you turn the tray into a piece of art that tells a story. With these Resin Tray Design Ideas, you get a mix of function and sentiment. It becomes a beautiful tray that’s also a conversation starter.
Thinking of starting with resin? Our guide on adding personal style to your home can help. It’s available here. Personalizing your resin tray is a great way to add ‘you’ to your space.
Troubleshooting Common Issues
Making resin trays can be fun, but you might run into some issues. This part will cover tips for Resin Crafting Troubleshooting. We’ll talk about how to fix problems like bubbles, uneven surfaces, and resin that hasn’t cured right. And give DIY Resin Tray Tips to beat these issues.
Bubbles in the Resin
Bubbles can ruin your resin project. They usually happen if you stir too hard or it’s too cold. To avoid them, mix your resin slowly and make sure the room is around 70°F. If bubbles still show up, gently wave a heat gun or torch over them. This can help get rid of the air trapped inside. Always remember, Fixing Resin Issues starts by mixing well and keeping an eye on the temperature.
Uneven Surfaces
Uneven surfaces happen if your setup isn’t level or your resin mix is off. Make sure your workspace is totally flat. And check that you’re mixing your resin correctly. For instance, Amazing Clear Cast uses a 1:1 mix. Getting these steps right will help avoid rough spots.
Cured Resin Problems
Cured resin might have sticky areas or not harden right if you mess up the mix or stir poorly. Always follow the directions for how long to mix and let it sit—usually, doming resins set in 24 hours. Also, keep your room around 70°F for the best cure. For Resin Crafting Troubleshooting, right measurements and temps can fix many common issues.
Tips for a Successful Resin Project
Starting DIY Resin Projects is very exciting! Making a beautiful piece for your home or a special gift is rewarding. Remember to keep your work area clean, play with colors wisely, and wait patiently for the resin to set. These are key steps for a great Resin Tray Crafting Guide.
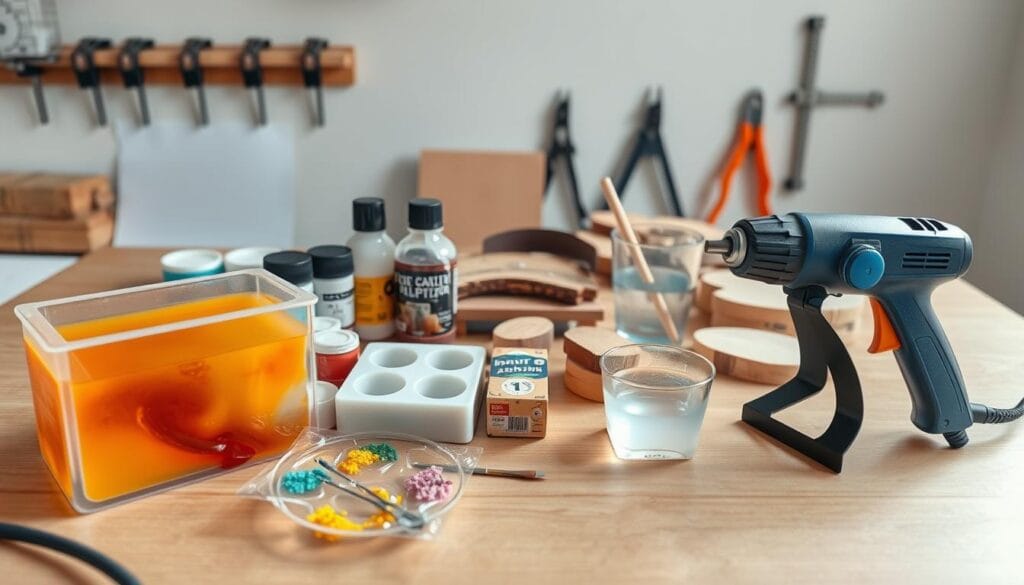
Keeping Your Workspace Dust-Free
Having a clean workspace is crucial for successful resin crafting. Dust and small bits can mess up your resin tray’s smooth finish. Make sure to clean your space before beginning. Wiping surfaces with a soft cloth and covering your project when not working on it helps a lot.
Working with Different Colorants
Using different colorants adds life to your DIY resin projects. You can choose from liquid dyes, powdered pigments, or alcohol inks for colorful effects. Stir your epoxy resin for 5 minutes before adding color. Then mix for another 4 minutes after adding the base color. Feel free to blend colors to match your style!
Timing and Patience
Managing time well and being patient is essential in resin craft. After pouring the base, you should complete other steps in 30 to 45 minutes. This helps the layers stick together. Allow your resin to cure properly, which takes about 24 hours for each layer, including the final coat. Following these tips will lead to a stunning and strong finish.
Caring for Your Custom Resin Tray
Caring for Resin Trays means a bit of effort keeps them looking good. Regular care helps your DIY pieces stay beautiful and useful.
Cleaning Instructions
Cleaning your resin tray is easy and important. Wipe it gently with a soft cloth or sponge and soapy water. Don’t use strong chemicals or rough pads because they can hurt the resin. Clean regularly and gently to keep it looking great.
Sunlight and Heat Considerations
Keep your tray away from too much heat and direct sun. Extreme conditions can make the resin lose its color or shape. It’s vital for the success of your DIY Home Decor Tips.
Repairing Minor Damage
Minor scratches or chips aren’t a big problem. A little sanding and a new topcoat of resin can fix them. This makes Caring for Resin Trays easy and doable.
With the right care, resin trays can be a lasting and beautiful part of your home. These DIY Home Decor Tips help ensure your resin art stays perfect.
Ideas for Using Your Resin Tray
Your custom resin tray is more than just a pretty item for your coffee table. It’s a useful piece that boosts your home’s organization and style. You can use it for serving snacks or keeping small things in order, making it a helpful part of your home.
Serving Snacks and Drinks
Using resin trays for serving snacks and drinks is a smart choice. When you have friends over or just want a quiet night, your custom tray steps up the moment. It’s tough, easy to clean, and ideal for appetizers, coffee, or drinks, bringing elegance to the occasion.
Organizing Small Items
Good home organization tips often highlight having a specific spot for tiny items. A resin tray can stylishly hold keys, remotes, and other daily stuff. Put it in your entryway or living room. This will help keep items handy and organized, cutting down on mess and boosting your decor.
Displaying Decorative Pieces
For cool coffee table decor ideas, think about placing decorative items on your resin tray. It can display candles, vases, or small art pieces, making your space more interesting. The tray’s unique look fits many decor styles, whether modern or rustic.
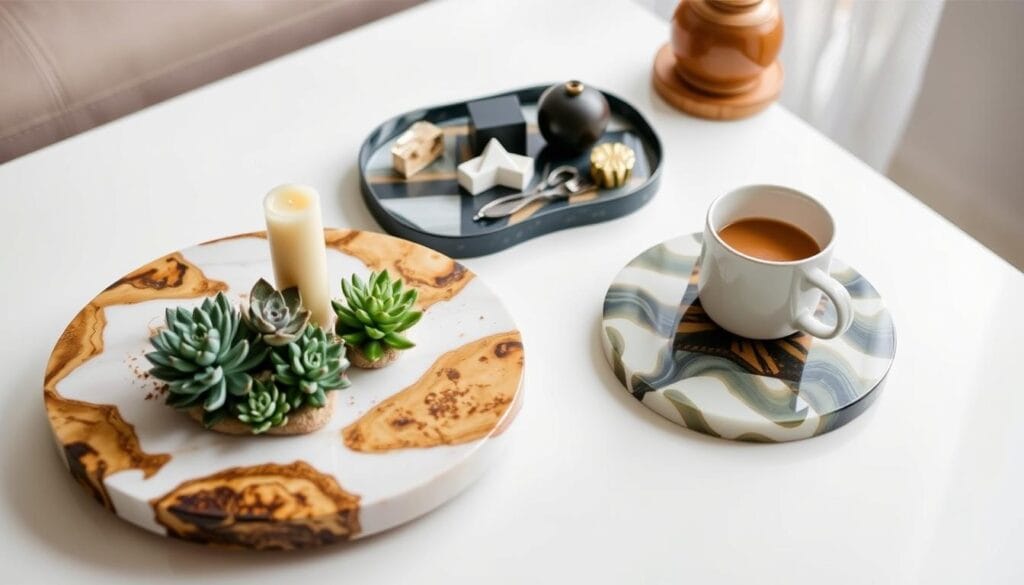
With these tips, your custom resin tray becomes not just useful, but also a standout feature of your decor. It shows off your taste and imagination.
Sharing Your Resin Tray Creations
You’ve finished making a stunning custom resin tray. Now, it’s time to show it off to everyone! By Sharing Crafts Online, you inspire people and join a lively crafting world. Let’s explore the great ways to show off your resin trays.
Engaging with Online Craft Communities
Joining online craft communities is a super way to meet others who love DIY. Sites like Reddit and Pinterest are full of crafters sharing tips and ideas. You’ll get great advice and feel part of the crafting world. Plus, seeing others like your work feels awesome!
Showcasing on Social Media
Social media, like Instagram and Facebook, is ideal for showing your work to many. Use hashtags like #DIYResinTray and #CraftingCommunity to spread your work wider. Take top-notch pics from various angles, and share your making stories. Good captions can pull people into your crafting world.
Starting Your Own Craft Blog
For a deeper dive into Crafting Community Engagement, why not start a blog? Share tutorials, guides, and stories about your resin projects. Platforms like WordPress or Wix make it easy to start. Your blog becomes a gallery and a place for others to learn about resin art.
Exploring Other Resin Craft Projects
After you get the hang of making custom resin trays, you’ll be eager to try out Additional Resin Craft Projects. There’s so much you can do, like making your own coasters and keychains or beautiful wall art and home decor. Let’s dive into some fun projects you can start with your new skills!
Coasters and Keychains
Creating coasters and keychains is a fun next step in resin crafts. They’re not just great for gifts; they also offer a chance to play with different designs and sizes. You can use silicone molds to make detailed designs or add personal touches like dried flowers or glitter. This way, every item you make is special and shows off your creative flair.
Wall Art and Home Decor
DIY resin art can transform any blank wall into something amazing. You can make colorful abstract pieces or art that’s inspired by nature. These are perfect for making your home feel more like yours. Remember, when you’re working on bigger projects, the resin needs up to a week to set, especially for thick layers. You can also spruce up your home with resin-decorated picture frames and plaques.
| Project Type | Main Materials | Estimated Cure Time |
|---|---|---|
| Resin Coasters | Epoxy Resin, Silicone Molds, Colorants | 24-72 hours |
| Keychains | UV Resin, Small Molds, Embellishments | Minutes with UV light |
| Wall Art | Casting Resin, Large Molds, Pigments | Up to a week |
Jewelry Making
Making jewelry is a highly rewarding part of DIY Resin Art and Creating Resin Jewelry. You can craft eye-catching pendants, earrings, rings, and bracelets. The shiny finish of doming resin makes these items really stand out. It’s cool to encase little objects like pressed flowers or beads in the clear resin. Just make sure to wear your protective gear, as working with tiny details needs focus and careful handling.

Conclusion: Your Custom Resin Tray Journey
Finishing a resin tray project lets you get creative and personalize your space. You start by picking out materials and end with adding the final touches. Making a resin tray involves a careful process, but it’s very rewarding. You’ll mix epoxy resin, work quickly, and put in the effort to make your tray look amazing. In the end, you turn a simple idea into a beautiful piece of art.
Whether you prefer a sleek rectangle tray or one with the rustic look of recycled wood, you can make it your own. You can pick from lots of design options, like shiny metallics or vibrant colors. And if you set up three molds, you can make multiple trays at once. This way, you’re more efficient and creative.
Statistics show 60% of people love classic designs for their elegant look. Meanwhile, 30% enjoy oceanic designs with their deep, blue resin art. Finishing a resin tray adds beauty to your home and shows off your crafting skills. Modern styles, with simple lines and soft colors, are a hit with 40% of folks. And 25% of people go for the rustic charm, loving its cozy feel.
Success in resin art means trying new things, challenging yourself, and making pieces that show who you are. With ClassBento’s support and a growing interest in custom resin furniture, you’re on the right track. Last year, more people wanted their own unique furniture pieces. So, keep practicing with each project. Your home is your place to be creative.
Don’t stop with trays; try making coasters or wall art to add more of your touch to your home. This journey with resin is just starting. Let’s keep making beautiful things, okay?
FAQs About Resin Tray Projects
We get a lot of questions about resin trays. People wonder about their safety and how long they last. Here, we’ve answered some top Resin Tray FAQs to help you enjoy your crafting.
Can I use food on a resin tray?
If you want to put food on a resin tray, use a food-safe epoxy. Brands like ArtResin and Max CLR Grade Epoxy Resin are safe choices. Make sure the resin is fully cured before using it with food. Adding a clear coat helps keep the tray safe for food.
How long does the resin last?
The life of resin projects varies. Quality epoxy like Art ‘N Glow is tough, reaching over 80 Shore D in hardness. This means resin trays can look great for years. Making them is also good for your mental health, making it a great hobby.
What if my tray isn’t perfectly level?
A tray that isn’t level can cause problems. Be sure your mold is flat before you start. You might need clamps or weights to keep it steady. If it still isn’t smooth, sand the rough patches. Then, put on a thin layer of resin to even it out.

