Have you ever looked at colorful flower pots in a garden store and thought, “I could make these at home”? You’re right; you can. And we’re going to show you how to start this creative journey! I want to tell you a story.
Last spring, I decided to bring out my artistic side and make over my patio. I used acrylic craft paints, some brushes, and a bit of free time. In just over three hours, I turned plain terra cotta pots into eye-catching art pieces. It took twenty minutes to get ready, an hour to paint, and a bit longer for them to dry. Even as a beginner, I was amazed by the stunning results and got lots of praise.
The whole project was super affordable, costing about $10 for supplies! It’s perfect for anyone, whether you’re experienced or new to DIY projects. Painting and making your terra cotta pots unique is fun and easy.
In this guide, we’ll cover everything: getting your materials ready, prepping your pots, exploring painting styles, and customizing your designs. Ready to begin? Let’s dive in and learn how to paint and personalize terra cotta pots. This will bring a touch of creativity to your space! 🌸
Stay tuned for tons of ideas and tips to make your terra cotta pot painting look top-notch and distinct. From start to finish, this tutorial has got you covered. Let’s unleash our creativity!
Introduction to Terra Cotta Pots
Terra cotta pots are known for their unique clay makeup. They are great for painting and crafts. These pots are not only beautiful but also durable. They allow plant roots to breathe well. Knowing their benefits helps in choosing the right paint and personalizing them.
What Are Terra Cotta Pots?
Terra cotta pots are crafted from clay and baked at high temperatures. This process makes the pots durable and porous. The porosity prevents water from logging in the soil, helping plant roots. These features make terra cotta favored by both gardeners and DIY fans.
Benefits of Choosing Terra Cotta
Terra cotta pots have a warm, natural look that suits many plants and decors. They are known for lasting a long time if cared for properly. They also serve as a great canvas for your creativity. By personalizing these pots, you make your garden or home even more special.
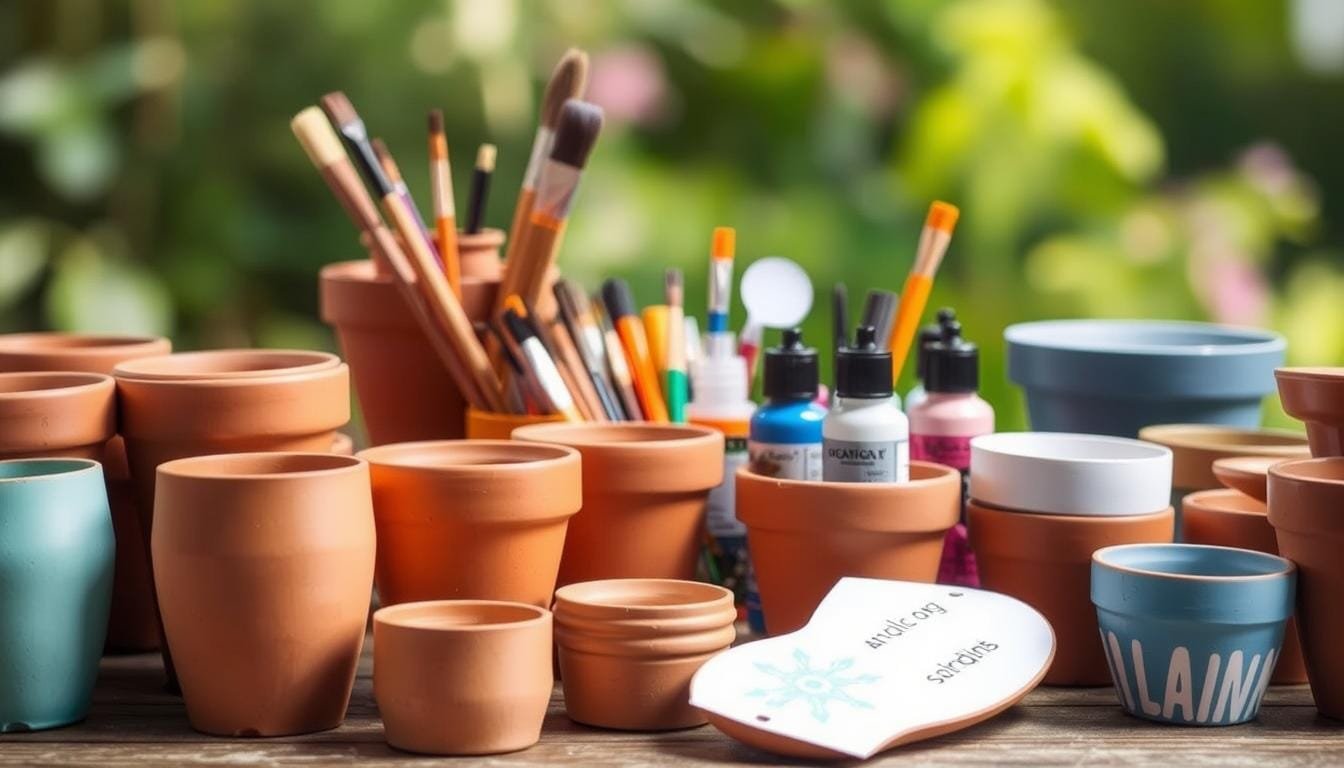
Materials Needed for Painting
Begin your painting project with the right tools for a perfect finish. If you’re painting terra cotta pots, whether you’re a beginner or a pro, the correct supplies are key. The right materials make a big difference.
Types of Paints Suitable for Terra Cotta
Use acrylic or latex paints for a bright and lasting finish. Acrylic paints offer many colors for your crafts. Applying primer is crucial; it stops blisters and bubbles. Spray paint is efficient for bigger tasks, covering several pots with one layer. Remember, using leftover paints saves money and matches your decor!
Brushes and Tools Required
You’ll need different brushes—flat ones for wide strokes and fine-tip for detailed work. Painting side to side gives a smoother look. For detailed patterns, stencils are very helpful. A stiff wire brush is great for a distressed look by scraping off the top layer.
Optional: Additional Decorative Items
For a personal touch, add items like beads, decals, or stickers. Consider house numbers or monograms for uniqueness. Adding these details can make your terra cotta pot crafts special.
Preparing Your Terra Cotta Pots
To get great results from our painting terra cotta pots tutorial, preparation is key. First off, we ensure our pots are clean and ready for paint. This makes the paint stick better and gives a smoother finish.
Cleaning Your Pots for Optimal Adhesion
Begin by giving your terra cotta pots a good clean. Dirt or residue can prevent paint from sticking well. Soak them in warm soapy water for an hour to remove any hard-to-get-off stickers or price tags. Then, scrub off any leftover debris with a brush and rinse well. Let the pots dry completely before you start painting. Clean pots mean your project will look better and last longer!
Protecting the Work Area
Before starting the painting terra cotta pots tutorial, make sure to protect your work area. Lay down newspapers or a big cloth to catch any drips of paint. This keeps your space tidy and helps you stay organized while you create. Have all your materials ready and within reach to make the process smooth and fun.
| Step | Action | Estimated Time |
|---|---|---|
| 1 | Soak pots in soapy water | 1 hour |
| 2 | Scrub and rinse pots | 15 minutes |
| 3 | Dry pots completely | 24 hours |
| 4 | Setup work area with protection | 10 minutes |
| 5 | Organize all materials | 5 minutes |
Painting Techniques for Terra Cotta
Turning plain terra cotta pots into vibrant, unique objects is both enjoyable and simple. Here are a few methods to give your pots a personal flair.
Base Coating
Begin by applying a solid base coat. This step is crucial as it creates a smooth surface and uniform color base. Acrylic craft paints are best for their wide color selection. Use a wide brush for full coverage and let it dry well before the next step.

Layering and Blending Colors
After the base coat dries, try layering and blending colors. For a gentle effect, thin the paint with water for a see-through wash. This brings out a soft, aged look. To add depth, blend colors while the paint is wet for seamless color shifts and shadows.
Stenciling Designs
Stenciling adds detailed patterns and pictures to your pots. Secure the stencil with painter’s tape to avoid smearing. Use FolkArt Brushed Metal paint for a sparkling finish against the terra cotta’s matte. Simple designs fit small pots best, while bold patterns enhance larger ones.
Personalizing Your Pots
Adding your twist to clay pots is a cool way to show your creative side. It’s perfect for making your home or garden stand out. You can paint on quotes or use designs that bring nature to mind. Let’s explore exciting ways to make your clay pots unique!
Adding Text and Quotes
Putting text or quotes on clay pots is a powerful touch. You could use stencils or write by hand to express yourself. Pick words that mean something to you or quotes that motivate you every day. Using bright colors will make your words pop.
Using Decals and Stickers
If you’re not into painting, try decals or stickers. They make adding cool patterns easy and fast. You can find lots of styles, like flowers, shapes, or fun images. Just stick them on, then spray with clear coat to protect them.
Incorporating Nature-Inspired Elements
Adding nature to your creative terra cotta pot painting makes them special. Attach or paint things like leaves or birds. Imagine pots with pretty ferns or butterflies. These touches make your pots more beautiful.
Making unique clay pots is all about enjoying yourself and showing who you are. Each pot is like a small artwork with your style. So, let’s start creating cool pots!
Sealing Your Painted Pots
Putting time into painting terra cotta pots means you’ll want to keep them looking great. Using a good sealant helps protect your art from rain and sun. This way, your pots can stay bright and beautiful for a lot longer.

Why Sealing is Important
It’s super important to seal your painted pots to avoid damage. Without protection, even the best paint can start to fade or peel off. Sealants provide a shield against water, sun, and changes in temperature.
Types of Sealants to Use
Different sealants work for different needs. For pots outside, try Minwax Polycrylic Spray or Zinsser Shellac Spray. These have proven to work well over four weeks. For a green choice, AFM DynoSeal is a safe, waterproof option that’s good for plants you can eat.
For best results, apply two layers of clear water-based spray acrylic. Let the pot dry fully, about 2-3 hours, between coats. This ensures a nice, lasting finish.
You can pick a natural sealant like Tung Oil for pots inside your home. Or choose strong synthetic ones for pots that stay outside. Sealing your pots helps keep them pretty and useful for much longer.
Display Ideas for Your Personalized Pots
After making your DIY terra cotta pot decorations, it’s time to find the best spot to display them! You can put them inside as decor or outside to brighten up your garden. Here are fun ideas to get you started.
Indoor Decorating Ideas
Adding your terra cotta pot crafts inside can make your home look better. You can place them on shelves, windowsills, or as centerpiece on tables. Even a small 4-inch pot can make a room look nicer.
Putting different-sized pots together makes the space interesting and matches well.
Outdoor Arrangement Tips
Outdoor areas are great for showing off your terra cotta pot crafts. Group them in your garden or on the patio. Make sure they can drain water by checking the holes at the bottom. This keeps them looking good for a long time.
Placing pots on steps or stands makes a lively set-up. Using bigger pots as a base for smaller ones on top creates a cool layered look!
Caring for Your Painted Terra Cotta Pots
To keep your painted terra cotta pots looking good, you need to take care of them. Simple care tips can help protect your artwork. This way, we ensure their bright designs stay perfect for longer.
Watering Tips to Prevent Paint Damage
Keeping the paint on terra cotta pots means watering the plants right. Be careful not to over-water; it can make the paint come off. Water the soil directly, avoiding the pot. If the pot does get wet, gently dry it with a cloth. Also, keep your pots inside when it’s cold to prevent them from cracking.
Cleaning and Maintenance
It’s important to clean your painted terra cotta pots for them to last. Use a soft, damp cloth to wipe away dirt gently. Don’t scrub hard because it can hurt the paint finish. A mild soap solution can clean without damaging the artwork.

Make sure your pots are dry before you put on any new sealants. This keeps them ready for more protection. It helps your art live longer and stay bright. For help, check this painting terra cotta pots tutorial for detailed steps.
Creative Theme Ideas for Pot Personalization
Personalizing your terra cotta pots can make your space more creative. Whether it’s for your home or garden, creative terra cotta pot painting reflects your unique style and the time of year. Here are some easy and fun ideas for painting your terra cotta pots.
Seasonal Themes
Personalize your pots with seasonal themes. In the winter, decorate with snowflakes, pine trees, and cozy fireplaces. When spring comes, paint bright flowers and buzzing bees to celebrate new life. Summer calls for beach scenes, sunflowers, and tropical motifs. For autumn, think about using deep colors and adding pumpkins, leaves, and scarecrows to your designs.
Inspirational Themes
Inspirational themes in your terra cotta pot designs can motivate you every day. Paint quotes or words that mean a lot to you. Add artistic touches that represent your hobbies, like musical notes, books, or sports equipment. This can fill your space with joy and spark creativity.
For a step-by-step guide on creating these designs, visit Seema Mago’s DIY Guide. You’ll discover many beginner-friendly DIY decor projects. These resources can give you more great ideas for painting terra cotta pots.
| Theme | Ideas for Designs |
|---|---|
| Winter | Snowflakes, pine trees, fireplaces |
| Spring | Flowers, bees, butterflies |
| Summer | Beach scenes, sunflowers, tropical patterns |
| Autumn | Pumpkins, leaves, scarecrows |
| Inspirational | Quotes, hobbies, artistic symbols |
These terra cotta pot painting ideas will beautify your decor and are fun for the family. They’re perfect for personalized gifts or uplifting your home. Let these themes guide your artistic journey. Enjoy your painting!
Common Mistakes to Avoid
Avoid common mistakes to get a flawless finish when painting terra cotta pots. Make sure you prep your pots well and choose the best paint. This will save you a lot of trouble later.
Issues with Paint Adhesion
Poor paint sticking is a big problem for many DIYers. It often happens because the pots aren’t cleaned well. Since terra cotta is porous, it can hold onto dirt and residue. A deep clean with soap and water, followed by a proper rinse, helps avoid this issue. Lightly sanding the pot can also make the paint stick better.

Picking the right paint is also key. Even though 60% of people like acrylic paint, it’s important to use paint made for the outdoors if your pots will be outside. Applying several thin coats, as suggested by 75% of users, is better than one thick coat for a lasting and smooth finish. A mechanical pencil can be useful for drawing precise designs before you paint.
Missteps in Sealing
Sealing your pots is a must, not just a suggestion. Many people forget how important it is. Sealing keeps your paint safe from water and sun damage, which helps your pot’s art stay beautiful longer. That’s why 90% of DIY guides stress on sealing. Use a top-notch clear acrylic sealer made for outdoor projects. Apply multiple layers if needed. For instance, Frenchic Finishing Coat dries fast, in about 15-30 minutes.
It’s also important to wait the right amount of time. For Al Fresco paint, it’s around two hours to dry to the touch but three weeks to fully cure. So, patience is crucial. Rushing might harm your pot’s design. Wait at least a week before using the pots to make sure the sealer is perfectly set.
For more DIY tips and how to bring a rustic feel to your space, visit our guide here.
Troubleshooting Paint Problems
Even experts can run into paint problems with DIY terra cotta pot decorations. These could be chips, scratches, or the color fading. But, we have easy fixes for these issues. Let’s tackle these common problems together.
Solutions for Chips and Scratches
Have you ever felt sad seeing chips or scratches on your painted pots? Here’s a way to fix it. First, gently sand the area to make it smooth. Then, use a small brush to apply a thin coat of paint that matches. Make sure it blends well with the rest.
If you’ve sealed your pot, put on a new layer of sealant after the paint dries. This protects your artwork.
Fixing Color Fading
Color fading can happen if your pot gets too much sun or doesn’t have enough paint. To bring back the color, clean the pot gently first. Then, put on two layers of Patio Paint. This helps the paint stick better and stops fading in the future.
Paint when it’s between 45 and 85 degrees Fahrenheit. Keep the pot dry for 72 hours after painting. This makes the paint look good and last long. Your artwork will be admired by everyone.
A sealant can keep the colors bright and protect against the weather. Just follow these easy steps. Your DIY terra cotta pot decorations will stay beautiful all year. Enjoy your crafting!
Exploring Advanced Techniques
Welcome to the exciting world of painting terra cotta pots! If you want to make your projects stand out, try these special tricks.
Using Acrylic Pouring on Pots
Acrylic pouring can make your pots look amazing with colorful, flowing designs. You mix paint with a medium, pour it over the pot, and let gravity do the rest. Every outcome is a surprise!

- Mix your acrylic paint with a pouring medium till it’s like warm honey.
- Get your space ready; it could get messy!
- Drizzle the mix over the pot, tilting to cover it all.
- Let it dry. It usually takes a day.
Creating Texture with Mixed Media
Adding texture takes your pots to a new level of beauty. With mixed media, you blend different materials like fabric or beads for a unique look.
Starting with mixed media is fun:
- Paint the pot a base color you like.
- Pick out your mixed media materials while it dries.
- Glue on things like beads or textures to the pot.
- Seal it with clear varnish to protect your design.
Let’s compare these two methods:
| Technique | Materials Needed | Difficulty Level | Time Required |
|---|---|---|---|
| Acrylic Pouring | Acrylic paint, pouring medium | Beginner | 24 hours (including drying time) |
| Mixed Media Texture | Fabric, beads, adhesive, base paint | Intermediate | 2-3 hours (excluding drying time) |
Both techniques will make your terra cotta pot projects shine. Whether you love acrylic pouring’s smooth designs or mixed media’s detailed touch, you’ll create something special! 🌟
Gathering Inspiration
Finding the perfect design for your terra cotta pot crafts can be fun but sometimes overwhelming. We love exploring different resources to spark creativity and make clay pots unique. There is plenty of inspiration out there, both online and in various DIY communities.
Where to Find Design Ideas
Inspiration for terra cotta pot crafts is everywhere, especially on the internet. Sites like Pinterest and Instagram are full of photos and guides. They show how to make clay pots look amazing. You can also find ideas in magazines, gardening books, and even by looking at nature.
For a personal touch, think back to your childhood crafts or traditional designs you love. These sources can make your project more meaningful to you.
Online Communities for DIY Enthusiasts
Online communities are great for DIY and craft lovers. You can join Facebook groups, Reddit threads, or specialty forums. These places offer advice, feedback, and a place to share your creations.
Being active in these communities helps improve your skills and connect with others who love crafting. There are live crafting sessions and weekly posts for new ideas. This keeps your terra cotta pot crafting fun and exciting.
Final Thoughts
Discover the joy of making pottery your own way with skills you learned on painting terra cotta pots. We’ve explored more than just how to change a simple pot. It’s about using creativity to show off your vision. Every brushstroke and design tells a story about you 🎨.
Encouragement to Create Unique Designs
Feel free to try new things! Use small brushes or cotton swabs for detailed work. Mix some paint with water and in just five minutes, you can change up a pot. Or add several coats for deeper color. A clear spray acrylic keeps your work safe for years. No matter what, your pot will share a story 🌱.
Here’s our advice: jump into this project with all your heart and creativity. Painting terra cotta pots is affordable, useful, and rewarding. They can brighten up your home inside or out. They’re a chance to show your unique touch. So, unleash your imagination and make every pot a unique creation! 🏡